Teaching The Kids (& Learning More Myself) – Lights Out Drill

When the lights go out (power failure) it tends to be during the worst times. Hopefully each of us has a plan, for our household, about what to do for light, heat (or cool), backup power, and entertainment. But does your family know your plan? Unfortunately many of us have a loose plan in mind and assume we’ll figure it out when it happens. But what if you’re not home or unavailable to help?

This week, during a calm time, we had a “lights out” drill. Sure the power was out, for real, in January, but Ryan was the only one of the kids at our house during that time (the girls were with their mom, and chose to stay there). The girls insisted that they’d be fine and had been through it all before, but I asked them to humor me.
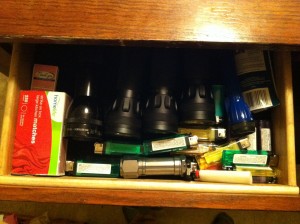
We waited until it got dark, so things would be a more realistic. I started by showing them where the circuit box was, and briefly explained it’s function and how to reset the circuits. We then turned off all the power (except to the refrigerator). I had them go get flashlights, carefully because it was now dark; they thought that was easy because they all know the flashlights are kept in the table drawer.

When they returned to the garage, I tried to show them how to open the garage door manually if the power was out. (Let me preface this by saying we recently got a new garage door opener.) I pulled the red cord to disconnect the garage door opener and it wouldn’t come loose. Sarah and I spent a few minutes trying to figure it out and were unable to get it to release or open the door. At that point we left it for later–and I still need to figure out why it didn’t work–but that was much better time to find out it didn’t work, then to find out when we NEEDED to get a car out of the garage and the power was out.

I then gave them a brief overview of our inverter and battery bank (with some hands-on) and showed them how to: check the battery levels, connect to to the inverter, turn it on, and reset it if necessary. I showed them which extension cords to use, how to plug-in the furnace, and then pulled the extension cord into the house. We discussed what we could power with the battery bank: lamps, TV/DVD, phone chargers, limited microwave, and what couldn’t be powered: refrigerator, oven, dishwasher, Tivo, coffee maker. We plugged in the standing lamps (with the LED bulbs), so we had light again. For practice, we got out the kerosene lanterns and lit them (and got out the fire extinguisher and set it nearby, just in case). Sarah then plugged in the TV and DVD player and we watched the movie Up, while the “power was out”.

After the movie I turned the power back on; I figured they already knew how to sleep in the dark. I finished up the following morning having Ryan make coffee without power, he used the hand grinder and the french press. I had meant to pull out the generator that morning and show the girls how to use it, but I forgot. Next time.

(Funny story though: A few weeks ago I got out the generator, in the middle of the afternoon, and started it up for our quarterly testing. One of the neighbors was working in his yard and asked if our power was out. I told him we were just practicing and checking the equipment, he replied, “That’s probably a good idea, easier now then when you really need it.” I couldn’t have agreed more.)

Our lights out drill went well. I tried to keep it simple and relatively painless. The kids were pretty good sports and are now more familiar with our procedure.

Teach your kids–and spouse–the skills you know; you may not be around when they are necessary. And remember, “To teach is to learn twice.” (- Joseph Joubert)

(Friday: What We Did This Week To Prep)

DIY Biltong

Here is the step-by-step, basic process of making biltong. I learned it from Jack Spirko of The Survival Podcast (YouTube video Making Traditional South African Biltong).

Preparing the meat

  • Start with lean strips of beef (or game meat)
  • Slice the meat into approximately one inch thick and one inch wide strips several inches long
  • Remove as much fat as possible (dried fat tastes like candle wax)
  • Place meat in casserole-type dish
  • Spritz all sides with vinegar (apple vinegar works well)
  • Moderately salt (with non-iodized salt)
  • Place in refrigerator overnight
  • Remove and lightly salt again, mixing meat around to coat well
  • Lightly apply coriander, mixing meat around to coat well
  • Moderately apply course ground pepper, mixing meat around to coat well

Meat is now ready to hang

  • To hang, use metal paperclips and bend them into an ‘S’ shape
  • Hang meat somewhere relatively dry (and out of the reach of pets)
  • Hang meat so it’s not touching
  • Using a piece of cord or twine, tie a loop for each piece of meat
  • Clip meat with large part of ‘S’ clip, and attach other side to the looped cord
  • Let meat hang for approximately 8 – 14 days, until dark colored and as dry as you prefer it
  • When dried, cut into small bite size pieces to eat

This is a very basic way of making biltong. It’s really that easy, and no it never stinks. There are many ways of flavoring and drying (including building a drying box). Biltong, completely dry, can store for a long period of time (very dependent on climate and/or refrigeration); biltong left more ‘wet’ will mold sooner and should be refrigerated if kept for more than a few days. Our family really enjoys biltong as a snack, but I also believe it’s valuable to know how to preserve large amounts of meat in a collapse.

(Wednesday: Teaching The Kids)


Momma Bear’s May Preps

May’s preps might have been a little obsessive. I am one of those people that likes to learn something new–and master it–before moving on to the next thing. May’s preps (in addition to making the usual stockpile purchases) have been almost exclusively focused on gardening, tomatoes mostly, and on my new food dehydrator.

I have decided that gardening is about one-half learned and about one-half luck and mother nature, and I am severely behind the learning curve. I’ve also discovered that rodents have teeth sharp enough to cut through chicken wire to get into my delicate young blueberry bush. Luckily I caught it early on and have since replaced the caging with a thick grade of plastic fencing. On a positive note, we have already harvested the first of our cilantro and lettuce and replanted more.

The other steep learning curve has been with the tomatoes. The seedlings did not survive the cats, so we went to the hardware store and randomly picked six tomato plants and started them in buckets. Random is bad. A few weeks into the project I finally decided to look up the varieties we had purchased and I discovered that four of the six plants would grow up to ten feet tall and produce tomatoes between one and two pounds. Oops. Thus they will require tall, sturdy stakes and some extreme caging structures. So we built ridiculously tall tomato cage/planters (and probably spent too much money). The second thing, about the tomato plants, is that they are really sensitive and tricky; they are susceptible to too much sun or water and are prone to bugs. Every couple of days I am out there hand picking off bugs, spritzing neem oil, and suckering off (trimming unwanted new shoots). I would sincerely appreciate any advice/suggestions as my ultra-urban gardening neighbors only grow flowers!

My second obsession of the month is my new food dehydrator. After packing up our first few months of food stores (beans, pasta, rice, etc.) we decided to try another approach to food storage. Our food stores weigh a lot and would be difficult to lug if we were bugging out. Plus if we are in a longer term bug-in, say in a power outage situation (snowmagedon anyone?), beans take significant time to soak and cook. This would dwindle our fuel supply quickly. So what if we had homemade, family-sized dehydrated meals stored? Like a backpacker’s meal, only family sized and not store-bought. They would take up less space, require less preparation time and be more transportable (if needed). Also, my family just plain does not like beans and I have to find more creative quick and easy ways to use them beyond simple beans and rice. I have found about 15 dehydrated meal recipes, and have started dehydrating some of the ingredients to make meals. The idea is that I will prepare, then vacuum seal these meals in mason jars (short-term), and my family will try them over the next several months to see which they like best and which need adjustments. Ultimately, we will put the “approved recipes” into mylar bags with oxy absorbers for longer term, portable family meal storage. You can see the jars in the photo, each card has the directions on the back and a rating of quick, medium or long for cooking time.

You can pretty much dehydrate ANYthing and it will take up much less room in your cabinets, whether stored in mason jars or mylar. I am currently dehydrating cooked beans (the canned kind or cooked dried ones and then drying again in the dehydrator).These can be left as beans or ground into powder and added to the meals to sneak in the protein (the same with carrots which my family doesn’t really like either). They come out crunchier than the original, but are lighter and take less time to cook. I also dehydrate rice every time we have any left over from a meal. You can even dehydrate chicken breasts and lean ground beef, though we have not started this yet. I will say that the downside to the dehydrator is that it makes for some intensely smelly days here at home depending on what is drying. It also requires some prep work and occasionally some minor blanching/cooking of the food prior to dehydrating (potatoes especially or they turn black). But so far I am really enjoying the results and look forward to sampling the recipes.

What did you do to prep this month?

City Cousin: My Plan

WHO, WHAT, WHERE, WHEN, AND HOW

Using my template (see my last post, Making A Plan) this is what I did, and am doing, to be prepared. I’m specifically focusing on the very real earthquake peril here in Seattle.

Prepare Short Term (72 hours) Medium Term (Six Months) Long Term (over Six Months)
Who Me.  (Single man, no dependents)

Done

Putting the “prepared bug” into friends and coworkers.

Ongoing – but I am surprised how open people are to it!

Compile a list of resources in my neighborhood then circulate to my neighbors.

To Do

What Peril:  Earthquake – at home

Done

Earthquake – for additional 7 days and being mobile if needed.

Done

Review what I’ve prepared, have things changed?

Ongoing

Where Prepared home.

Done

Preparing home for additional 7 days.

Done

Storing additional provisions at friends’ place in case home is unavailable.

Ongoing

When Goal was establish years ago.

Done

Items I need to replace and or secure:

  • Replace sleeping bag
  • Replace camp stove
  • Water purification system

Ongoing

Annually, on April 1st, I inspect my provisions and make sure everything is current, rotated, or if anything new needs to be done or secured.

Ongoing

How Research needs:

  • Set goals with start and end dates within financial constraints
  • Secure what is needed.
  • Figure out appropriate storage.

Done

If things were not done you can set up start and end dates in your “when” columns.

This has been an ongoing process including choosing where to live. My apartment building is a wood frame building that meets or exceeds earthquake building codes and having been in it during the 2001 Nisqually quake, I am reassured that this building will be standing after another earthquake. This does not address preparing your home itself for an earthquake (i.e. securing bookcases to walls, etc.). This was just used for basic resources (food, water, medical supplies, etc.) needed if those resources are not available after a major earthquake or other disaster. My goal is to be prepared after the incident until help arrives or I can safely leave the area.

After securing your supplies, in a small home where do you store them? Creativity is the key. Since I also want to make sure things are mobile, I have put my supplies in a backpack and fanny packs that can be Bug Out Bags, if necessary. A backpack fits nicely in the back of my closet.  Fanny packs can be hung over the coat rail in the closet. I have a large cooler, on wheels, that I can put food and water in if I need to leave my building; this fits under my hanging coats. Remember to keep together where they are readily available. You don’t want to bury things and have to dig them out if you are in a hurry. I feel better knowing that I am prepared even if it is just with basic needs.

Commercial emergency packs are available. That may provide an easier way to get started for you. I put my own kits together, but looked at what these sites had in theirs. Two good sites are: BePrepared.com and EssentialPack.com.

Prepping in an ongoing process. As circumstances change, what you need to do to face unexpected challenges ahead may change as well.  Once you know the road you are taking, having the mindset and a method for preparing will give you a peace of mind. And I have a simple challenge for you if you think you’re all prepared: Go a week without going to a store or gas station and see how you do. You’ll find out what you missed and it’s a chance to use and replace items you have store. In any case, enjoy the journey.

The City Cousin’s Bio
I come by prepping by growing up watching the example my father set; he was always prepared for whatever situation would arise. Now, as a single man living and working in Seattle, I have opted to live near downtown in a small apartment. For me this is a comfortable space; trying to be “green” it has reduced my use of resources from electricity to gas for my truck. With limited space, I have reviewed what I can reasonably be prepared for in my urban environment.

(Friday: What We Did This Week To Prep)


Introduction To Biltong

Biltong hanging to dry

As a prepper it is important to know multiple ways to preserve food that require little or no energy and no refrigeration. So, today we’re going to introduce biltong. Biltong, from the Dutch bil (“rump”) and tong (“strip”), was brought to southern Africa by Dutch settlers and used as a way to preserve large native game meats. I’m just going to give an overview of it today, and a do it yourself step-by-step process next Monday (5/25/12).

I first heard about biltong from Jack Spirko, on an early episode of The Survival Podcast (TSP) (Episode 27 – 9 Methods of Storing Food for the Modern Survivalist). Jack talks about it regularly, and has a YouTube video on how to make it.

Last fall we made biltong for the first time. It was easy and our family likes it. We don’t make it very much, it’s a little on the pricey side because we buy a lean cut of beef, but we’ve tried it a few times to develop the skill. Of the commonly available store-bought meats, beef is the best (both pork and chicken shouldn’t be eaten raw). Venison, or other large game meats, also make great biltong. Start with a lean cut of meat and cut off as much fat as you can, not because the fat is “bad” for you but, because dried fat kind of tastes like candle wax.

Once you have the meat you only need vinegar, salt, pepper, and coriander (though once you’ve figured it out you can season yours anyway you like). As opposed to jerky, you want your biltong about an inch thick and an inch wide, cut into long strips. The strips should be cut across the grain; this makes it easier to cut into smaller pieces, with the grain, once it’s dried. After it’s seasoned, hang it for about 10 – 14 days to allow it to cure completely. Biltong is also different from jerky because jerky is dried using heat, biltong is dried at room temperature, and uses vinegar to help cure the meat.

Once biltong is completely cured, it can be sliced up into bite-size pieces and stored for a long time. Store in a paper bag that allows oxygen to circulate, so mold doesn’t grow. Some people prefer their biltong more “wet” in the center, so they don’t hang it for as long; biltong prepared this way doesn’t store as long and should be refrigerated to maximize its storage life.

Check back next Monday for DIY Biltong.

(Wednesday: City Cousin)

What We Did This Week To Prep 5/18/12

The sunny warm spring weather, up here in the Northwest (it doesn’t normally happen this way), motivated Sarah to get some of the plants out of the greenhouse and into the ground this week. She didn’t do all of them, but she did transplant the several varieties of squash and the green beans. Hopefully, when the temperatures return back to our normal “temperate” levels the plants will be okay (it really doesn’t get, and stay, warm here until July); if temperatures get too cold we’ll cover up the young plants at night. Sarah also planted all the seeds into the garden. The tomatoes, and a couple of other things, are still in the greenhouse for a few more weeks. It’s also fun to see our perennials: raspberries, strawberries, lavender, asparagus, rhubarb, and some of the herbs that we planted last year coming back to life and growing again.

Sarah spent this week in Portland for a business trip; since I have Sunday and Monday off, I went down with her for a couple of days. We left early Sunday morning and drove all the way down to “meet” some prepper friends who we had previously only known through the internet. It was fun to meet and talk face to face. They recently bought a wonderful, river front, homestead in western Oregon. It was about a six-hour drive to get there; but OR is beautiful this time of year, we enjoyed the one on one time, and the drive passed quickly. We enjoyed seeing their new homestead in it’s raw form. It’s always easy to sit back and say when I get “mine” I’ll do this or I won’t do that, but once you’re actually there that gets tougher to do. They are actually doing it. They have an amazing vision for the property and are making plans to accomplish their goals. It’s too bad they don’t lived closer to us so we could help them more, but we wish them the very best in their endeavors! Seeing their property makes us want our own place even more.

The fish antibiotics arrived that I ordered last week. We ordered through a company called Aqua-Products. They had the best prices and their deliver was very quick. Even after all I’ve read and heard about fish antibiotics and human antibiotics being the exact same thing I still felt just slightly skeptical. As I had all these generic looking fish pill bottles sitting in front of me, I decided to open a bottle and look at the pills (I hadn’t actually done that before, not wanting to break the seal). The Aqua-Mox, which is amoxicillin 500 mg capsules, was red and pink with ‘WC 731’ written on both halves. I looked it up drugs.com Pill Identification Wizard, and it matched exactly with amoxicillin 500 mg. This unequivocally convinced me they are all the same, they all come from the same place, and the only difference is the label on the bottle.

What did you do?

Momma Bear: Home-Made Reusable Sanitary Napkins

Just because the SHTF, the monthly cycle will still continue. Sooooooo… what are the ladies in your family going to use for their long-term feminine hygiene needs? Sure, you can stockpile a lifetime worth of sanitary napkins, but what are you going to do with the used ones? They do not compost, and because they are both plastic and filled with blood borne pathogens, you cannot burn them. It is a much better idea to have something reusable ready. So what the heck does that mean???

I found two options: First is something called a “menstrual cup” which comes in both a disposable and reusable form. I am sure from the name you have an idea of what it does, but I had never heard of it before. Ladies can research for themselves to see if that is something they would like to try.

The second option is the old school idea of reusable/washable sanitary napkins. What I was amazed to find out is that people are making these already and selling them on ebay, and other crafting websites, for a RIDICULOUS amount of money (around $10 for one washable pad)! I am here to tell you that anyone with a sewing machine or the patience to hand sew can make their own for a fraction of the cost. They can also be made by recycling old towels and flannel sheets, thus reducing your cost to nothing but thread and labor.

I recently sat down my 13 year-old daughter and broke the “reusable pads” idea to her. It was a great teaching opportunity. I started with a simple question and answer; asking her what she thought ladies did back before plastics, mass manufacturing, and easy access to stores. I explained that if there was a true emergency, resulting in a long-term power outage, we had to go with something washable. I was surprised that she was so open to the idea. So we hit the internet and found Tipnut.com, it’s a great site with MANY different kinds of tutorials on making sanitary napkins.

Because we don’t have surplus flannel sheets, we opted to hit up Wally world for some fabrics. We picked out some nice flannel for close to our skin (a yard for each of us) and something thick, fluffy, and cotton for the inner layers (three yards for the two of us). You can see from the photos that we are using the basic “wings” style pad with a snap for the underside. These are a two-part napkin consisting of the outer “liner” and then an inner “pad” for absorption. Although we used a pattern off the internet, you can just as easily trace what you have in the cupboard.

First, we made copies of our pattern and compared them to the store-bought stuff. In this case the top layer of the liner is one solid piece with wings, and then there are two bottom layers which are about 2/3 of the top pattern each with one wing. This is so that those two pieces (on the bottom) will overlap, allowing you to insert your inner absorption pad. These top/bottom layers are stitched together with the flannel (fuzzy sides) facing each other, then they are turned right side out, ironed, then overstitched again all around the edges. I also stitched an extra line around the pad area, to provide a crease point right about where the wings flip down, thus ensuring the pad wont slip around. Last, we added snaps to the wings.

After sewing all the liners we made the pads. These are anywhere from two to four layers of padding just sewn all together to make a firm rectangular pad. These are the interchangeable inner pads (this would be towelling or absorbent fabric) that are made in different thicknesses for the different levels of flow (*in the photo the opening to insert the inner padding is face up, but this would normally be face down toward the inside of the panty). While we opted for removable inner pads, there is no reason why you couldn’t just make them part of the liner and stitch the whole thing together. We just liked the idea that we could add more pads or take them apart for a more thorough washing. Because of the snaps these are foldable into little square packets for easy storage.

I personally do not sew on a regular basis and found curvy type napkins difficult to make, hence ours look kind of rectangular. I will also caution any novice sewers to make sure they wash and iron their fabrics, before beginning this project, because cotton shrinks. I have to admit that I had trouble with that stupid “snap kit” (and I lost my patience); instead opting to hand sew old school snaps on. Also of mention, we made multiple sized pads because 13 year olds and moms don’t necessarily use the same size of anything. I think in total we spent $23 on fabric and snaps and made ten liners for each of us and 30+ inner pads of different thicknesses. This was a pretty simple project over all that anyone can make.  No insanity required.

(Friday: What We Did This Week To Prep)

Trace’s Note: Be sure to also read our follow up posts by Sierra Kate: Reusables, Self-Reliance & Feminine Hygiene Part  1- Options, and Part 2 – How Do They Perform?

Being Prepared In Body, Mind, and Spirit

If we knew the world around us was going to collapse tomorrow we’d hope that we were as prepared as possible. We’d hope we had adequately covered our five basic needs of food, water, shelter, security, and energy. We’d hope we had built in redundancies for the unavoidable failures and shortcomings. We’d hope we had developed some type of community knowing we can’t survive alone.

But what kind of condition would your body be in? How are you physically, mentally, emotionally and spiritually?

In the past couple of weeks I have gone to see both my dentist and my doctor (actually nurse practioner). Both visits were just normal check-ups. But the medical appointment was the first physical I have had since getting out of the military 13 years ago. What motivated me to finally go (medical-type people are the worst), was the same thing that’s motivated me on most of my projects and new endeavors over the last few years — the desire to be prepared.

Motivators in are lives our important. Most of us are intelligent and aware enough to know what we should do, but finding the time, desire, and motivation is hard. Most of need more motivation than, “just because I should.”

For example we all know that physically we should:

  • Exercise regularly. Thirty minutes of moderate, varied exercise five days a week.
  • Eat well. A moderate intake of a healthy variety of quality foods.
  • Drink plenty of fluids (especially water). Experts say that the amount should be two to three liters of water per day (more in hot weather or if you’re exercising heavily).
  • Get enough sleep. This means seven to eight hours of sleep, every night.
Prophylactically we can/should:
  • Have a physical exam. At my exam I found out my cholesterol was a little high and my Vitamin D was low; both things I can easily correct now that I know about them.
  • Have dental exam, and complete any needed work. I had the beginning of a couple of cavities; I’m sure they could wait, but I chose to get them taken care of now when there is easy access to dental care. Personally I’d rather avoid dental work during a collapse.
  • Ensure immunizations are current. I’m not talking about things like the flu shot (I choose not to get those), but I found out I needed a Hepatitis A vaccine and a tetanus booster. Both of those are diseases that could be rampant in a collapse.
  • Consider getting lasix eye surgery to correct your vision. Or stock up on lots of extra glasses, imagine going without.

But there are other ways to stay “fit” that we don’t  think of as much, like what do you do to keep your mind active? If you’re a prepper you’ve got this one covered already, because there is always so much out there to learn. But simple activities like doing crossword puzzles, sudoku, playing games, math in your head, anything that keeps the cognitive function, um, functioning and challenged on a regular basis.

What about your emotional health? This is one that many of us prefer to ignore, because “we’re fine, thanks.” But it is crucial to have a good emotional support system. How do you release the built-up stress of day-to-day activities? Maybe through exercise, meditation, music, talking, pets; it doesn’t really matter as long as you know what it is, and it is working for you. Knowing who you can you talk to when you’re down, a friend, a family member, a spiritual leader, a counselor; again the choice is yours, but there must be someone — there are times we all need someone to lean on.

Then there’s spiritual. This is an interesting one because we tend to be dichotomically divided here. Either religion/spiritualism/belief is a big part of our lives, or it isn’t at all. But I feel that people need something to believe in, something they see as bigger than themselves, something to strive for beyond this life.

Statistically speaking we know the world isn’t going to collapse tomorrow, or probably not even the next day. But I think we all believe that the world, as we know it, is going to have some major changes in the relatively near future. In a collapse I can only imagine that everything that can go wrong will go wrong. Physical problems will surface with the increased amount of physical effort required. Stress, anxiety, depression will be compounded exponentially. Little issues, that we all have and may just be inconveniences now, will no longer be able to be hidden away when you’re hungry, tired, scared, in pain, cold, worried, and lonely.

No one can be responsible for taking care of your body but you. It’s not being selfish to take care of yourself; if you don’t take care of yourself then you can’t take care of anyone else. Make it a priority to be ready.

(Wednesday: Momma Bear)


What We Did This Week To Prep 5/11/12

Today is my 100th post. On one hand that number amazes me and I can’t believe I’ve written that much, but on the other it seems like I’ve been doing this forever. I said I’d write, three times a week, for a year and see where I am at that point — I’m into the 9th month.

We went to Costco. It was a relatively light trip, actually under budget. Since we had a little extra, we again added to our stock of over-the-counter (OTC) medications. Right now OTC generic meds, like: ibuprofen, acetaminophen (Tylenol), diphenhydramine (Benadryl, for allergies), loperamide (anti-diarrheal), pseudoephedrine (Sudafed, for congestion), guaifenesin (Mucinex, a cough suppressant), hydrocortisone (topical for skin problems), loratadine (Claritin, 24-hour allergy med) and daily multi-vitamins are all cheap and readily available. If you keep them stored in a cool, dry, dark place, they’ll last a long time. There may be a time in the future they’re not as readily available, so stock up now–even if you don’t use them much on a regular basis–you’ll be glad you have them then. Remember, as with all your preps, rotate your stock and always use the oldest first.

On the medication category we also budgeted money to buy more fish antibiotics. We already have the fish version of amoxicillin, cephalexin, and metronidazole. I ordered more amoxicillin (probably the best, widest spectrum antibiotic available in the “fish market”), more cephalexin (a good antibiotic to use for cellulitis, which I believe will be a very common type of collapse infection), doxycycline, and ciprofloxacin. We’re still not quite where I want to be, but probably a good 2/3rds of the way. Again, these are only to use after a total collapse, but at that point they will be life-saving. This is another item you can buy now, easily and inexpensively and safely store for years; and it’ll be invaluable to have in your preps if the SHTF. Unlike almost everything else we store, this is not to be rotated and used on a regular basis. This is only for a collapse, and then only to be used with proper care and education, and sparingly. If things collapse, on a large-scale, it’s likely these will never be available again.

We’ve been shooting airsoft regularly and really enjoying our little airsoft pistol. Sarah, Ryan, Alison, and I have all been shooting on our small “indoor range” inside the house; now that the weather is getting nice we go outside and shoot cans and plastic bottles off the picnic table (Sarah, especially, is getting really good). Since we’re using it so much I’ve decided to upgrade to a better, more accurate airsoft pistol. I’m also considering getting a tactical-style rifle to incorporate into our training.

On a related note, security and home defense have been in the forefront of my mind this past week. I recently read Holding Their Own and looked through Holding Your Ground, both by Joe Nobody. Also a prepper friend and I have been discussing homestead security concerns and ways to address them. Then Jack, on The Survival Podcast, did a show this week on “Security During a Break Down” (TSP episode 899) which made me do even more thinking on the topic. Security isn’t something to panic about, but it definitely needs to be part of your planning. As Jack said on the show, of your five basic needs, your body tells you when you need food, water, shelter, and energy–but sometimes you don’t know you need security until it’s too late.

I hope everyone is enjoying their spring weather and shaking off the “long dark winter” cobwebs; it’s been especially nice here. If at all possible, plant a garden this summer, start it this week if you haven’t already (it’s not too late). Even if it has to be something small; start learning the skills, eating healthier food, and learning an appreciation for growing something with your own hands.

What did you do this week?

Sarah’s View: The Disaster I See

In high school I was introduced to a book that changed my life and provided me with a foundation to accept the concept of prepping when Trace introduced it. That book was Ishmael by Daniel Quinn. Quinn was able to hit a nerve in my subconscious and explain the world, “our” culture, in such a way that – for a split second – I felt like I “got it”. Of course, as is the case with many such occurrences the feeling of “got it” was fleeting and life went on as normal. I went off to college and there, while studying Anthropology, returned to Ishmael and Quinn’s other books. I don’t know if I enjoyed my Anthropology classes more because of Daniel Quinn or if I enjoyed, and understood, his ideas because of Anthropology. Regardless, they were very complementary.

But what, exactly, does all of this have to do with disasters? or with prepping?

While the story of the boiling frog is, unfortunately, scientifically inaccurate, it still provides an excellent illustration for the concept of a slow, and therefore unnoticed, deterioration or destruction. We are the frog, simmering away in the belief that the world was meant for humans and that we are living – finally – as humans were meant to live. But, humans lived for millions of years as ‘part of the world’. Then, something changed and we started thinking that instead of being a part of the world, the world was meant for us and could – no should – be molded to our will. Quinn proposes that change was agriculture and, more specifically, putting food under lock and key, thereby allowing for larger and more concentrated populations but also introducing a cultural control mechanism in food and other resources.

Honestly, at this point, I don’t think it really matters what caused the change; what matters is to recognize the issue with this “new” mindset.

Humans live as if we are alone on this planet – utlizing resources without regard for what happens tomorrow, or in a month, or a year from now, when there is none left. As Quinn says in Ishmael, “I have amazing news for you. Man is not alone on this planet. He is part of a community, upon which he depends absolutely.” We have forgotten that we depend on everything – water, fuel, plants, animals…

And, I bring us back to prepping. As a group I believe preppers intrinsically understand how much humanity depends on the rapidly depleting resources. The disaster I see is that too few people have recognized this early enough for the world to continue as we know it.

(Friday: What We Did This Week To Prep)