Sarah’s View: The First Steps to Debt-Free

by Sarah Adams -

1288604993JYP2mWLast year I wrote A Prepper’s Budget, about the budgeting philosophy that has helped us work toward being debt-free. That post, however, talked mostly about our ongoing budgeting strategies and did not really address how to get started.

While it depends on what your goals are, as Trace and I have talked about before on this blog, getting debt-free was our primary goal and certainly recommended by many in the prepping world. In order to be debt-free you must stop using the credit cards. You cannot be debt-free if you’re still digging the hole.

debt-ball-and-chainStep 1: Pay your monthly bills. Can you pay all of your monthly bills with your current income? In order to make any kind of dent into your debt, you have to be able to cover all your monthly expenses with your monthly income. If you are not in a position to pay all your bills each month you need to take a hard look at your lifestyle. What can be dropped? Do you need cable? Can you find a cheaper cell phone plan? What about income? Can you pick up extra hours? Once you can cover all your normal monthly expenses, without dipping into the credit card, you’re on your way.

Step 2: Create a financial emergency fund. This is Dave Ramsey’s Baby Step 1 – the $1,000 emergency fund. He recommends keeping this in cash, someone accessible — but not so accessible that you go to it when it’s not a true emergency. The idea is to set aside $1,000 to cover the unexpected; so that when the unexpected does happen you don’t have to use credit (and go deeper into debt). I know it isn’t always easy to save up to $1,000, especially if Step 1 was a challenge, but it’s so important to be prepared for those emergencies that will come so that you can continue down the path to debt-free.

debt snowballStep 3: Debt snowball strategy. Again, we followed Dave Ramsey’s recommendation and paid off our debt using the concept of a “debt snowball”. The idea is that you pay any extra toward the debt with the smallest principal (don’t worry about the interest rates). Say the minimum payment is $50 a month and you add an extra $10 a month to that payment; once that bill is paid you now take that $60 and put it towards the debt with the next-smallest principal outstanding. This $60 is over and above the minimum payment for this debt. As you can see the payments you are making “snowball” quickly.

Step 4: Begin saving. Now that you have paid off, or at least paid down, your debt you can start saving. Once we had our debt paid off, we were able to save for and buy a truck last year with the money we had been using for our snowball. We have also worked to have at least one month’s expenses in savings. Trace and I are currently saving toward the new house, but after that we plan to save up to having the three to six months’ expenses in savings. The best part, by doing it this way, our old debt no longer needs to be included in the amount we need to save to cover our monthly expenses. We have less debt and, therefore, fewer expenses to worry about in an emergency.

We followed the above steps while doing a monthly zero-based budget as I described last year. The budget allowed us to see our expenses each month, in black and white, and helped us project when we could move from one step to the next.

Life-Without-DebtGetting started can be incredibly overwhelming and money is a challenging topic to tackle, but it is so worth it. As a prepper, being debt-free is one of the best things you can do to prepare for any scenario – big, small, local or nation-wide.


 

Nuts & Bolts by Nick: The 911 Bag

by Nick Romaniello -

ambulanceWith bugout bags, get home bags, EDC, etc, preppers tend to organize many go-to kits for various emergency scenarios. The prepper mentality is largely one of self-reliance, but what happens when injury or health emergency force you to rely on someone else? Do they know everything they should? I have recently experienced a few scenarios, both directly and indirectly, within my own family where medical emergencies rendered a person unresponsive. Without going into too much personal detail, one scenario had me alone with a person who lost consciousness from a drug interaction. Training had allowed me to avoid panic and react properly. A call was placed to 911 and information was conveyed in a calm clear way to assist responders as much as possible. When paramedics arrived on scene, the quest for information continued and I found myself suddenly unable to answer all the questions. “What medications does this person take?” “Who is their Primary Care Physician?” “We are taking them to So and So hospital, do you know the way?” I was suddenly at a disadvantage. A disadvantage that affected this persons effective treatment. What could I do to prevent this disadvantage in the future?

Pregnant women are often the most prepared for a sudden departure to a hospital or birthing center. They know they will be going, but just aren’t sure when. So they get prepared. When “it’s time” they just pick up and (relatively) calmly go, knowing that they will have everything they need. The truth is that we all may be on our way to the hospital and just don’t know when. Remember that “it’s not if, but when” mentality of being prepared and pack a small bag for each household to be grabbed in the event of a medical emergency. When a person is rushed to the hospital (especially if they are unable to speak) you will have important information and gear that will make the difference.

emergency roomWhile I’m sure there are resources out there that discuss this type of prep, I haven’t come across any. Based on my personal experiences alone, I would recommend the following to be included in such a kit:

  • Prescription Information: This includes a list of all current medications, dosage amounts, usual times they are taken, and prescribing doctors contact information.
  • Over-the-Counter or Natural Remedy’s: If the subject is taking anything that may react with prescriptions being taken or medications that may be administered in hospital the ER should be alerted.
  • Allergy Information: If the subject has any allergies to medication, food, latex, etc.
  • Copies of ID: Drivers license, organ donor information, insurance card, and a list of important phone numbers.
  • Personal Essentials: If the subject wears glasses, dentures or anything else needed to function normally be sure to either include spares in the bag, or list a reminder to get them on the way out the door.
  • Hospital Information: Depending on your location, there may be one or many possible destinations for an ambulance. A list of local ER’s with addresses, phone numbers and directions can help greatly when your mind is racing.
  • Clothing and Personal Items: A change of clothes, a book, and some comfort items such as a family photo can bring some peace to a person facing an unexpected hospital stay. Perhaps include some snacks and a book for the person sitting in the waiting room holding the bag. Include dollars and coins for parking and vending machines.

For me this type of kit is a recent concept and is far less refined than the oft-discussed B.O.B. so I would welcome any additional information or ideas to help make the 911 bag, as I am calling it, a more effective piece of prepping gear. A rush to the hospital is never a pleasant experience, but being prepared can help alleviate stress and speed effective treatment.


Nuts & Bolts by Nick: Dual Flush – The Smarter Toilet

by Nick Romaniello

CrapperWe have come a long way from digging a hole in the ground, to get rid of our bodily wastes, and then wiping with a leaf — but anyone who has been through a disaster can tell you it doesn’t take much to send us back there. Although toilet technology has progressed over the years, most homes still contain toilets that use components developed in the 18th and 19th century. Karl Benz may find nothing in a modern automobile resembling the horseless carriages that he developed in the late 1800’s, but plumbing pioneer Thomas Crapper could easily find his innovations operating virtually unchanged in commodes over 130 years later. While fancy water saving toilets have become the norm elsewhere in the world, the West has been slow to adopt these due to water being plentiful and cheap. We don’t really stop to think about water consumption very often, but the truth is that the average American family uses about 100 gallons of water per person every day! That’s far more than the one gallon per person per day that we consider the survival standard. The biggest household consumer of water is the toilet, responsible for 25-30% of usage. This can be a heavy burden in a water shortage, or even if you have a finite supply such as a private well or small municipal source. Water conservation can help the planet and your wallet, but it can also preserve a precious resource for more important needs.

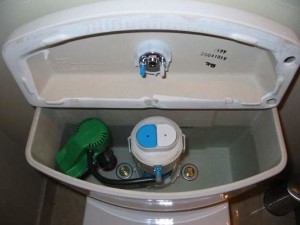
Dual flushWhile new toilets sold in the U.S. meet EPA guidelines of 1.6 gallons per flush, many homes still contain older, less efficient models that can use around six gallons per flush or more. Replacing an old toilet with a new high efficiency model is an easy project for a do-it-yourselfer, but little effort is needed to take it a step further and install a dual flush toilet. Dual flush toilets look like and install like any other toilet but allow you to choose how much water you flush with. Many have two buttons in place of a flush handle or a flush handle that can be pushed up or down to select the desired amount. When you only have urine and some toilet paper to flush, the first setting only uses a fraction of the amount in the tank. For solids, the second setting uses a full tank to thoroughly flush everything down. Gone are the days of the “If it’s yellow let it mellow, if it’s brown flush it down” mentality of conserving water. I have installed many dual flush toilets and my customers have always been pleased with the planet and cash saving technology. Dual flush toilets come in as many style options as any other toilet and like anything, the fancier you want, the more you will pay. However, a dual flush toilet doesn’t have to be expensive. I have installed several Glacier Bay (Home Depot brand) and Aqua Source (Lowes brand) dual flush toilets which cost around $100. I have had no reports of problems with these less expensive models even after some have been in use for years.

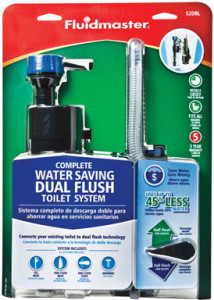
df conversion kitIf you already have a high efficiency toilet that isn’t dual flush, conversion kits are available that replace the flush mechanism in your tank. These conversions are quick, easy and don’t require the removal of the toilet. While the packaging wouldn’t discourage a sale by saying so, these conversion kits do not work on toilets older than 1995 when the low flow technology became the standard. These kits cost from $30 and up.

Upgrading to any dual flush technology will quickly pay for itself with savings on your water bill and keep less of a life giving resource from going down the drain.


Sarah’s View: 1st Time Using a Pressure Canner

meat into jarThis weekend we used our pressure canner, for the first time, to can turkey meat and stock. We had bought two turkeys during the post-Thanksgiving sales, I cooked them, and Trace cut up the meat and used the carcasses to prepare a large pot of turkey stock.

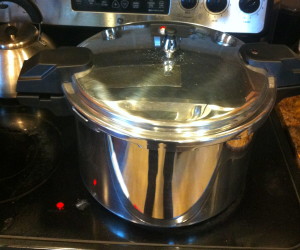
Originally the intention had been for Trace and I to work on the project together, however he had a number of other things he needed to get done around the house and once I got started I just kept going. About three weeks ago we purchase a Mirro 16-Quart Aluminum Pressure Cooker Canner. Sunday morning we took it out of the box and started reading the directions.

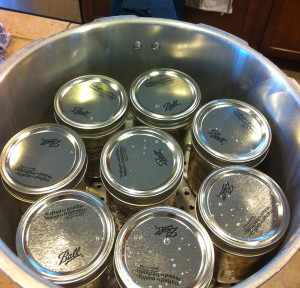
jars into pressure cannerThe first step was to run the canner through a quick “cycle” without any jars so we could determine how high the heat on our stove needed to be to keep it at the appropriate pressure. This process went smoothly enough and, after the canner cooled back down, I felt ready to move on to the real thing. At the end of the summer we used the water bath canning method to can our salsa, so I was somewhat familiar with the next steps. I did consult a couple of sites to determine the best way to pack the turkey meat – loosely and with some water/stock – and then consulted both the canner manual and our So Easy To Preserve book to determine the pressure (10 psi for our elevation) and time for processing (75 min pressure canner on stovefor the pint jars).

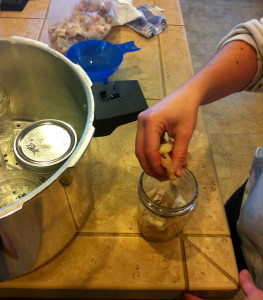
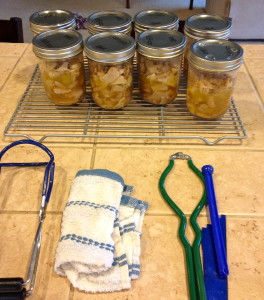
I was pleased to read that for pressure canning I did not need to sterilize the jars so I simply rinsed them, filled them with hot water, and set them in the canner to wait – this also allowed me to confirm how many jars would fit at one time. I started with the turkey meat, first pouring a bit of stock in the bottom of the jar and then packing in the meat. While our meat was cooked when we canned it, we read later that we didn’t need to cook it all the way, or could even can it  meat cannedraw. However we both felt that trying to cut it off the bone raw would have been more difficult and we had used some of the cooked turkey for meals and sandwiches before setting aside the rest for canning, so cooking it made sense for us. I probably could have packed the meat tighter than I did as it shrunk during processing, but as it was we canned 13 pints of meat.

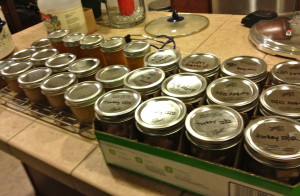
Once I finished the meat I moved on to the stock. Trace wanted to keep the condensed stock in manageable quantities, so we did that in half-pints. We ended up with 16 half-pints of stock, as well as a quart jar we put in the refrigerator to use right away (we were out of half-pint jars and it didn’t really make sense to run the canner for one quart jar).

all doneI have to say that the process turned out to be remarkably easy. Though a bit noisy with the steam escaping a couple of times each minute! I must give credit to Trace for having the meat and stock ready to go – the meat was cooked and chopped, the stock was boiled and strained. I’m looking forward to doing more canning. Of course, the true test will be when we open one of our jars and taste our home-canned turkey.

It’s refreshing to know that we now have the tools and knowledge to can our own foods. For us this means we can start storing more locally produced meat and vegetables. We will have more control over the source(s) of our food storage. This also allows us to rescue and preserve frozen meats in the case of a long term power outage (using a propane heater). As Trace would say, repetitive and redundant. Plus it was kind of fun!


Nuts & Bolts with Nick: Getting To Know Your Home Utility Shut-Offs

by Nick Romaniello -

“Shut ‘er down!”

While knowing where your home’s utility shut-offs are located may seem like common knowledge — I routinely run into homeowners who have no idea where they are or how to operate them, so I feel it should be addressed. If you are already familiar with your home’s shut-offs then this is an opportunity to brush up (or share with your other family members). Most on-grid homes utilize three basic utilities: Electric, Gas and Water. While most of the pipes and wires hiding in the basement should be left to the professionals, knowing how to shut off each of your utilities in an emergency is your responsibility. The place and method for which they enter your home vary from one municipality to another, so take the time to familiarize yourself with your area’s specifics. Call your local utility company, a plumber, or electrician if you have specific questions; but I will address the basics here.

Water

Water generally enters the home from underground to prevent the lines freezing in winter. The water meter will usually be located in a basement, or utility room, and will have a shut-off on each side of the meter to allow the water utility to easily change the unit. The shut-off will usually be either a lever, or a knob, or possibly one of each. Operating the shut-off on either side of the meter will stop the flow of water throughout the house. Hard water can corrode shut-offs that have not been operated in years so it’s a good idea to regularly make sure your water shut-offs are in operating condition. If they are stuck in the on position they must be replaced immediately. A non-functioning shut-off is a major hazard and should not be ignored.

Gas

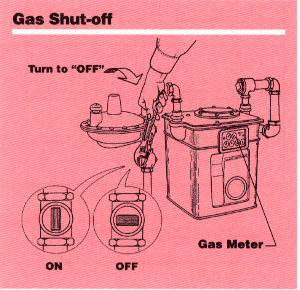
Your gas meter may be located inside or outside your home, as natural gas is not affected by freezing. Gas meter shut-offs do not have handles or valves since they are not intended to be regularly operated by home owners. The gas meter will require a wrench to operate. Usually an adjustable wrench will work, but some meters use specialty wrenches; find out what your meter uses before hand and keep it near the meter. Following natural disasters (i.e. earthquakes, tornadoes, hurricanes) many devastating fires are fueled by ruptured gas lines, so shutting off your natural gas can help prevent home damage from becoming total home loss. ONLY shut off your natural gas service in an emergency. Once it is off all of your pilot lights will go out; turning the gas back on without proper knowledge and equipment could release natural gas into your home and become deadly.

Electric

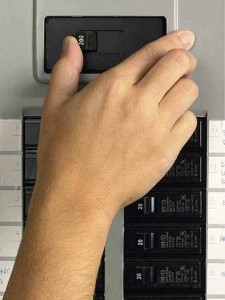
Depending on the age of your home you will either have a fuse box (older) or breaker box (newer). A breaker or fuse (often placed at the top and away from others inside the box) should be labeled as ‘main’. To disconnect electricity either flip this breaker or remove this fuse. If you have fuses, consider contacting an electrician about upgrading to breakers for convenience and added safety.

Take the time now to locate all of your utility shut-offs and be sure that they are not obstructed. Being able to access them in a hurry or in the dark may be necessary. Shutting off your utilities during a natural disaster, or before an evacuation, can add a layer of protection against possible utility-fueled fires, floods, or explosions should your home sustain damage. There are many variations that I couldn’t cover in a single article so be sure to take time to learn your particular system or consult a professional if you are unsure.


What We Did This Week To Prep 9/7/12

This week we headed back to the Olympic Peninsula, in and near the Sequim area, to look for a potential “homestead” property. We looked at about half a dozen places and found one that we really like. The house is small (900 square feet) but it’s in ‘ready-to-move-in’ condition, on six acres; it also has a large pole barn, the property is heavily treed (including several large oaks, which are more rare in this area), relatively flat, and in a very good location. After talking it over, first together, then with our realtor, we put in an offer. We should hear back on it in the next couple days. We’re pretty excited, but trying not to get our hopes up too much.

the coffee house where we meet

I got together again with our budding prepper group (there are now four of us). We try to get together every month, have a cup of coffee, and reassure ourselves that it’s the world that’s crazy and not us — you know how it feels sometimes when you’re a prepper. Again, if you live anywhere near the Seattle area, or are even visiting, we/I’d love to get together and meet you. We all have something to offer, we all have our individual strengths and weaknesses; sometimes you’re the one teaching, sometimes you’re the one learning — most of the time both. Community is so important; I believe it is the number one thing that will allow us to survive well if times get bad.

Western Washington is having a very atypical summer–I know, I know the rest of the country is too. August here was the driest month on record (ever), and as of today we are 48 days without rain (the all-time record, set back in 1951 was 51 days). Fortunately there was plenty of rain and snowfall last winter and we are not experiencing drought conditions. And our garden has been loving all this sunshine! Everything is growing well. We are bringing in tomatoes, beans (multiple kinds), snap peas, carrots, and herbs every afternoon; it’s nice to feel that our gardening has been successful. Ironically, with all the sunshine our strawberries, which produced in early July, have started producing again. It’s amazing what happens to your garden when you add sunshine to good soil, mulch, and water!

What did you do?

(Monday: One Year Blog Anniversary)

Sharpening Knives, Part 2: Actually Doing It

Last week I wrote Sharpening Knives, Part 1: Choosing The Right Sharpener. As I stated, “what makes it easier to sharpen a knife is to have the right sharpener”. Now that you have a good ‘whetstone’, how do you get a good edge on your knife?

Knife Sharpening is the process of making a knife or similar tool sharp by grinding against a hard, rough surface, typically stone”.

Assuming you have a DMT folding sharpening stone (like I prefer/recommended) start by holding the stone in your non-dominant hand and holding the knife in your dominant hand. If your blade is dull start sharpening it on the coarse side of the stone; if it has a decent edge maybe you can start off with the finer side. As you sharpen the knife you don’t need to apply much pressure, just a gentle firm push/pull across. As you work the blade across the stone some people like to imagine that they’re trying to shave off a very slim piece of the stones surface.

When you’re sharpening a knife the most difficult part is finding, then maintaining, the correct angle. You want to position the knife at approximately 20 degrees (or about the angle that is already visible on the blade’s edge) against the stone. It takes practice to develop a “feel” for the correct angle. There are sharpening guides available that hold the knife at the proper angle–but as a prepper I believe it’s worth taking the time to learn the skill. The smaller the angle the sharper the knife will become, but the less strength the edge itself will have and it will bend much easier (e.g. a straight razor has a much smaller angle to produce the razor edge, it is then stropped each time to make sure the edge is straight and polished). Practice. You’ll get it, then you’ll get faster.

Both sides of the blade need to be sharpened equally, when you’re working on the coarser side of the stone it’s easier if you do about half-dozen on one side before you turn it over and do the other side. Make sure to do the same number of strokes, maintaining the same angle, holding the same amount of pressure, over the entire surface of the blade’s edge. Once the knife is noticeably sharper, switch to the finer side of the stone and this time alternate strokes one on each side of the knife.

The knife is sharp when you think it is. You’re not going for a razor edge, unless you’re sharpening a razor. For most knives sharp enough is good enough. As you practice it’ll become smoother, faster, and more natural. As you develop the habit of keeping up the edge you’ll find you just need to do a few strokes across a fine stone to keep it ready.

Here’s a good, how-to, knife sharpening video that sums all this up:

http://www.youtube.com/watch?v=nWJMEWck3WI&feature=relmfu

(Wednesday: Sarah’s View)


Sharpening Knives, Part 1: Choosing The Right Sharpener

My grandfather gave me my first pocket knife at 8 years old and taught me to sharpen it. Each time he’d visit he’d check the edge, if it wasn’t sharp he wouldn’t say anything but he’d take it, sharpen it, and return it to me. He used to say the only thing a dull knife was good for was spreading butter.

It took me a long time to get good at sharpening. I believe what makes it easier to sharpen a knife is to have the right sharpener. Many years ago I went on a ‘quest’ to find the best knife sharper.

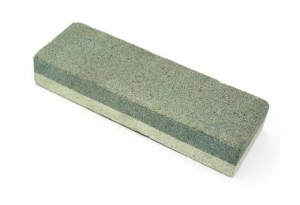
There are many styles out there. The traditional whetstone is the standard. Incidentally “whet” means to sharpen a blade (not wet as in a reference to using it lubricated). Natural whetstones have long been used throughout history, but because of their rarity have become more expensive, and their grain is inconsistent. Today most are artificially made, resulting in a less expensive product, with a consistent grain. Many now are double-sided with a coarser side* and a finer side. Whetstones can be used dry, or wetted with oil or water which reduces resistance for a finer edge. My grandfather always had a large fine whetstone sitting on his desk and another coarser one with the tools (and frequently a smaller one in his pocket). The disadvantage of a whetstone is that the lower density material gets shaved off, over time, during sharpening; this causes the stone to become misshapen, or curved instead of flat. When this happens, it must be reshaped so it can again correctly sharpen a blade.

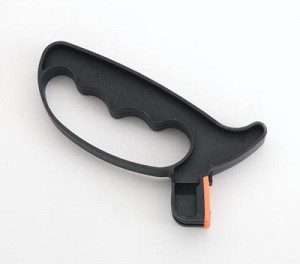
As I said, I’ve tried many of the sharpening stones/systems/tools out there. There are types that you mount the blade into and then the blade is kept at exactly the right angle; I don’t like them much, I’ve never had trouble holding the knife at the right angle and all the mounting stuff takes time and extra space and equipment. I also don’t care much for the ceramic rods sharpening system.; again they require setup and space and create the “exact” sharpening angle. There are also electrical sharpeners which are expensive but sharpen well and can even sharpen serrated knives. Also, there are relatively inexpensive ‘V’ style sharpeners that work fine. But using either of these last two, you never “learn” to sharpen a knife, which is an important skill-set for a prepper.

So what I use, and recommend, is a diamond plated stone. The surface is impregnated with diamond dust particles, which act as an abrasive to grind metal. They come in various sizes and grades of grit. They tend to be more expensive than artificial whetstones, but never become misshapen.

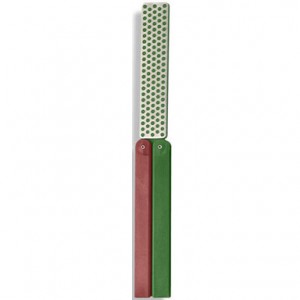
My favorite brand, though there are others, is DMT. I particularly like their folding models which are lightweight and compact (closed 5 inches long). They have a double-sided version that comes with a coarser side and a finer side (I buy the one that’s red: fine, and green: extra fine) they cost about $30. I also have one of their bench stones which is larger and is designed to be used with it sitting on a solid surface.

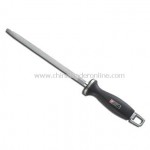
It’s also important to have a good honing steel (also referred to as a sharpening rod), especially for your kitchen knives. Honing re-aligns the blade whereas sharpening on a stone actually scrapes off a little of it, so you hone more often than sharpen (but honing does no good if the edge is blunt, because it removes no material). If you have a good set of kitchen knives that you use frequently you’d probably sharpen them on a stone every couple of months, but you should probably hone** them on a steel before each use.

Monday (8/6/12) I’ll post Sharpening Knives, Part 2: Techniques and Tips For Sharpening

*A coarser grit is used to remove larger amounts of metal more rapidly, such as when forming an edge or restoring a damaged edge. A finer grit is used to refine an edge.

**Honing steels are more effective on knives with softer steel blades that sharpen quickly but where the edge can easily deform. A harder steel knife blade deforms very little and instead just needs to be touched up regularly on a whetstone.

(Friday: What We Did This Week To Prep)

Momma Bear’s July Preps

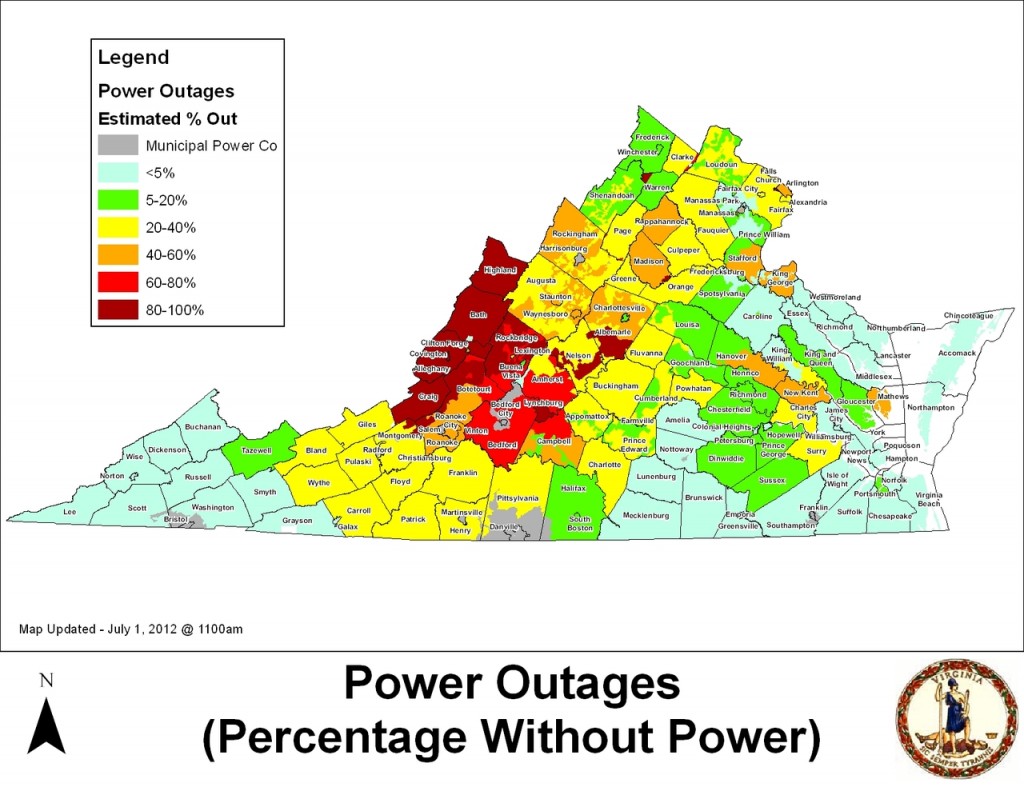
The end of June brought northern Virginia and lower Maryland a serious, and very sudden, storm that resulted in more than a week without power to over a million homes. While we were not personally without power, there were food and ice shortages at some neighborhood stores as supply chains were rerouted or disrupted. It was a great opportunity to talk to our family about heat related illnesses and to review what we would have done for more than a week without A/C in 100+ degree weather. While we have a fireplace to stay warm during cold weather power outages, staying cool in the summer is much harder without power. We are now considering getting a generator, in part, to run a small window A/C unit. We’re also considering some solar battery chargers to power electronic devices. The least expensive option, which we will probably do first, is to get an inverter for our automobile outlets so that we could charge our cell phones and laptops. I think we are going to plan a “power outage drill” weekend in the fall. It will be an opportunity to see if our planning is really living up to our needs.

The biggest weakness we found in our preparations was that simple drinking water is not always enough when the emergency/disaster is during a heat wave. In a long-term, high heat situation–especially during strenuous activity–a Gatorade-type drink is recommended to replace the electrolytes that are lost. So we have added that to our LTS list (diluting it to half strength which is a better ratio for the body, and helps avoid stomach aches and cramping). You can make your own electrolyte oral rehydration solution. Into a quart/liter of water add: 3 tablespoons sugar, 1/2 teaspoon table salt and 1/4 teaspoon potassium chloride (bought as salt substitute, e.g. Morton Salt Substitute or Nu-salt) (note: if you don’t have access to potassium chloride double the amount of table salt to 1 teaspoon). Overall though our home is pretty well prepared for a week or more without power. We continue to stock up on alternative cooking fuels (charcoal, propane, butane, and sterno), as well as foods that require minimal cooking, and comfort foods.

After six years out of the country, we have recently purchased fishing gear and licenses (still searching for the perfect boat though). Although none of us are overly experienced fishermen we have begun/resumed fishing — though at this point it’s catch and release. Having grown up in the Pacific Northwest, the types of fish we have here are quite a bit different from what we are used to so it’s all about practice. Bass and catfish are the most common and they require larger hooks and stronger line than what we use for trout back home. We are fortunate to live near a number of lakes, and the Potomac River, so there is ample opportunity to practice.

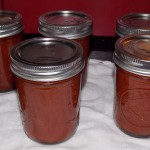
My tomatoes are also growing like gangbusters; I picked one yesterday that is over a pound. This past weekend I canned my first batch of ketchup. It is a little on the gourmet side for flavor (meaning the grownups like it but the kids don’t). Next up for canning is fire roasted tomato salsa. My husband, who is quite the city boy, has been blown away by the idea that we are storing food that we actually grew ourselves, and from which I have harvested seeds for next year’s garden. Like Sarah, I have kept a garden journal to keep track of what is and isn’t working. We are already looking forward to next year to try a few different vegetables and probably more containers since our sunny spots are not necessarily gardenable otherwise. We are working as best we can with what we have.

How is your summer going? What are you canning or storing?

(Monday: Building In Redundancies In Case You Aren’t Available)

Hand Washing Laundry

We’ve decided that our next prepper goal is to be able to hand wash laundry. Washing machines require lots of power and lots of water, if you’re without either of those doing laundry gets much harder. Though we now do laundry every week, in a collapse it will not be as high of a priority or done with that frequency. But cleaning clothes and linens will still be important because they will last longer, keep us healthier, and overall improve moral and make life feel more “normal”.

We’ve never hand washed laundry before, so I began doing research on the process and what equipment we would need. There were several variations of the basic idea:

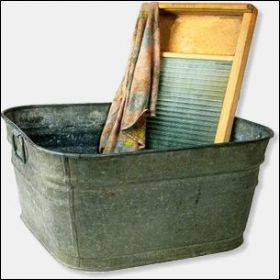
  • Use a washboard to scrub off stains. Apparently, contrary to popular opinion, washboards are smooth and won’t damage the fabric. They’re said to be a relatively easy way to remove stains.
  • Fill a tub full: This could be anything from a bathtub, a kitchen sink, a 5-gallon bucket, or an old fashion washing tub. Fill with cold, warm, or hot water as needed.
  • Add soap: From my reading I’ll probably just use a small amount of dish detergent. If you use laundry detergent use a very small amount; if it’s powder detergent dissolve it first in water before adding. Historically a bar of soap was grated into the water. You need to find the balance of enough soap to clean the clothes while avoiding too much soap that will be difficult to rinse out. Let clothes soak for at least 30 minutes before washing.
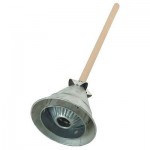
  • Agitate the clothes in the water: It looks like the easiest thing to use would be a clean (preferably new) toilet plunger. We found a ‘Tin-Plated Steel Washer’ in the Lehman’s catalog which looks like a metal plunger. Lehman’s states, “Just plunge up and down to force soap and water through clothes and linens — it’s that simple.”
  • Rinse the clothes, probably more than once. Soap left in the clothes will break down the fibers.
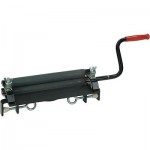
  • Wring the water out of the clothes: This can be done by hand, or much more efficiently with a hand wringer. Again in Lehman’s they state their hand wringers “. . . remove up to twice as much water as a spin dry.”
  • Hang the clothes to dry: This can be done either outdoors on a traditional clothes line, if weather and temperatures permit, or inside on drying racks. (Remember to get clothes pins for outdoor drying.)

So that’s the process. Our plan is to buy:

  • A washboard (Lehman’s $16 – $23)
  • Two galvanized wash tubs (about $40 – $50 each), they’re a good size and easily portable, plus they also have many other uses.
  • A Tin-Plated Steel Washer (Lehman’s $18.95).
  • A hand wringer (wide range of prices and quality).
  • A large indoor drying rack. Living here in the Pacific Northwest we’ll probably have to dry inside most of the time.

Once we get everything we’ll give it a few test runs and, of course, I’ll post about how those go.