Momma Bear: Carefully Choosing Seeds This Year

It’s that time of year again when we are all starting our seeds and getting those gardens back in shape. Last year was our first year gardening — EVER. We had mixed success, primarily because our property is about 80% shade. One thing I learned though is the importance of picking the right seeds. By this I do not mean just picking the right vegetables, but also the importance of using heirloom seeds so I could let some of my garden go to seed and harvest those seeds for the next year.

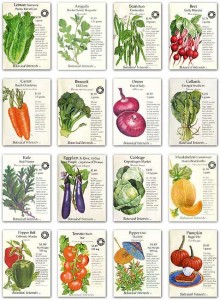
heirloom_seeds-posterThis year, while surfing the internet for seeds, I came across some interesting articles about seed banks. The National Geographic article, Food Ark, refers to the world seed vault (which I initially thought was kind of a hokey idea). But I kept reading and discovered why it is so incredibly important. I am sure most of the prepper community understand the value of using heirloom seeds, instead of hybrids, for seed harvesting. But, what I found to be both fascinating and horrifying is that 95% of vegetable and fruit varieties have gone extinct in the last 100 years. Mass production, produce values, and hardiness were chosen over variety. While we are busy saving pandas, polar bears, and whales, no one seems to be worried about saving our food. (Another good article is, The Extinction of Food: Why Heirloom Seeds May Be Our Only Hope.)

I am appalled to report that my own heirloom seeds fall into sprng-sgnthe category of hearty store-bought ones. There is nothing unique or special about my seeds. So what can we do to help with this problem? My advice would be that we all seek out these rare varieties, join seed exchanges, and support farmer’s markets and CSA Co-Ops (Community Support Agriculture) whenever possible. Find the uncommon and value its place in our future.

Next I read, EWG’s 2012 Shopper’s Guide to Pesticides in Produce, and looked at a list of what they call “The Dirty Dozen”; the foods we buy and eat that have the most residual pesticides. Again, this was eye-opening information that showed me exactly which of my favorite produce was on the danger list. And worse yet, I am not strict enough about washing my produce. If I wasn’t already a “prepper,” this would be enough to make me seriously consider joining the team!

heirloom-seeds-wordleMy new growing/gardening goal is to seek out a variety of quality seeds, and to grow some of those vegetables on the high pesticide laden foods list that we would normally buy. So this year–in addition to growing tomatoes, cilantro, and green onions from last year’s seeds–I will be growing my own spinach and peppers (two of the dirty dozen). We eat spinach more than most other varieties of lettuce and it grows really well in containers. Additionally we are still on the canning salsa kick so we are really looking forward to the peppers. I will also be networking with some friends in the Pacific Northwest to see if I can get some of their heirloom seeds for next year, and possibly getting involved in the Seed Savers Exchange.

Do you grow any rare varieties?  If so, what?  And would you be willing to share some seeds?!


What We Did This Week To Prep 10/12/12

The week started off with a drive in our new (to us) Ford F350 pickup truck to Josh’s house (Josh of Rural Relations with Josh), about two hours away. I had gotten together with him several times, but this was the first time meeting his family. We thoroughly enjoyed his wife and children and our time at their place. While there Josh taught me how to split wood (I grew up in the suburbs…), and Brynn and Alison enjoyed learning how to ride his off-road mini-bike. It was fun to see his place, “in real life”, and see what he describes in his blog posts. While there are some great aspects to his property, I also saw the disadvantages and hassles he has discussed. Again I’d encourage everyone, develop community, get to know both your neighbors and the like-minded preppers around you; take the initiative and reach out to them — I believe community will be the key to survival in the future.

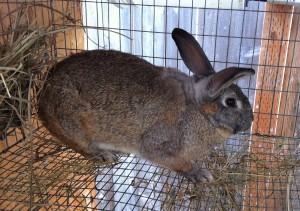
Our “father” rabbit, Winston, had an ear infection this week. So we went to our favorite rabbit resource, Rise and Shine Rabbitry, and determined he had a mild/moderate case of ear mites. We’ve been treating it by putting drops of olive oil mixed with tea tree oil into his ears and massaging it in. Apparently ear mites can live up to 28 days, so we’ll treat regularly for the next month. We definitely do not want them to spread to Clover, our pregnant doe, or her future babies.

Summer here in Western Washington is pretty much over. After almost three months of sunny days, but without too hot of temperatures, it’s been one of the best summers we can remember. But now they say rain and the clouds are on the way again; possibly with very heavy rain this weekend.

We’re done with summer gardening. We picked everything still on the vine and will can some salsa this weekend. We left most of the plants themselves in place, for now, and will pick them as needed to feed the rabbits. We just received our fall/winter crop seeds in the mail. We’ll be growing a bunch of greens, mainly for the rabbits, and a compost cover crop for the garden as a whole. After most of the plants are out of the garden we’ll cover the garden with the hay and manure from under the rabbit hutches as a fertilizer-rich mulch layer.

What did you do?

Sarah’s View: Learning To Save Seeds

When we started gardening this year I hadn’t really thought much beyond learning more and what produce we could get out of it. But, as the season continued I started thinking about next year and, being cheap, I started wondering if I could save seeds from this year’s garden instead of buying more. Turning to my good friend Google, I started researching how to save seeds for our more unique garden items.

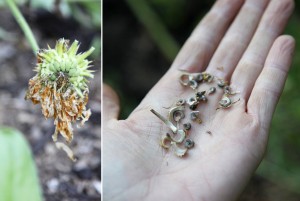
The first I looked for was Calendula. I’m not sure why I started there exactly, except that there weren’t many seeds in the seed packet. Not only that, but the Calendula seeds had looked really odd and I couldn’t come up with where on the plant they would be. It turns out, as the petals wilt the center is surrounded by seeds. Now, these seeds don’t look like any others you might have seen, or at least not like any I’d ever seen. But, once I knew where to look they were remarkably easy to harvest. Some had dried on the plant, others I dried in the house and then stored the dried seeds in a small plastic bag. (Plastic isn’t ideal, I’d prefer to use small envelopes so as to prevent moisture building, but the coin envelopes just seemed pricey – see, I’m cheap.)

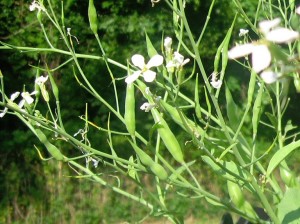
Once I figured out how to harvest Calendula seeds I was excited to see what else I could save. I next looked into radishes and garbanzo beans. These are both rather easy – they have pods which form on the mature plant and the seeds inside the pods are dried and saved for planting. Granted, we didn’t plant radishes for eating (we planned on them flowering to attract pollinators) so all our plants flowered and then formed pods. If you were growing radishes to eat and still wanted to harvest seeds, you’d need to let a couple of plants flower so they form the pods.

Next, I started researching the herbs. These are a bit trickier as their flowers, and therefore seeds, tend to be significantly smaller and not easily harvested right off the plant. From what I’ve read, the best way is to clip a few of the flowering stems and put them in a paper bag (lunch bag size) and hang to dry. The paper bag helps with moisture control, keeps out light, and prevents seeds from being lost as they fall off the drying plant. I’m still on the drying stage with my herbs, so I’m not sure how successful it will be.

With any luck I can harvest seeds from most of my plants this year. I still plan to buy seeds for spring, but hopefully they will be more for back up as well as to increase the variety in our garden.

What We Did This Week To Prep 8/10/12

Prior to leaving on our vacation to Colorado last month, Ryan and I tried to get an automatic watering system for the rabbits in place. While I had never worked with PVC piping before it didn’t seem like it would be too difficult. The concept was easy enough but we didn’t take enough time to ensure everything was properly glued and that led to it leaking. We reverted back to the water bottles for a couple of weeks until we could get it fixed/redone. This week, with the benefit of our previous experience (isn’t everything easier the second time around?), we re-did the project using new PVC, better glue, and clamping the spouts in place while they dried; this time everything worked flawlessly. The project still isn’t done, I plan on putting “gutters” on top of the rabbitry roof to collect rain water, and eventually extend it to the lower level (when we add a second row of hutches). But the rabbits now have plenty of water and the 5-gallon bucket will only have to be refilled every week or so.

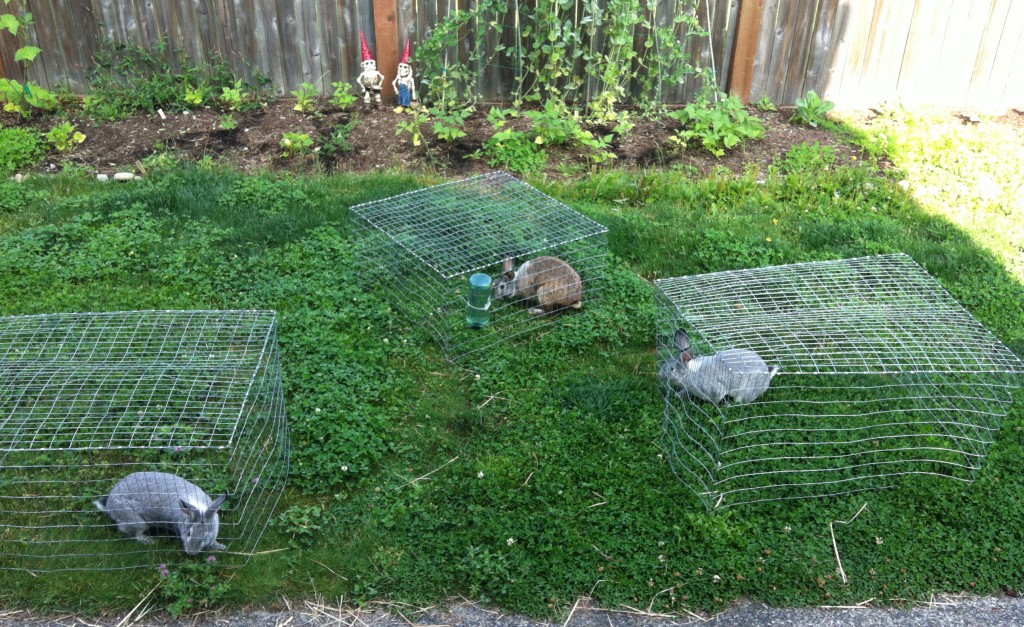
Ryan also made two more “pasturing hutches”. Essentially the same thing as the hutches they live in, but these were made without bottoms so the rabbits have access the grass, clover, and other assorted things growing in the back lawn. Previously we only had one so I’d get each rabbit out, one at a time for an hour each, to let them each graze. It was a bit of a hassle because I pastured them each day before I’d give them their store-bought feed (so they’d wake up hungry and maximize their opportunity to eat fresh greens), so I had to be around and move along each morning to get them all out and fed. Now I can just take all three of them out and let the eat at the same time. Much easier and smoother.

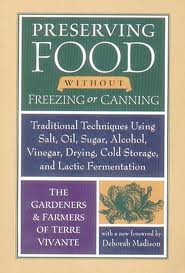
Per Momma Bear’s recommendation we ordered a new prepper book: Preserving Food without Freezing or Canning: Traditional Techniques Using Salt, Oil, Sugar, Alcohol, Vinegar, Drying, Cold Storage, and Lactic Fermentation.

Amazon describes it, in part, as:

Typical books about preserving garden produce nearly always assume that modern “kitchen gardeners” will boil or freeze their vegetables and fruits. Yet here is a book that goes back to the future—celebrating traditional but little-known French techniques for storing and preserving edibles in ways that maximize flavor and nutrition. . . this book deliberately ignores freezing and high-temperature canning in favor of methods that are superior because they are less costly and more energy-efficient. . . says in his foreword, “Food preservation techniques can be divided into two categories: the modern scientific methods that remove the life from food, and the natural ‘poetic’ methods that maintain or enhance the life in food. The poetic techniques produce… foods that have been celebrated for centuries and are considered gourmet delights today.” . . . offers more than 250 easy and enjoyable recipes featuring locally grown and minimally refined ingredients.

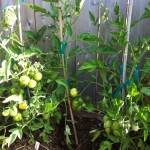
For those of you, okay mostly us, that were worried that we wouldn’t get tomatoes this year — we finally have a bunch of green tomatoes on our vines! We’re pretty excited about it and keep telling ourselves that our patience – in our temperate growing region – will pay off. Hopefully in the next couple of weeks we’ll be eating fresh tomatoes and maybe even canning the extras!

What did you do?


What We Did This Week To Prep 8/3/12

Still not a lot of success in the garden, though our raspberries and snap peas are doing great. The tomato plants never got very big, but finally have a lot of buds on them and a few even have small green tomatoes. The sunflowers are doing well–though we didn’t plant sunflowers–we have several of them in the back corner;  I can only guess they made the “leap” from the neighbor’s garden (they had them against the adjoining fence last year). The squash plants also have buds and a few small squash growing, but they still have a ways to go also. I try not to compare our garden to the ones I read about in other parts of the country, summer here really doesn’t start until the first week of July and typically continues through the end of September. So we’re only a month into our “summer”.  I’m still hoping for some good things from the garden.

After I butchered rabbits with Rob, he gave me some meat to take home. We do a lot of cooking in the crock pot and decided we’d try rabbit stew. We put the whole butchered rabbit into the crock pot, bones and all (per the recipe), and added fresh vegetables and let it stew. Dinner was tasty and we were pleased with the results. Once we start breeding rabbits, we’ll average about 60 rabbits a year; so we need to find good, varied ways to prepare them. I had thought about grilling it, but Rob mentioned it dries out easily. He offered to have us over for dinner and show me how he cooks it.

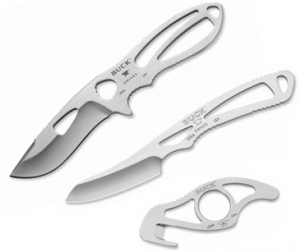
Having helped Rob butcher the rabbits, and sharing his skinning knives, I decided I needed to get a set of my own. I picked up a 3-piece set made by Buck that has a light-weight knife, a heavier knife, and a guthook. They come in a durable, washable soft case. I probably won’t use the guthook for the rabbits, but it’ll be there in the future for larger game.

We made our monthly trip to Costco. After being sick last week I was motivated to continue stocking up on OTC meds and vitamins. We got guaifenesin (cough expectorant), multi-vitamins, Vitamin C, and Vitamin D. (I later picked up some Sudafed at another pharmacy.) Costco also had a good price on a 50-foot ,12-gauge extension cord for $20.

What did you do?

(Monday: Sharpening Knives, Part 2)

Sarah’s View: Gardening Journal

No occupation is so delightful to me as the culture of the earth, and no culture comparable to that of the garden…But though an old man, I am but a young gardener.” ~ Thomas Jefferson

There’s a podcast I listen to on a regular basis that I highly recommend – The Thomas Jefferson Hour – and it was the inspiration for this month’s post. As you may or may not know, Thomas Jefferson was quite the gardener. Not only did he spend a significant amount of time gardening, but he also kept an exquisitely detailed gardening journal.

I was talking to Trace about the concept of a gardening journal and he asked if I would like to do one for our garden. I had thought about it keeping one, but hadn’t worked up the motivation to actually get started. With Trace’s encouragement I found a blank sketch book (it doesn’t really matter what you use) and started making notes. Since I just started it this weekend I’ve had to look back over the last couple of months’ blog posts to make sure I got my dates right for what we planted and when. I included the date we planted the seeds and placed them in the indoor grow box, the date we moved them out to the greenhouse, the date I transplanted and separated the seedlings and, finally, the date I transplanted the seedlings into the ground.

Besides simply recording the important dates, I’ve tried to make a few simple observations as to how certain plants are doing or why I chose to transplant some on one day and others at a later time. I also put the receipts from our seed orders in there, as well as the sketch I did of the layout for the garden.

I would encourage anyone with a garden (large or small) to keep some sort of record. At the very least, keep track of what you planted and when and what was successful. If nothing else, this may help you decide what to plant (or not plant) next year. It doesn’t need to be complicated, while there are “official” garden journals available, it can be as simple as a piece of paper.

I hope to make notes and observations in my gardening journal as the season continues. While it would be beneficial to make notes daily, both on the plants themselves as well as on the weather, and animal or pest activity, I’m not sure I have the discipline. My goal, therefore, will be to observe and write weekly. Then, next winter as Trace and I sit down to plan the 2013 garden, hopefully the 2012 gardening journal will provide us with hints as to what we might do to improve our garden, or at least, what we should avoid doing.

A garden is half-made when it is well planned. The best gardener is the one who does the most gardening by the winter fire.” ~ Liberty Hyde Bailey, Cofounder of the American Society For Horticultural Science

(Friday: What We Did This Week To Prep)

DIY Indoor Grow Box

In February, Sarah pulled out our grow box–I had made it last year–and got our seeds started. I should have written this post then, so that others could have made their own this year, but unfortunately I didn’t. A friend asked how I made it, so I figured I’d post about it now so that you can build yours for next year. It’s quick and easy.

What you need:

  • plastic Rubbermaid-type bin with lid (the under-the-bed size works well)
  • 4 – 2 x 1/4 inch bolts, with 4 nuts, and 4 – 1 1/2 inch washers
  • 4 – 18 x 1/4 inch pieces of all thread rod, with 8 nuts, and 8 large washers
  • board (plywood or shelving) approximately 24 x 12 inches (dependent on your lid size)
  • 2 aquarium light fixtures with full spectrum fluorescent bulbs

Assembly

1) On the inside of the lid, attach the board with the bolts and nuts, put the washers on the outside of the lid so the bolts won’t pull through the plastic. Line the board up in the inside center of the lid and drill a 1/4 inch hole through each corner of the board, with a matching hole through the lid. This board provides the stable surface to mount the light fixtures.

2) In each corner of the lid drill a 1/4 inch hole and put through the all thread with a nut and washer on each side of the plastic lid. The all thread will be the adjustable “legs”.


3) Mount the light fixtures, per the directions, to the board on the inside of the lid.


Once Completed

Plant your seeds – the container you choose doesn’t really matter, but make sure there are holes in the bottom for drainage. Place the containers in bin, adjusting the all thread so the light is close to the plants. As the plants grow larger the light can be lifted higher by adjusting the nuts on the all thread.

(I used 10 inch all thread, it was high enough when I first started but not enough when the plants grew bigger, so I cut blocks to put under each all thread leg to make them higher.)

After you’ve transplanted all of your sprouted plants, disassemble the legs and slide the entire box under the bed to neatly store until next year.

Simple and it works.

(Wednesday: We Still Want Coffee)

The Greenhouse Is Built!

How We Built Our Greenhouse – a DIY
– –
We started building the greenhouse the second week of March and I finished it yesterday – six weeks. Sure there are all the excuses and explanations: life is busy, I could only work on it a few days a week (and had to coordinate Ryan’s schedule with mine, when possible), weather was a factor, and we were learning as we were building – but it still took a long time. Now it’s done.

I found the plans we used on BuildEazy.com. I splurged and paid five dollars for the “handy pdf file, ad free”. I printed up the twelve pages of plans, bought the materials needed to get started (the first of many trips to the hardware store), and we began.

The first few steps could be built in the garage. First was the bottom frame; we built it out of pressure-treated 2x8s, 8 feet long. The plans had it built 10 foot by 8 foot – but I hadn’t noticed that before I bought the lumber. Since I only bought four 2x8x8s I went with that, ours would be 8 foot by 8 foot, we modified the plans as needed for the slightly smaller size. Other than the bottom frame we used untreated 2x4s for everything else.

We then framed both sides and built the trusses. I had never built anything that had to be framed before and it was a learning experience. The sides were easy, they were just square. The trusses were tougher, because of the way the window was built into the peak of the roof there were several angle cuts that had to be identical and match up. The 60 degree cuts were especially a hassle because the mitre saw only goes to 45 degrees; they had to be drawn then cut with a circular saw. That was all we were able to pre-build in the garage.

The project then sat for a couple of weeks waiting for a dry weekend when Ryan and I were both available. When that weekend arrived we laid out the bottom frame, put up the two side walls, then attached the trusses. The bottom and sides were pretty easy; we kept the square and level handy, and used them for each piece. The trusses were again harder, it was tough to keep them square – at that point they were only attached on each side and weren’t very stable. But, finally, the structure was outside and coming together (i.e. it sort of looked like a greenhouse).

The directions for the front and back-end walls were far less “exact”, the plans stated “This is pretty much measure, cut, and fix as you go.” We varied from the plans and only put a door on one end (the plans called for a door on both ends). Building the door frame and the door (another thing I had never done before) went slowly and was a challenge because we knew it had to be completely square, or the door wouldn’t work; there also had to be enough space, around the door, to allow for swelling of the wood in wet weather. The hinge placement was another challenge, but we did it and the door fit and closed smoothly.

(All this happened over a period of weeks because of weather and time availability.)

The roof trusses were then secured with ‘strap braces’, galvanized steel braces 2 inches wide and 1/4 inch thick. They connected the opposite corners of the long section of the roof, tying in with nails each of the separate trusses. The trusses were now a lot more stable, but it had been difficult to keep the outside ones from pulling toward the center.

Next was the roof window – the most complex step of the project. This window was one of the reasons I chose this plan, I really liked the ability to be able to open a portion of the roof to release heat on sunny days. The measurements had to be very precise and much of the work was done on ladders; it was also a hassle holding up the window assembly and getting the hinges attached to the frame. But finally it was in place and would open and close smoothly (mostly).

The entire wooden framed structure was now built. We then started on the shelving. There were no directions for this in the plans, so I decided to build the shelf frames at 44 inches from the ground. Sarah, who is 62 inches, came out and saw the height and nicely mentioned that they were a little high; after some discussion I re-installed them to 32 inches – a height much easier for her (our primary plant starter) to work at.

Now the wood part was done and it needed to be covered. For this directions said, “Cover the greenhouse with a UV-resistant polythene (there are other options also).” We did some reading and also talked with the expert at the local hardware store (McLendons – we love them, very helpful and knowledgeable) about the “other options”. We found out the polythene/Visqueen-type plastic, though inexpensive, breaks down because of the sun’s UV rays and the weather and would need to be replaced each year. So, with the goal of making the greenhouse longer lasting and sustainable, we instead purchased polycarbonate plastic that lasts 20+ years. It did cost significantly more, but we felt that it was a one-time cost and a worthwhile investment which would require far less maintenance. It came in 2 foot wide sheets (with some extra for overlapping) and we bought 10 foot lengths.

When we got it home, using a friend’s truck, we first covered the long roof section. This is where we really saw that the framing wasn’t quite square, but fortunately the polycarbonate has a little flex to it and we were able to compensate. The roof was the hardest part, again, all the work had to be done on ladders and we had never used the polycarbonate before. It is relatively easy to cut with a circular saw (kind of), and smaller cuts could be done with my old trusty bandage shears.

The following week we covered both sides, the short side of the roof, and the window (that was a pain). Finally, this last weekend, I was able to get the back, front, and door done and that meant the greenhouse was completely enclosed. All that was left was to finishing the shelving. Sarah determined that a 1/4 inch wire mesh would be the best material, as it would allow water to drain and sunlight to pass through. The sunlight passing through was important because it allows containers on the ground to also get sunlight.

So it’s done. We’re pretty proud of it. I can’t help but smile every time I see it though the window or go outside. I’m really glad we have it. I’m sure the greenhouse will be a regular topic in our posts as we continue to learn, discuss our failures, and celebrate our successes.

north side
south side
east side
west side

Thanks very much to Ryan for all his hard work and time. I also appreciate Chanse helping when he could. And I want to acknowledge and thank Sarah for her technical advice, monetary budgeting, and most of all, patience. (And thanks to my father-in-law, Jay, for his DeWalt compound mitre saw.)

(Wednesday: The City Cousin)
 

Sarah’s View: DIY Potato Box

This weekend, with the beautiful weather we had here, Trace and I decided to work on some of our outdoor projects. I was able to build my potato box (in one day) and asked Trace if I could share the results, on our blog, sooner rather than later!

This year will be our first year growing potatoes. As we understand the way potatoes grow, they need soil added as the plant grows bigger to further stimulate production. Many people choose to simply mound the dirt around their plants or use old tires for their potato ‘frame’. However, years ago (before Trace) I saw a design for a ‘potato box’ that allows the grower to harvest the baby (or new) potatoes throughout the growing season.

We had already bought all the materials needed: one treated 2x4x12 and ten 1x6x6 boards (actually fence slats).

We pulled out the power tools – my dad’s mitre saw (which now ‘lives’ at our house) and the drills (plural because, if you have two, you don’t have to switch bits between the pre-drilling and the screwing in of the screws) – and, after quick review on how to use each, I got started (I’d used drills before, but not the saw).

My first step was to cut the 2x4x12 into four 33-inch pieces. These will be the upright corner posts. (A handy tip from Trace: measure from the end for each cut, that way you don’t lose the width of the saw blade from your cut). I then cut the 1x6s into twenty 24-inch pieces.

Next, I attached four 1x6s across the upright 2x4s to form the bottom frame into a square.

Originally I’d intended to build up just two layers of boards, leaving the rest to be added as dirt was piled onto the growing potatoes. I realized, however, that there was no reason not to build three sides up completely and only have one unfinished/working side. The first side went slowly as I lined up each board, pre-drilled the holes and then attached them. The second and third sides went much faster as I got used to the tools and the box gained more and more stability.

The fourth side boards will be attached as we add dirt. These will be attached with only one screw on each side, for easy removal, with the intention of harvesting the potatoes at the bottom of the box early, while allowing the rest to continue to grow.

We placed the three-sided box at the corner of our garden, where sun will hit the open side and we had some good dirt. I planted the seed potatoes–Kennebec and Red Pontiac–and hopefully, fingers crossed, we’re good to go for this year’s potato crop.

(Wednesday: Momma Bear)


What We Did This Week To Prep 3/2/12

This week Ryan and Chanse built a T-bar trellis for the raspberries. Last year was the raspberries first year so, of course, there was a lot of growth–with shoots coming up all over–but very little fruit. This year we plan to trellis them, over wires connected to the T-bars, to keep them more organized and maximize the space. We’re going to allow them to spread out some more, but at their perimeters I had the boys bury pieces of plywood (vertically 15 inches deep) to keep them from getting out of their allotted space. Hopefully, this the raspberries second year, we’ll get a good harvest.

I borrowed a truck from a friend (can’t wait to get our own, it’ll make these jobs much easier) and returned to the Landfill Compost Factory. The first day Ryan and I got two cubic yards of fine compost (I describe it as ‘fluffy dirt’). The following day I went back, by myself (Ryan started track practice), and got another two cubic yards, this time of the coarse compost (it’s more like slightly composted mulch). Between the two days we added about five inches of new compost to the garden areas, both front and back; it’ll have about three months to ‘settle in’ before we plant into it in June. The soil in this area was initially just clay and rock with about an inch of topsoil, so hopefully the soil improvements we’ve made the last couple of years will pay off.

Sarah and I finally made time to get together and finalize our seed order. Sarah had mapped the garden area, labeling what would go where, to make efficient use of the space available. As mentioned, last year was our first real garden and we had deliberately kept it smaller (and only had limited success); this year we’ll be planting about twice as much space. After looking at her garden map and making a few additions to the list, we got our seeds ordered. Ryan and I will build the greenhouse in the next couple of weeks.

What did you do?

(Monday: What Bridges?)