Sarah’s View: 1st Time Using a Pressure Canner

meat into jarThis weekend we used our pressure canner, for the first time, to can turkey meat and stock. We had bought two turkeys during the post-Thanksgiving sales, I cooked them, and Trace cut up the meat and used the carcasses to prepare a large pot of turkey stock.

Originally the intention had been for Trace and I to work on the project together, however he had a number of other things he needed to get done around the house and once I got started I just kept going. About three weeks ago we purchase a Mirro 16-Quart Aluminum Pressure Cooker Canner. Sunday morning we took it out of the box and started reading the directions.
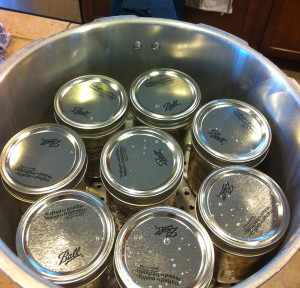
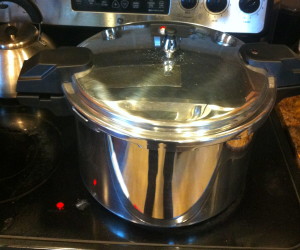
jars into pressure cannerThe first step was to run the canner through a quick “cycle” without any jars so we could determine how high the heat on our stove needed to be to keep it at the appropriate pressure. This process went smoothly enough and, after the canner cooled back down, I felt ready to move on to the real thing. At the end of the summer we used the water bath canning method to can our salsa, so I was somewhat familiar with the next steps. I did consult a couple of sites to determine the best way to pack the turkey meat – loosely and with some water/stock – and then consulted both the canner manual and our So Easy To Preserve book to determine the pressure (10 psi for our elevation) and time for processing (75 min pressure canner on stovefor the pint jars).
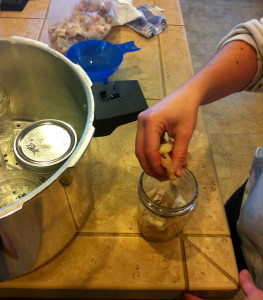
I was pleased to read that for pressure canning I did not need to sterilize the jars so I simply rinsed them, filled them with hot water, and set them in the canner to wait – this also allowed me to confirm how many jars would fit at one time. I started with the turkey meat, first pouring a bit of stock in the bottom of the jar and then packing in the meat. While our meat was cooked when we canned it, we read later that we didn’t need to cook it all the way, or could even can it  meat cannedraw. However we both felt that trying to cut it off the bone raw would have been more difficult and we had used some of the cooked turkey for meals and sandwiches before setting aside the rest for canning, so cooking it made sense for us. I probably could have packed the meat tighter than I did as it shrunk during processing, but as it was we canned 13 pints of meat.
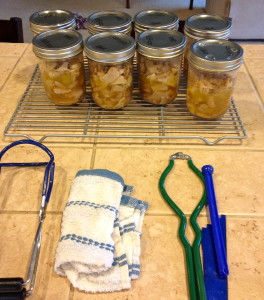
Once I finished the meat I moved on to the stock. Trace wanted to keep the condensed stock in manageable quantities, so we did that in half-pints. We ended up with 16 half-pints of stock, as well as a quart jar we put in the refrigerator to use right away (we were out of half-pint jars and it didn’t really make sense to run the canner for one quart jar).
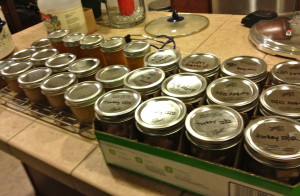
all doneI have to say that the process turned out to be remarkably easy. Though a bit noisy with the steam escaping a couple of times each minute! I must give credit to Trace for having the meat and stock ready to go – the meat was cooked and chopped, the stock was boiled and strained. I’m looking forward to doing more canning. Of course, the true test will be when we open one of our jars and taste our home-canned turkey.

It’s refreshing to know that we now have the tools and knowledge to can our own foods. For us this means we can start storing more locally produced meat and vegetables. We will have more control over the source(s) of our food storage. This also allows us to rescue and preserve frozen meats in the case of a long term power outage (using a propane heater). As Trace would say, repetitive and redundant. Plus it was kind of fun!

 

Momma Bear: Long Term Food Storage Specifics

For our family, as I discussed in last month’s post, there are a number of obstacles to long term food storage. It is not only about packaged vs. fresh foods, but some of the traditional prepper foods and storage methods are EXPENSIVE! Food that comes in #10 cans can be very pricey, and putting away my own foods in mylar and buckets was just not working for me (though I did it heavily in those first few months). Last is a common prepper notion that anyone will eat anything if they are hungry enough (and by this people usually mean beans and rice). That is just not a realistic approach with kids, especially if you are trying to get them to support your prepper habits. At our house we have embarked on ways to incorporate long term food storage into everyday life so that if the SHTF, the food will not be foreign and mysterious (aka “ICKY”).

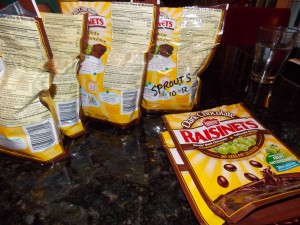
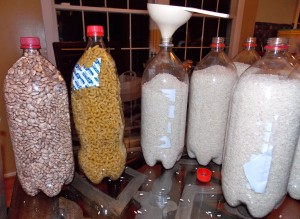
The ideal of prepper packaging for the apocalypse seems to be centered around big mylar bags and 5-gallon buckets. I personally hate both of these things. I hate the big bag because it costs money, it makes it almost impossible to check on your food or to use it in any sort of rotation. And I really hate the buckets because they are round which wastes space on shelves. They also weigh a ton and make it impossible for me to move without assistance, which I may not have in an emergency. I do occasionally use the thick gallon sized mylar bags for food storage, but more frequently I recycle other containers. Currently I am storing beans, rice, flour, oatmeal and macaroni noodles in 2-liter soda bottles with two 100cc oxygen absorbers. On the internet you will see some debate as to the long term viability of these bottles, but I think as long as you are using the thicker PET bottles, there is no reason not to use them. Please note that water bottles are much thinner than soda bottles and I only use those for water. I feel the pros outweigh any cons. So far they have a beautiful air tight seal (as evidenced by their deflation caused by the 02 absorbers), I have the ability to visually check my product, they are much easier to move around by myself, and I can use my long term food storage as needed in smaller quantities without opening an entire 5-gallon bucket of something. The other container that I have taken to re-using is small mylar bags from some of our regular food items. For instance a bunch of candies and even prunes come in small mylar bags with ziplock seals on the top (at our house it’s Raisinettes). I clean these bags out and use them for storing popcorn (my husband’s favorite treat) and bean sprout seeds. These smaller bags are the perfect size for both. I treat them just like any purchased mylar bag: insert my food, drop in a 100cc O2 absorber and heat seal it as usual (but just below the ziplock seal area).

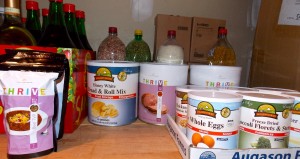
I find those #10 cans to be a bit of a mystery. Typically, the types of foods that I buy in #10 cans or in buckets are things that I cannot store myself, primarily protein items and vegetables that are tough to store/delicate to handle, or luxury items like butter and sour cream which would dress up storage foods for recipes. TVP, powdered eggs & cheeses, spinach and broccoli are items that we have recently been purchasing in cans. We had absolutely no experience with them and were not sure if we even wanted to buy them in cans or buckets without trying them first (Costco and Sams sells in bucket sizes). Fortunately, on their websites Auguson Farms and Shelf Reliance sell most of their products in small soup sized cans/mylar containers that are perfect for sampling. We ordered an assortment and are working our way through them to see which we want to buy in bulk. I will mention that on the Costco website, one of the food manufacturers (Thrive) sells their items sealed in a mylar pouch, in a bucket with a gamma seal (reusable lid), while many other companies only put the item directly into a traditional bucket with a one time use lid. In any event, like everything else, these dehydrated foods take practice to be able to use them effectively. And by trying the sample sizes, we feel we are making more specific choices about which ones we would truly use in an emergency.

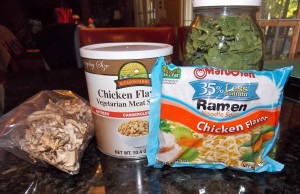
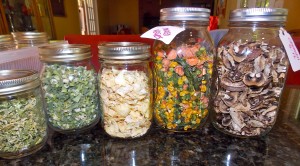
So what do I store that makes all this food storage work for our family? How do I tie it all together to get the kids to eat it and still make it nutritional? For us it is all about the components. As long as the food contains a main item that my kids recognize, they can usually be coaxed into eating it. For us that is usually vegetables. My kids will never willingly drink powdered milk, so I make sure I have a bunch of their favorite cereals stored in mylar for long term (stashed away where they don’t see it in the pantry). Ramen anyone? It’s filled with empty pasta calories and high sodium, right? But after living in Japan, ramen is a staple in our household, much like rice, pasta and potatoes. I buy the low sodium ramen and then I start adding the nutrition in, normally fresh stuff. But with a little retraining, we are using chicken TVP, dried mushrooms, green onions and spinach (all that I dehydrated myself and vacuum sealed in mason jars), and fresh bean sprouts (that we grew ourselves in only a few days inside the house). Dried spinach seems to have a much stronger flavor than fresh (so don’t use as much). Another item that I store is curry powder, which can be added to any bean or rice dish for flavor (for us this is a familiar flavor after living overseas for so long). I have also started routinely using dehydrated vegetables in our regular recipes and have discovered that the kids often don’t recognize the difference. We also have a favorite “no-bake” cookie recipe which uses oatmeal, chocolate, sugar, and peanut butter and is made on the stove top (perfect without electricity!). It has been hard, but I am really trying to find ways to store foods that are familiar. Also, your food preps aren’t any good if you don’t have a list of recipes to go with it. As for my husband the bean hater…he will willingly eat almost anything if I can promise him that bowl of popcorn at the end of the day!

So what secret food storage tips do you use?  Any special ingredients in your closet that we might like to hear about?

What We Did This Week To Prep 11/9/12

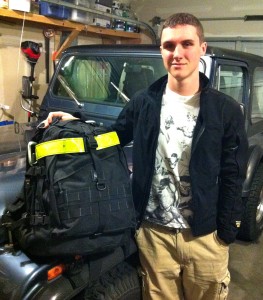
Since we’ve added a Ford F350 truck to our household we needed to get a bug out bag (BOB) in it. We’ve got top-notch ones in each of our two primary, daily use, vehicles; then a pretty good one in the Jeep CJ-7. We took the one from the Jeep and put it in the truck. Now Ryan (my 18 y/o son), who is now the primary driver of the Jeep, is in the process of building his own BOB. He has a Maxpedition Vulture II pack and we’ve gathered some stuff for his kit; he’s got a decent start and has made a list of items to round it out. It’ll be good for him to build his own BOB so that when he goes off on his own he’ll have his kit that he knows and has confidence in.

It was interesting seeing all the views of my blog during and after Hurricane Sandy. It got double the hits in that week than I get in an average month. It’s ironic how being prepared all of a sudden becomes “common sense” when a disaster is on the way (or after it has already struck…). It’s also interesting to see which posts people are searching/reading. In the near future I’m going to add a new page that has a list of all of the top viewed posts that people seem to find the most valuable. By far the most popular post during this time was How To Wire Your Gas Furnace To A Generator by guest contributor Rick Brodersen; it received hundreds of views daily. Plus Rick has been a great resource, he has personally answered each of the comments in the section and has been directly responsible for several people being able to heat their homes when their power was out.

Last spring Momma Bear wrote a post entitled Home-Made Reusable Sanitary Napkins. It was a valuable topic that may, one day, be very relevant to almost half of our population. Recently “Kate” wrote in the comments section of that post about menstrual cups. Her knowledge and experience were quite extensive and she wrote a great summary. I contacted her and asked her if she’d be willing to write it as a blog post for us and she pleasantly agreed. So Monday (10/12) I’ll post the first of her two-part article on menstrual cups; first-hand knowledge is always invaluable.

Well the time for having baby rabbits came and went. Apparently, despite some maternal indications, Clover was not pregnant. She did gain weight (though we fed her more thinking she was pregnant) and she did go through a nesting phase, but no babies. Apparently it’s not that easy to tell when a rabbit is pregnant, and determining it mostly comes down to experience and knowledge (neither which we have yet). So this weekend we’ll try breeding our other doe, Artemis. I’ve done some additional reading and feel more confident about how to maximize our chances of fertilization. Who ever thought breeding rabbits would be hard??

What did you do?

Product Review: Meal Kit Supply MREs

After Momma Bear’s post on MREs (meals ready to eat) we decided we wanted to add more MREs to our preps. We have a couple of cases but, with a family of six, those would go quickly. We decided that we should have one case for each person — eating two MREs a day, this would last six days.

The ones we currently have I bought from a military surplus store. They were already a couple of years old, I have no idea what conditions (temperatures) they had been stored at, and they cost $70 a case. So I was looking for another source when, coincidentally, I was contacted by Meal Kit Supply (after they saw Momma Bear’s post), and asked if I would consider reviewing their product. I said that I would, and a few days later a case of MREs arrived in the mail.

Like Momma Bear said, MREs have improved substantially over the years. My first MRE was in USMC boot camp in February 1986, and if you were starving (and we were) they were…okay. When I went back into the National Guard in 1996, it was obvious they’d done some work to improve them — and they were better. (The last MRE I ate was in 1999.)

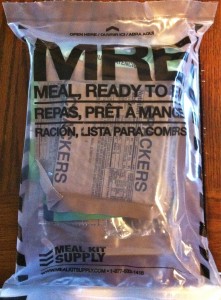
When we opened the case from Meal Kit Supply the first thing I noticed is that they were packaged in clear, heavy-duty, plastic bags (instead of the tan military ones). That was kind of cool.

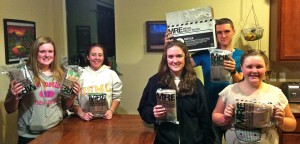
I wanted to get the whole family in on the sampling/reviewing. I wanted them to be familiar with the meals, including how to use the Flameless Ration Heater. So we randomly grabbed six out of the case (case of 12). Instead of trying to explain to them how to use the Heaters I chose to let them watch the video on the Meal Kit Supply website and then see how easy it was to follow the instructions.

Then, in the kitchen, we each opened an MRE. I explained that each had an entrée, side dish, dessert, bread/cracker, spread, beverage, spoon, and condiment packet, and I had everyone identify what they got in their meals. We then, without any issues, activated our Flameless Ration Heater to heat our entrée and then set it aside (it takes about 10 minutes to warm up). We sampled, and then let everyone else try, our bread or crackers with the included peanut butter, jelly, or cheese spread. Once the meals were warm we each went around and allowed everyone else to sample our entrée and side dishes so we each tried everything.

Now I need to mention that my kids (ages 18, 15, 13, 11) aren’t that picky when it comes to eating; they know if it’s put in front of them that’s what’s for dinner and there’s no “I’m not eating this” nonsense. But, overall, Sarah and the kids liked them, and were pleased with the diversity and flavors. Personally I was very impressed with the freshness and overall quality of the food and flavors. Maybe it was the years since I’d last had one, but I remembered them being much less flavorful and more stale tasting.

Once we were done eating we discussed each of them, recorded comments, and rated them on a scale of 1 to 5 (1=terrible, 3=not bad at all, 5=pretty darn good). So of the random six we had eaten, here’s our menus (menus may vary), comments and average scores:

  • Spaghetti, Potatoes Au Gratin, Carrot Pound Cake, Cracker, Cheese Spread, Grape Electrolyte Drink Powder (EDP), Cocoa Beverage Powder (CBP): “Spaghetti wasn’t bad, but noodles were kind of mushy” / “Cheesy potatoes were pretty dang good” — SCORE: 3.58
  • Chicken with Noodles, Fried Rice, Vanilla Pudding, Cracker, Peanut Butter, Grape (EDP), CBP: “Not bad” / “Chicken tastes normal” / “Chicken was really good” / “Rice was flavorless and mushy” / “Vanilla pudding was pretty darn good” / “Grape beverage was very good” — SCORE: 3.67
  • Vegetable Lasagna, Applesauce, Fudge Brownie, Wheat Snack Bread, Cheese Spread, Orange (EDP), CBP: “Slightly disappointed with the lasagna” / “Lasagna didn’t quite taste right” / “Need to add flavor to lasagna” / “Brownie wasn’t bad” / “Brownie was pretty tasty” — SCORE:  3.25
  • Chicken with Feta, Potato Cheddar Soup, Chocolate Pudding, Cracker, Peanut Butter, Orange (EDP), CBP: “Chicken with feta was really good” / “Chicken entree was very good” / “Soup was very good, yea very good” / “Pudding was yuck” / “Pudding wasn’t great, but would be better warmed up” / “I like the juice” — SCORE: 4.08
  • Pork Sausage Patty, Hash Browns with Bacon, Strawberry Toaster Pastry, Wheat Snack Bread, Peanut Butter, Orange (EDP), CBP: “Pork was too sweet” / “Pork tasted like real sausage” / “Bacon was nice in the hash browns” / “It’d be a nice breakfast.” — SCORE: 3.58
  • Apple Maple Rolled Oats, Hash Browns with Bacon, Nut Raisin Mix with Chocolate Chips, Wheat Bread Snack, Blackberry Jam, Fruit Punch (EDP), CBP: “Oatmeal had good flavor” / “Mixing in the nuts and stuff in the oatmeal was a good idea” / “Oatmeal was mushy” / “It’d be an odd dinner” / “Blackberry jam was good” — SCORE: 3.33

So Chicken with Feta was the top score and the Vegetable Lasagna was the bottom. But nothing was below 3.25 which is in the “not bad at all” range. Everyone commented that there was nothing they wouldn’t eat, and with some time and creativity they’d be even better.

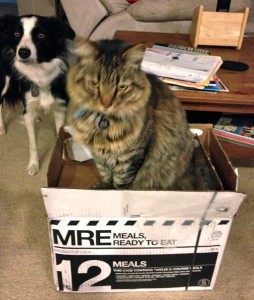
Pet Approved!

There are many sources for MREs. My only hesitation about Meal Kit Supply’s is that they are a little bit more expensive than some others, at $124.95 for a case of 12 (though that price does include shipping the 22 pound case). But their MREs are guaranteed to be fresh, they are built to military standards but use premium components. And they actually make them themselves overseeing each step of the process, they’re not just the distributors.

MREs are the perfect ‘Week 1 Food’ in a disaster: they’re pre-cooked, mobile, and ready to eat. Meal Kit Supply MREs are 100% U.S. Military food components — the same as the military uses. Now I suppose you could say that’s good or bad, but at least there is a consistent base to compare them to. I was happy with Meal Kit Supply’s service, their MRE’s taste, and was very pleased with the freshness.


Momma Bear’s October Preps

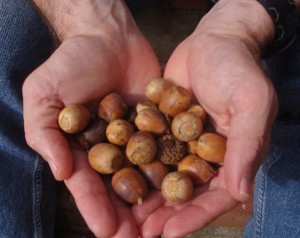
Although October’s weather has been mild and the leaves are just barely starting to come down, it feels like THE SKY IS FALLING! After an exceptionally warm and dry summer, the acorns are dropping in record numbers. (I learned that this will lead to next summer having a mice and deer population boom (due to the surplus food), followed by an overabundance of ticks that live on them.) I felt this was a good time to study up on acorns as a food source. Acorns, like other nuts, are surprisingly nutritious and containing protein and “good fat”. Acorns do have high quantities of tannins, which make them bitter and somewhat inedible as is, but these tannins can be removed with repeated boiling. The acorns can then be roasted and ground into a meal to be used in place of, or with, flour. You can even make a coffee-like substitute. Acorns are best stored as nuts, and then processed throughout the winter as needed, because the ground meal has a short shelf-life due to the high fat content. Fall is a great time for gathering “natural produce” from your local surrounds. If you are unfamiliar with wild edibles, look for a local class offered by an expert. Here are my links to: acorn processing (with recipes) and a local nature hike for wild food identification.

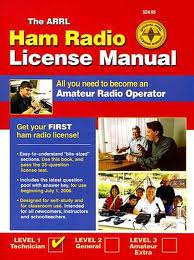
The HAM radio class has been…interesting. No, I am not going to lie, it’s HARD! This class is put on by the local HAM radio club, using approved slides by the American Radio Relay League (the people who license you). BUT, what they don’t tell you is that this book/class/test has almost nothing to do with how to actually operate the radios. It covers the laws of usage, and the how and why of the science that make these radios work. For anyone who doesn’t have a science or electrical background, or who has been out of school for a long time, this is some hard stuff! There is nothing in the book or class that will teach me how to actually dial in and listen to people broadcasting, let alone how to actually broadcast myself. My class ranges in age from about 12 to 70 years old and we are all pretty much shaking our heads. Once we finish the class and take the test we will be licensed, but we are all going to have to join the club to get mentors to teach us how to actually operate the radios!

In the last month my husband and I attended our first of two gun shows together, and took our concealed carry class. If you have never been to a gun show before (my husband had not), I describe it as “Bubbas, Bellies & Bullets”. They have so many rows jammed with tables that I literally had to squeeze in between all the big bellied bubbas to even walk. As a Marine my husband is familiar with a number of interesting weapons, but he had never seen so many interesting people in such a confined space. I finally explained to him that gun shows are to the NRA what ComiCon is to gamer/sci-fi nerds. Gun shows are the ultimate showplace for our right to bear arms. We spent our time at each of the shows looking at smaller handguns that I could use for concealed carry. What I discovered was that the bursitis in my elbow prevents me from comfortably holding any weapon over about 1.5 lbs., thus limiting my options. Like everything else, we will be taking our time, heading to the range to try them out, to find just the right weapon.

What did you do to prep this month?

What We Did This Week To Prep 10/19/12

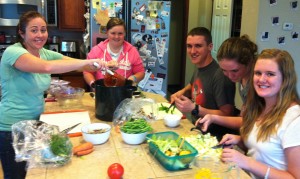
We started off the week making salsa. After picking all the remaining tomatoes from our garden (red and green), digging up a couple of onions, and picking the last of the cucumbers (because they were there), we set to work cutting everything up. Last year was our first salsa making experience and though it came out pretty good, I wanted to try a new recipe this year. A couple of months ago I had seen a post on The Homestead Fritz – How To Make Great Salsa; there he mentioned that his coworkers described it as, “the best salsa they have ever eaten.” With that recommendation, I decided we’d give it a try. With all six of us cutting stuff up: tomatoes, onions, pepper, jalepenos, garlic, cilantro, and cucumbers (again because we had them, figured it’d make it more chunky) the process went fairly quickly. After everything was mixed together and cooked up, Sarah and I spooned the salsa into the canning jars (we didn’t have pint size so we used quart jars — but with the size of our family those will go quickly). Since Fritz didn’t mention it, we weren’t sure how much it’d make. We followed his recipe (our only addition was the extra cup of cucumbers) and we came out with three quarts of salsa, plus one 1/2 pint jar (that we gave as a gift to friends). Next year we’ll double it (or even triple, we like salsa), and use the pint size jars so we can share more with friends and neighbors.

My good friend, and fellow prepper, Mike recently gave us the book, So Easy To Preserve put out by the Cooperative Extension of The University of Georgia. Since we have very limited canning experience (blackberry jam and salsa last year) it came in handy reminding us of the steps involved in the water bath method. It’s a good reference book that thoroughly covers: canning, pickling, jellies, freezing, and drying.

Inadvertently, you could also call it busy or lazy, we had a small test of our store what your eat (SWYE) food storage. We normally shop every two weeks. Well life got busy, we missed a shopping trip, and we went a full month without grocery shopping. It’s interesting that with our food storage we really didn’t notice it all that much. Sure we were missing the items that have shorter shelf lives: fresh fruit, most fresh vegetables (though we were able to add some from our garden), and milk. Since we’re not big milk drinkers we’d just mix up some of the powdered stuff when we needed to add it to a recipe. Another item we would have been out of is eggs, but we have a local farm source that we get them from regularly so we didn’t go without. It was interesting how uninterrupted our daily food supply was; between our SWYE pantry and our deep freezer we had plenty. It’s nice to know that if we HAD to go that long it wouldn’t be an issue at all; that alone gives us a certain feeling of safety and confidence.

I’m happy to announce our fourth (and most likely final) regular blog contributor, Nick. Nick is a general contractor and a prepper who specializes in “Sustainable Improvements, Repairs, and Installations“. He will be posting the fourth Wednesday of each month (starting next week, October 24th), focusing on what we can do to make our homes more sustainable and keep them in good repair — from a prepper perspective. I’ve now completed one of my goals for my second year of blogging, to have a guest contributor for each week:

  • Week 1 – Rural Relations with Josh
  • Week 2 – Sarah’s View
  • Week 3 – Momma Bear
  • Week 4 – Nick

These four share really good, and varied, perspectives–different than I’m able to provide–that I believe will add value to both my blog and the prepper community. For more information about each of them, and a list of the posts they’ve written, there’s a link to Guest Contributors in the top right hand portion of the Home page.

Finally, I want to congratulate two of my closest prepper friends on additions to their families. From our prepper coffee group, both Mike and Rick had newborn sons this month! They’re both great dads who I know will raise their kids up to be “properly” educated, self-sufficient, and independent.

What did you do?


Momma Bear: Figuring Out How To Make Food Storage Work

At our house food storage is a complicated issue. We all face obstacles to our prepping, whether it is financial, lack of family support, or just being unknowledgeable. I grew up poor, so you might say I have “food issues.” And when I say poor, I mean that I really only finished my senior year of high school because they provided low-income families two free meals a day; for me the school part was just the filler between my meals.  But what I did not realize until recently, thanks to the article: The 5 Stupidest Habits You Develop Growing Up Poor, is that growing up that way affects how I shop for food even today. After 20 years of marriage, with a much more substantial income, I was still shopping paycheck to paycheck. I had the mentality of only buying exactly what we immediately needed.  But once I became a prepper, I had to retrain myself to “buy extra.”

One obstacle of the ‘poverty cycle’ I was able to break, was my love of packaged foods. Packaged foods are cheap, have a long-shelf life, and feed more people than fresh foods do. Poor people eat lots of these, essentially training their bodies to expect high fat, high carb, and high sugar as the core of their diet. This causes their bodies crave these foods and, as a result, they tend to be frequently overweight, even obese. I was able to overcome this and have raised my children on fresh, home-made meals with plenty of vegetables. Though the flip-side of this is that it’s really hard to reconcile my love of fresh foods and wanting to stock my long-term food storage. To combat this personal conflict, we have been gardening and canning foods at home. I feel that at least then I can control exactly what ingredients are in my “canned” foods. (It has also been a great teaching tool for my children.)

I do not believe that there is only one way to have/create/do food storage. I believe that how we choose to store food needs to be a reflection of our families and who we are as preppers. Here is my take on different types of food storage:

Food Storage Theory 1: Most preppers live by the simple motto “store what you eat, eat what you store.” This is the simplest way to store food, one giant pantry that is in a constant rotation as part of your daily household diet. Most commonly you will see shelves filled with canned and packaged foods, and buckets of rice and beans. It makes prepping very easy because your goal is to store the same things in increasingly larger quantity, and you never run the risk of waste because you know you will use it. I applaud people who do this because they are able to use everything without risk of waste.  Although I have increased the amount of beans and other previously unknown foods my family eats, they will never be lovers of beans or packaged foods. This storage method simply doesn’t work for our family.

Food Storage Theory 2: This is the idea of having two separate food “pantries”, one that is for your regular rotational use and one that is exclusively long-term food storage (that you won’t eat unless the SHTF). The rotating pantry contains basic items that wouldn’t be the core of any diet, but that you do regularly eat, and could enhance the longer term food storage. At our house this is condiments, oils, canned vegetables, powdered broths, etc. The long-term food storage then consists of large quantities of beans, pasta, rice, TVP, and an assortment of canned and packaged foods that are NOT even part of our regular diet. This is a more expensive way to prep because you run the risk of possibly never using that long-term food storage and at some point you will have to decide what to do with it as it ages. This is how our family is storing food.

Food Storage Theory 3: This is a combination of the first two Theories, plus fresh foods from a garden and a renewable protein source raised at home (chickens, rabbits, goats, etc.). These are the people that are pushing for the greatest level of self-sufficiency should the SHTF. Many of us may never be able to attain this goal for a number of reasons. For instance, local ordinances restrict us from owning chickens, and although we are allowed to have rabbits, “processing” them at home is illegal. Even if we could, I’m not sure we would chose some of those options; I applaud those that can achieve this level of self-sufficiency.

My post next month will focus on specifics of food storage: container choices, canning and dehydrating, and purchasing bulk items from Costco or Sams Club. I would love to hear feedback from other preppers as to how they store food.

What We Did This Week To Prep 10/12/12

The week started off with a drive in our new (to us) Ford F350 pickup truck to Josh’s house (Josh of Rural Relations with Josh), about two hours away. I had gotten together with him several times, but this was the first time meeting his family. We thoroughly enjoyed his wife and children and our time at their place. While there Josh taught me how to split wood (I grew up in the suburbs…), and Brynn and Alison enjoyed learning how to ride his off-road mini-bike. It was fun to see his place, “in real life”, and see what he describes in his blog posts. While there are some great aspects to his property, I also saw the disadvantages and hassles he has discussed. Again I’d encourage everyone, develop community, get to know both your neighbors and the like-minded preppers around you; take the initiative and reach out to them — I believe community will be the key to survival in the future.

Our “father” rabbit, Winston, had an ear infection this week. So we went to our favorite rabbit resource, Rise and Shine Rabbitry, and determined he had a mild/moderate case of ear mites. We’ve been treating it by putting drops of olive oil mixed with tea tree oil into his ears and massaging it in. Apparently ear mites can live up to 28 days, so we’ll treat regularly for the next month. We definitely do not want them to spread to Clover, our pregnant doe, or her future babies.

Summer here in Western Washington is pretty much over. After almost three months of sunny days, but without too hot of temperatures, it’s been one of the best summers we can remember. But now they say rain and the clouds are on the way again; possibly with very heavy rain this weekend.

We’re done with summer gardening. We picked everything still on the vine and will can some salsa this weekend. We left most of the plants themselves in place, for now, and will pick them as needed to feed the rabbits. We just received our fall/winter crop seeds in the mail. We’ll be growing a bunch of greens, mainly for the rabbits, and a compost cover crop for the garden as a whole. After most of the plants are out of the garden we’ll cover the garden with the hay and manure from under the rabbit hutches as a fertilizer-rich mulch layer.

What did you do?

What We Did This Week To Prep 10/5/12

Monday morning I bred our rabbits for the first time; it was relatively uneventful and went, essentially, as one would predict. We should have babies about November 1st, and then harvest them about February 1st. We’ll bred Mom #2 December 1st. This should establish a cycle where we bred one of our two mothers and butcher a litter, of approximately eight off-spring, ever eight weeks. If things go as planned, that will provide one rabbit to eat (approximately 2 1/2 pounds of meat) a week.

I ended Monday by going to my friend Rob’s house (where I got the female rabbits from originally and where I helped butcher more last month) to again help him butcher the current litter and to continue developing my skills and knowledge. I brought my son, Ryan, and had Rob teach him the process. After watching Rob, Ryan did three of his own; since there were fewer in this litter I only did one. Ryan and I are feeling relatively confident in our skills, we’ll probably help Rob another time or two before we do our own.

That day had a “Circle of Life” type feel to it: breeding to create life in the morning and ending life to provide food that evening. It was interesting to view, and participate, in the cycle first-hand.

Several months ago Sarah, along with her cousin, set a goal of getting in better shape. To do so they decided to challenge themselves by signing up to run a half-marathon. Sarah has never been a runner, and though she works out on a regular basis, this was a new thing for her. This past Sunday she/they achieved the goal by successfully competing the Bellingham Half-Marathon. She trained regularly and was well prepared for it and did very well, including accomplishing it within the time-goal they had set. Afterward, and in the days following, she felt pretty good; we attribute that to good sleep, nutrition, and especially hydration leading up to the race. Is this a prepper topic? I believe it is. A lifestyle that includes healthy and consistent: exercise, nutrition, sleep, hydration, learning, and achieving goals is the key to success now and will be even more important in a collapse.

Property update: We got the septic inspection (passed, all looked good), well inspection (passed, also looked good), and the home inspection (there are several things that need done, but the house is structurally sound) done this week. We approached the Seller with some items that needed repaired so  the house would appraise, and we were told they didn’t have the money or time to get it done and were unwilling to do it. This essentially stopped the process and at that point we chose to walk away. Maybe time, and lack of success, will make them more willing to negotiate in the future. We still love the property, the location, and the pole barn, and believe the house is fine for now and has potential for the future. But we want to be smart about this decision and approach it logically and as unemotionally as possible.

What did you do?

Momma Bear: MRE’s For Your Preps?

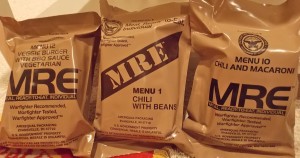
‘Meals Refused by Everyone’ is a not-so-affectionate term for Meals Ready to Eat (MRE). MREs are the field rations that our military eats whenever they are out training or on military operations. Though some preppers have chosen to stock up on cases of MREs, there are many who have avoided MREs due to their mystery and the stereotype of bad military food. Having grown up with a step-dad who served in Vietnam (and into the 1980’s), I was pretty familiar with the old school military C-Rations, which came in cans and required the use of a small personal can opener. The only redeeming quality found in those early rations was the cardboard like caffeine-laden chocolate bar that I loved. But today’s MREs are not only much better tasting, but have a better variety of foods, and meet a rigorous nutritional standard.

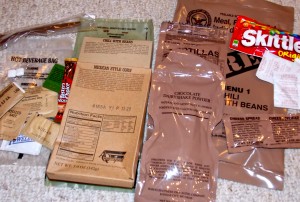
An MRE is made up of roughly 1300 calories: 169 grams of carbs, 41 grams of protein, and 50 grams of fat. Yes, that is a LOT of carbs and fat!  But remember that this nutritional standard was designed for our military, classified as ultra-athletes, “exercising” in a combat environment. A typical MRE is made up of a: main course, side dish (fruit/vegetable usually), bread or snack item (pound cake, tortillas, crackers, candy, peanut butter, jelly, etc.), beverage of some sort (coffee, tea, kool-aid, an electrolyte-type drink, and/or hot cocoa), matches, gum, condiments, and a spoon.

They come in a sealed plastic package and weigh 1.5 pounds. They also contain a “flameless ration heater”,  a chemical pouch that heats up when activated with water, to heat your main course. The average service member only consumes about one or two of these a day, because they are just too dense to eat as three square meals. Also, most service members “field strip” their MREs down to the parts they know they are going to use to reduce their bulk.

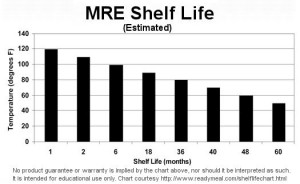
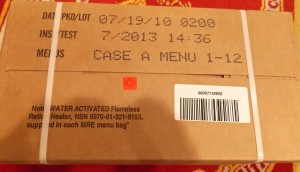
There are 24 MRE menus. The meals come in two case lots: menus 1-12 and 13-24 (and include specific vegetarian and religious meals). MREs are considered to be shelf stable for six months at 100 degrees and three years at 80 degrees (see side bar chart). There are two ways that packaging dates are listed on MRE cases: 1) A standard pack date (as shown in the photo of a military issued case) and 2) A numeric date, listing the last digit of the year followed by the Julian date of packaging (so my husband’s same box is: 0200, meaning it was packed on the 200th day of 2010). Currently, the military uses three manufacturers for production of MREs: Wornick Company, SOPAKCO, and AmeriQual; I mention this because there are a lot of pseudo-MREs out there.

My husband unofficially rates MRE’s in three categories: good, okay and nasty. His “goods” include: chili with beans, beef ravioli, chicken with noodles, chili & macaroni, spicy penne pasta w vegetarian sausage. His “okays”: meatballs with marinara, cheese tortellini, beef patty, spaghetti with meat sauce. And his “nastys”: beef brisket and beef stew. These are his ratings, I’ll ask around in the next few months for some reviews by my husband’s troops. Personally, I find the spicy types of MREs to cause killer heartburn, and I wouldn’t want to be in the field without a good antacid! Though the meals claim to be balanced in the fiber department they need to be consumed with sufficient water, or they will literally leave you in a “bind”. But overall–as long as you are not eating more than two a day–they are a good, handy meal that certainly has a place in most preppers’ food storage and Bug-Out Bags.

Also of mention, the MRE heavy plastic pouch itself is extremely durable and can be used for holding/carrying water.  While the packaging is not currently being recycled or made from recycled materials, the package does certainly have multiple uses that are only limited by the imagination. While serving in Somalia, my husband reported that the local children would salvage the packages out of the trash to be used as shingles on their homes.

The Operational Rations of the Department of Defense provides a pdf file that gives the entire background on MREs, and includes the complete menus for 2011 and 2012.