Sarah’s View: Learning To Save Seeds

When we started gardening this year I hadn’t really thought much beyond learning more and what produce we could get out of it. But, as the season continued I started thinking about next year and, being cheap, I started wondering if I could save seeds from this year’s garden instead of buying more. Turning to my good friend Google, I started researching how to save seeds for our more unique garden items.
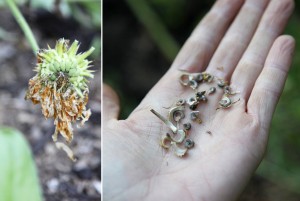
The first I looked for was Calendula. I’m not sure why I started there exactly, except that there weren’t many seeds in the seed packet. Not only that, but the Calendula seeds had looked really odd and I couldn’t come up with where on the plant they would be. It turns out, as the petals wilt the center is surrounded by seeds. Now, these seeds don’t look like any others you might have seen, or at least not like any I’d ever seen. But, once I knew where to look they were remarkably easy to harvest. Some had dried on the plant, others I dried in the house and then stored the dried seeds in a small plastic bag. (Plastic isn’t ideal, I’d prefer to use small envelopes so as to prevent moisture building, but the coin envelopes just seemed pricey – see, I’m cheap.)
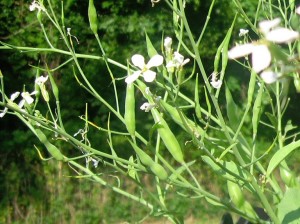
Once I figured out how to harvest Calendula seeds I was excited to see what else I could save. I next looked into radishes and garbanzo beans. These are both rather easy – they have pods which form on the mature plant and the seeds inside the pods are dried and saved for planting. Granted, we didn’t plant radishes for eating (we planned on them flowering to attract pollinators) so all our plants flowered and then formed pods. If you were growing radishes to eat and still wanted to harvest seeds, you’d need to let a couple of plants flower so they form the pods.

Next, I started researching the herbs. These are a bit trickier as their flowers, and therefore seeds, tend to be significantly smaller and not easily harvested right off the plant. From what I’ve read, the best way is to clip a few of the flowering stems and put them in a paper bag (lunch bag size) and hang to dry. The paper bag helps with moisture control, keeps out light, and prevents seeds from being lost as they fall off the drying plant. I’m still on the drying stage with my herbs, so I’m not sure how successful it will be.

With any luck I can harvest seeds from most of my plants this year. I still plan to buy seeds for spring, but hopefully they will be more for back up as well as to increase the variety in our garden.

What We Did This Week To Prep 8/17/12

After I discovered the ease and convenience of recharging batteries, with our Goal Zero Nomad 7 Solar Panel and Guide 10 Power Pack, I decided we needed to expand out into the world of rechargeable batteries. This was a new thing for me, the rechargeable batteries that I was used to were the old fashioned kind that were expensive, didn’t last long, developed memories, and over-all not worth the hassle. The new kind can be charged over 1500 times and developing memory is no longer an issue.

I also recently learned about this topic on The Survival Podcast when Jack interviewed Steven Harris on Dealing with a Large Scale Blackout. Steven discussed how people could have been better prepared for the recent east coast power outage, and of course any future power outages, in some very simple ways with some very straight-forward products.

Steven Harris is a guru of all things ‘energy’. Yea he’s slightly goofy and tends to ramble a bit, but his knowledge and ability to easily explain the complex world of energy is incredible.

The products that he recommended–not his products, just ones he’s thoroughly tested and provided links to on his site: SOLAR1234.com–that we chose to order were:

  • Powerex Eight Cell Smart Charger (MH-C800S). An 8 AA or AAA battery charger that charges in one to two hours; it also has a large LCD screen showing the status of each battery. This will give us an easy, relatively low energy draw, way to have an almost infinite supply of battery power.
  • Sanyo 1500 eneloop 8 pack AA, and AAA, NiHM Precharged Rechargeable Batteries. (For use with the above charger.) We ordered one of each, Costco also carries these and we can get more there after we test them out. These can also be recharged with our Goal Zero Solar Panel and Power Pack.
  • Duracell 800 Watt DC to AC Digital Power Inverter (813-0807). It runs at 150 watts through your car’s cigarette lighter, or 800 watts when clamped directly to your car’s battery (comes with cables for each method). It has a display that shows: voltage in, voltage out, and watts (power) that you are currently drawing. With this your car becomes an improvised generator and power is stored in your car’s battery (800 watts is enough to power your refrigerator).

And the item we’re most excited about:

  • Trent iTorch IMP52D 52mAh External Battery Charger (for ANYTHING USB). It’s a portable rechargeable lithium battery that holds enough energy to completely charge a dead iPhone 3.5 times! We ordered one for both Sarah and I (and Sarah’s Dad, who happened to be here at the time). We’ve been searching for a product like this to add to our get-home bags (GHB) and this one comes very highly recommended. I plan on thoroughly testing, then reviewing the iTorch.

On another topic, we had to find a way to keep our rabbits cool this week. While I know we won’t get much sympathy from the rest of the country, it actually got hot here in Western Washington. We had temperatures in the mid-90s, which is really hot for us (keep in mind hardly anyone here has air-conditioned homes). To put that temperature in local perspective, I had a co-worker who would say, “Any time it gets above 80 degrees it’s god’s way of showing me what hell would be like.” Yes, the Pacific Northwest is temperate. Anyway with the “hot” temperatures we had to find a way to keep our (Western Washington, not used to the heat) rabbits cool. Sarah did some research and found one of the easiest ways is to put a frozen 2-liter water bottle into each of their hutches and they can lean against it if they get hot. It seemed to work well, the rabbits looked less agitated and seemed to be panting less.

What did you do?


What We Did This Week To Prep 8/10/12

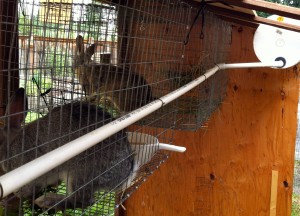
Prior to leaving on our vacation to Colorado last month, Ryan and I tried to get an automatic watering system for the rabbits in place. While I had never worked with PVC piping before it didn’t seem like it would be too difficult. The concept was easy enough but we didn’t take enough time to ensure everything was properly glued and that led to it leaking. We reverted back to the water bottles for a couple of weeks until we could get it fixed/redone. This week, with the benefit of our previous experience (isn’t everything easier the second time around?), we re-did the project using new PVC, better glue, and clamping the spouts in place while they dried; this time everything worked flawlessly. The project still isn’t done, I plan on putting “gutters” on top of the rabbitry roof to collect rain water, and eventually extend it to the lower level (when we add a second row of hutches). But the rabbits now have plenty of water and the 5-gallon bucket will only have to be refilled every week or so.

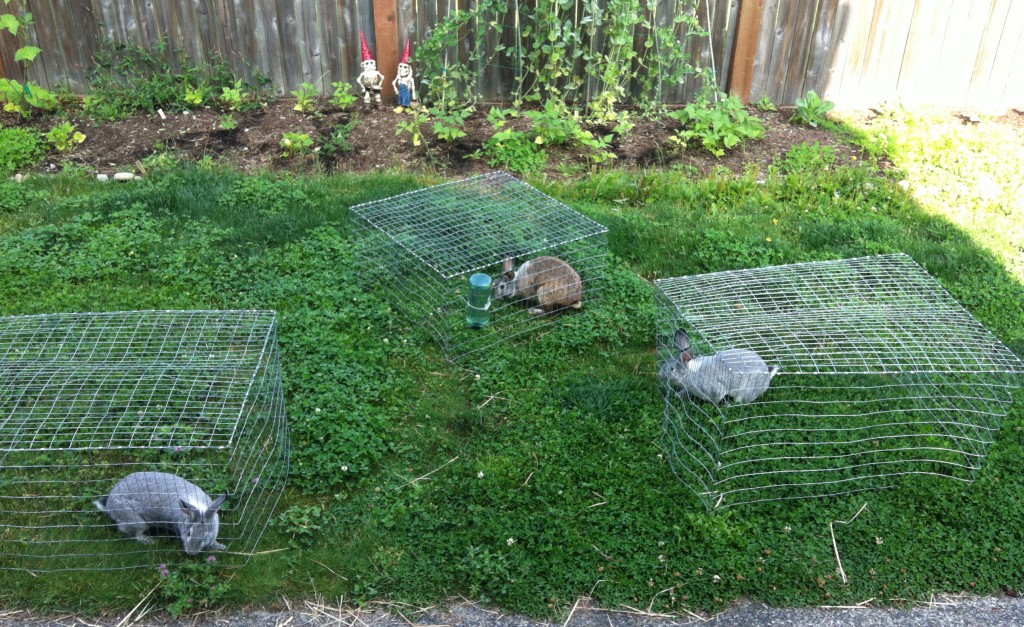
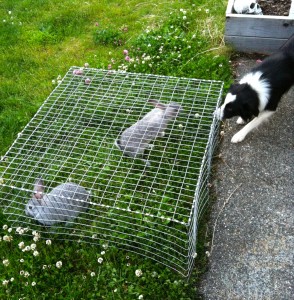
Ryan also made two more “pasturing hutches”. Essentially the same thing as the hutches they live in, but these were made without bottoms so the rabbits have access the grass, clover, and other assorted things growing in the back lawn. Previously we only had one so I’d get each rabbit out, one at a time for an hour each, to let them each graze. It was a bit of a hassle because I pastured them each day before I’d give them their store-bought feed (so they’d wake up hungry and maximize their opportunity to eat fresh greens), so I had to be around and move along each morning to get them all out and fed. Now I can just take all three of them out and let the eat at the same time. Much easier and smoother.

Per Momma Bear’s recommendation we ordered a new prepper book: Preserving Food without Freezing or Canning: Traditional Techniques Using Salt, Oil, Sugar, Alcohol, Vinegar, Drying, Cold Storage, and Lactic Fermentation.

Amazon describes it, in part, as:

Typical books about preserving garden produce nearly always assume that modern “kitchen gardeners” will boil or freeze their vegetables and fruits. Yet here is a book that goes back to the future—celebrating traditional but little-known French techniques for storing and preserving edibles in ways that maximize flavor and nutrition. . . this book deliberately ignores freezing and high-temperature canning in favor of methods that are superior because they are less costly and more energy-efficient. . . says in his foreword, “Food preservation techniques can be divided into two categories: the modern scientific methods that remove the life from food, and the natural ‘poetic’ methods that maintain or enhance the life in food. The poetic techniques produce… foods that have been celebrated for centuries and are considered gourmet delights today.” . . . offers more than 250 easy and enjoyable recipes featuring locally grown and minimally refined ingredients.

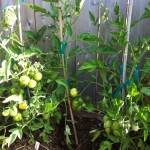
For those of you, okay mostly us, that were worried that we wouldn’t get tomatoes this year — we finally have a bunch of green tomatoes on our vines! We’re pretty excited about it and keep telling ourselves that our patience – in our temperate growing region – will pay off. Hopefully in the next couple of weeks we’ll be eating fresh tomatoes and maybe even canning the extras!

What did you do?


What We Did This Week To Prep 8/3/12

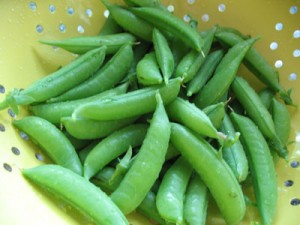
Still not a lot of success in the garden, though our raspberries and snap peas are doing great. The tomato plants never got very big, but finally have a lot of buds on them and a few even have small green tomatoes. The sunflowers are doing well–though we didn’t plant sunflowers–we have several of them in the back corner;  I can only guess they made the “leap” from the neighbor’s garden (they had them against the adjoining fence last year). The squash plants also have buds and a few small squash growing, but they still have a ways to go also. I try not to compare our garden to the ones I read about in other parts of the country, summer here really doesn’t start until the first week of July and typically continues through the end of September. So we’re only a month into our “summer”.  I’m still hoping for some good things from the garden.

After I butchered rabbits with Rob, he gave me some meat to take home. We do a lot of cooking in the crock pot and decided we’d try rabbit stew. We put the whole butchered rabbit into the crock pot, bones and all (per the recipe), and added fresh vegetables and let it stew. Dinner was tasty and we were pleased with the results. Once we start breeding rabbits, we’ll average about 60 rabbits a year; so we need to find good, varied ways to prepare them. I had thought about grilling it, but Rob mentioned it dries out easily. He offered to have us over for dinner and show me how he cooks it.

Having helped Rob butcher the rabbits, and sharing his skinning knives, I decided I needed to get a set of my own. I picked up a 3-piece set made by Buck that has a light-weight knife, a heavier knife, and a guthook. They come in a durable, washable soft case. I probably won’t use the guthook for the rabbits, but it’ll be there in the future for larger game.

We made our monthly trip to Costco. After being sick last week I was motivated to continue stocking up on OTC meds and vitamins. We got guaifenesin (cough expectorant), multi-vitamins, Vitamin C, and Vitamin D. (I later picked up some Sudafed at another pharmacy.) Costco also had a good price on a 50-foot ,12-gauge extension cord for $20.

What did you do?

(Monday: Sharpening Knives, Part 2)

Learning To Butcher Rabbits

When we’re young we have lots of ‘firsts’. As we get older we have fewer and fewer; both because of life experiences and because we tend to specialize and stay within our comfort zones. Yesterday I had a first, I learned how to butcher rabbits. Now I realize that butchering most small animals is about the same, but I had never killed and/or butchered anything before. That includes hunting; though I’ve nothing against hunting–and plan to learn–I didn’t grow up hunting and have never gone as an adult.

I went to Rob and Beckie’s home–they provided our does–and Rob taught me how to butcher rabbits. The siblings of the rabbits I got from him had matured (three months). He did the first one as I watched, I did the second one and he walked me through the process. We then finished the rest, each working on his own, but Rob was always available to help or answer my questions.

As I reflected on how I felt about butchering the rabbits, both at the time and afterward, I think the best word I could come up with was ‘satisfaction.’ Satisfaction that we had done it respectfully and efficiently, that the rabbits had not suffered, and that the meat would be used to feed our families and improve our diets. Before we killed each one we calmed it, thanked it for it’s sacrifice, and promised to appreciate what it would provide.

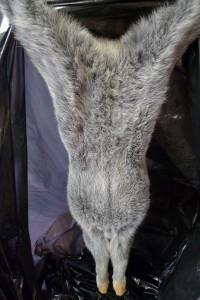
I’m glad I’ve learned. I can’t say I look forward to the next time, but I feel confident that I can do it well, painlessly, and without waste. I like knowing that I can provide a healthy source of protein for my family. Both Rob and I would like to learn how to tan the hides and utilize the pelts.

I felt a bit overwhelmed when we first got our rabbits, but it’s much easier than I thought it would be. I enjoy the day-to-day chores of raising and feeding them; soon we will go through the process of breeding and bringing up the next litter, and I know now how to harvest the meat that we will raise. I encourage anyone who is considering raising rabbits that it’s a good idea, it’s easier than you think, and it will be a valuable addition to your homestead, big or small. Any help I can give you, either in the form of rabbits to raise as your own, skills I can teach you, or knowledge that I’ve learned I’d be happy to.

I’ve mentioned it before but I’d strongly recommend RiseandShineRabbitry.com and Storey’s Guide to Raising Rabbits. Both are excellent sources of advice and how-to information on raising rabbits.

An interesting side-note: When we first got our “does” from Rob (at six weeks), we instead got one female and one male (it’s harder to tell than you think). When we discovered this, Rob told me to just bring the male when I came and we’d swap it out for a healthy female.

Rob knew that I pastured my rabbits as much as possible (maybe half their diet), and he feeds his strictly store-bought rabbit feed, so he suggested an experiment: once butchered we’d compare my male and how much fat he had and how much the meat weighed to the ones Rob had raised. We found that my pasture fed rabbit had considerably less fat, but the meat weighed almost the exact same.

What We Did This Week To Prep 7/13/12

It’s been a busy week as we get ready to leave on a family vacation. We’re heading to Colorado Springs, CO to see my parents and other assorted family members. We’re looking forward to the trip; my two youngest, Emily and Alison, have never flown before and are very excited about that.

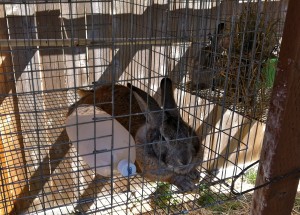
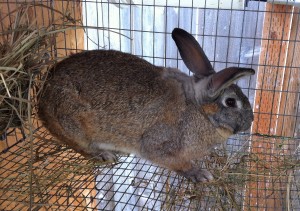
We did get a few things done. We picked up a seven month old male American Chinchilla Rabbit this week, from another breeder. He will be the patriarch of our future litters; he’s full grown and sexually mature. The does are just three months old now and we need to wait until they are five months to breed them; so the first breeding will be about mid-September. (Winston, our male, looks more brown than gray in the picture, my understanding is that his coat was discolored from the sunlight.)

Speaking of does, I should instead say doe. As advised, we went back and “sexed” our two younger rabbits to ensure they were both female. Turns out one is male. It’s much harder to determine, especially when they’re young, than I would have thought.  Rob, the breeder we got them from, is more than happy to exchange him for a her. I’ll be going to Rob’s place in just over a week to learn from, and help, him butcher his next batch of rabbits. I’ve never done that before and I look forward to the opportunity to learn, but am a little cautious about how I will feel doing it. I believe in what we’re doing and I think it’s important, but taking another life is–and I believe should always be–a difficult thing. I’ve discussed it with Rob and he’s very respectful and efficient about it.

One of the things I really wanted to get done this week, and did–sort of–was to set up an automatic watering system in the rabbitry. Trying to attach a 2-liter water bottle to the side of the hutches is a pain in the butt; I wanted a system that would provide them plenty of water and we wouldn’t have to hassle with it. Sarah’s Mom will be staying at our place and taking care of the dog, cat, rabbits, and garden while we’re gone and I  wanted to make things as easy as possible for her. The system we built basically worked, though I’ll have to spend some time fine tuning it when we get back. We put it together using a 5-gallon bucket to hold the water, 1/2 PVC pipe, and attachments and auto feeding spouts (I got from the feed store). I have little experience with plumbing or PVC piping, but it seemed simple enough. My first attempt leaked too much and had to be redone. It still drips a little and I’ve only routed it to the first two hutches, but it’s fine for now and will be relatively easy to fix and extend as needed. My eventual goal is to use the surface area of the rabbitry (4’ x 12’ = 48 square feet) to catch rain water and channel it into the 5-gallon bucket. After all, we live in Western Washington and have plenty of rainfall, even on that small surface we could collect almost 1200 gallons of water annually; yields will be as low as 30 gallons in July and as high as 170 gallons in November.

What did you do?


What We Did This Week To Prep 6/29/12

We’ve started pasturing our rabbits. We spent the first few weeks we had the rabbits slowly/progressively getting them used to fresh grass and clover. They adapted well as evidenced by their continued solid poops and healthy growth. We’ve now started taking them out of the rabbitry daily and putting them under a movable “rabbit tractor’ in the backyard. We have a good growth of clover and the white clover we planted in the spring is finally starting to come up, so the rabbits should have plenty to eat; hopefully they’ll eat enough to make up over half of their diet. We’re still feeding them rabbit pellets and dried grass hay, but they have been eating progressively less.

Even though the rabbits are still several months away from breeding and producing litters we are already benefiting from their manure. Rabbit manure is the most concentrated fresh animal manure available (NPK), it can be put straight onto the plants, it breaks down relatively quickly, and has no smell. The chart below shows how it compares with other livestock manure (the others all need to be composted before adding to the garden, and many have a strong odor).

Material Nitrogen (N) % Phosphorus (P) % Potassium (K) %
Chicken Manure 1.6 1.5 0.9
Cow Manure 0.3 0.2 0.1
Horse Manure 0.7 0.3 0.6
Pig Manure 0.5 0.3 0.5
Rabbit Manure 2.4 1.4 0.6
Sheep Manure 0.7 0.3 0.9

Since we don’t have enough to manure yet to cover all the plants, we’re maximizing what we have by making rabbit compost tea. We mixed a couple of large scoops of manure into a 5-gallon bucket of rain water (from our rain barrels); it’s been sitting for a couple of days and this weekend I’ll go around and water each one of the plants with it. We’ll especially get some extra on the tomatoes because their leaves are yellowing a little and I understand that means they’re low on nitrogen.

Unlike most of the country, Western Washington had cooler than normal temperatures in June. Our average high temperature for the month was 65.1 degrees, and we’ve only had six days that have reached over 70 degrees. We’ve also had 27 days with partly cloudy or cloudy conditions. Because of our cooler temperatures and lack of sunshine our garden hasn’t done much yet. It hasn’t suffered but it certainly hasn’t “bloomed” either. Most of the plants are about the same size as when we put them in the ground, with the snap peas and potatoes being the exception. This week we put more plants into the ground from the greenhouse, but we still have half of our tomatoes in there and the ones in the greenhouse are doing better. While we know much of the country is suffering from hot temperatures we’re jealous of their garden productions and early harvests. We’re ready for summer to start here, July should be warmer and more sunny; it typically is, with a monthly average high of 75.3 degrees.

What did you do?

What We Did This Week To Prep 6/15/12

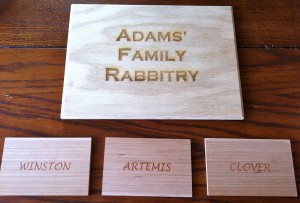
Ryan and I spent more time working on the rabbit hutch, or I guess I should correctly call it our ‘rabbitry’. It’s covered now, the top row of cages are hung, and our does have moved from the garage and are now in their new home. As planned I put it where we can see it through the kitchen window, kind of the “in sight, in mind” concept. This is their second week on fresh grass and clover, we’ve doubled the amount and they seem to be handling it well (poops still solid). Next week we’ll start pasturing them. We told the kids they could name these rabbits (since they’ll be the parents); then Ryan, in his wood shop class, made some nice signs with their names on them for the rabbitry (we’ll get them stained and up this week).

I mentioned, during our last ‘lights out drill’, that we couldn’t get the garage door to open manually when the power was off. We pulled the red handled cord and nothing happened, we shined the flashlight around and tried to figure it out and couldn’t see anything wrong, we pulled harder and still nothing. At that point we gave up and continued with the drill. Yesterday I went out to figure out why it wouldn’t open (as I mentioned, the garage door opener was recently replaced), eventually–it took longer than it should have–I figured out the manual disconnect handle had been tied off to the wrong spot. I moved it over to where it should be and now it works just fine. Look around your own homes and double-check the little things, make sure you not only know how to open/close/shut-off or whatever but you actually do it to make sure it works (except don’t shut off your natural gas, that’s a hassle to relight). If this had been a true emergency there would have been the associated increased stress level already, and the door not opening would not have helped; a stressful blackout emergency is not conducive to calmly trouble-shooting something that is not working properly.

A couple of months ago I went to a friends semi-official/developing prepper group. Mike is doing a good job getting people together on a regular basis and slowly exposing them to prepper ideas and concepts (this month, our second get together, I taught first aid to the group). The first get together, he did a short presentation on home safety items: backup/emergency lighting, fire extinguishers, smoke and CO2 detectors, escape ladders, etc. We had everything thoroughly covered at our home, except the escape ladders. We have two bedrooms with windows that are about 14 feet off the ground, not impossible to hang and drop from but we figured it’d be better to have the escape ladders. We bought two ladders (about $30 each) and will practice with them soon, and then store them under the beds near the windows.

What did you do?

(Monday: NO POST – we’ll be in Las Vegas on vacation with friends)

What We Did This Week To Prep 6/8/12

Rabbits have been our prepping focus this week. As mentioned, we got two American Chinchilla does. We’re glad we have them and really feel like they will be a positive addition to our family and our preps. The kids enjoy holding them, and while they understand they’re not just pets, we feel it’s okay for them to bond with the mothers of our future litters. We’re starting to slowly introduce fresh grass, clover, and dandelions to them to get their guts use to it. Our goal is to pasture them in the backyard (under a “rabbit tractor” to keep them safe and contained) as much as possible, especially during the summer; then during the winter grow greens for them. We’ll continue to feed them pellets daily to supplement, and round out, their natural diet.

I’m looking forward to watching Sarah’s gardening journal grow and expand. While a journal isn’t a new concept and it’s a very simple idea, I’m not sure I’d have thought about it in reference to a garden. I think it will be very valuable, and interesting, to track our progress over the years. Sarah will also be keeping a rabbit journal, recording: breeding, litter size, butchering, diet, any health problems, and other pertinent information.

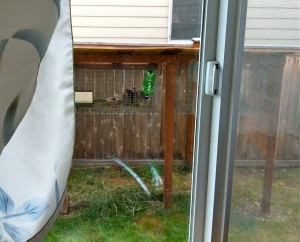
Even though we have our rabbits we don’t have our full rabbit hutch completed yet (so they’re still in the garage). Ryan and I are building it in the backyard on the north side of the house. We figured the north side would work best because it gets less sunlight, so we don’t grow anything there, and it’ll be cooler; rabbits deal better with cool temperatures than hot. Plus it will allow us to see the rabbits through the kitchen window so it’ll be easy to watch them and ensure their comfort and safety.

Even though we won’t be able to breed and butcher our rabbits anytime soon, one advantage of rabbits that we’ll be able to take advantage of almost immediately is their manure. Rabbit manure is some of the best stuff you can get to fertilize your garden. It can be put straight onto the garden, without having to be composted first (it’s not “hot”), even around plants you will be harvesting soon. Rise and Shine Rabbitry, has a great post on the uses of rabbit manure. Between the front and back yards we have a lot of garden space to cover. I’ll start by putting it around individual plants, then as we get more spread it all through the garden. When we get a good layer everywhere it’ll either be time to start over or share it with some of our neighbors who also garden. Maybe we’ll arrange a trade with them, their old garden and vegetable scraps for rabbit manure.

What did you do?

(Monday: Be Sure You Have Alternate Routes)


Sarah’s View: Gardening Journal

No occupation is so delightful to me as the culture of the earth, and no culture comparable to that of the garden…But though an old man, I am but a young gardener.” ~ Thomas Jefferson

There’s a podcast I listen to on a regular basis that I highly recommend – The Thomas Jefferson Hour – and it was the inspiration for this month’s post. As you may or may not know, Thomas Jefferson was quite the gardener. Not only did he spend a significant amount of time gardening, but he also kept an exquisitely detailed gardening journal.

I was talking to Trace about the concept of a gardening journal and he asked if I would like to do one for our garden. I had thought about it keeping one, but hadn’t worked up the motivation to actually get started. With Trace’s encouragement I found a blank sketch book (it doesn’t really matter what you use) and started making notes. Since I just started it this weekend I’ve had to look back over the last couple of months’ blog posts to make sure I got my dates right for what we planted and when. I included the date we planted the seeds and placed them in the indoor grow box, the date we moved them out to the greenhouse, the date I transplanted and separated the seedlings and, finally, the date I transplanted the seedlings into the ground.

Besides simply recording the important dates, I’ve tried to make a few simple observations as to how certain plants are doing or why I chose to transplant some on one day and others at a later time. I also put the receipts from our seed orders in there, as well as the sketch I did of the layout for the garden.

I would encourage anyone with a garden (large or small) to keep some sort of record. At the very least, keep track of what you planted and when and what was successful. If nothing else, this may help you decide what to plant (or not plant) next year. It doesn’t need to be complicated, while there are “official” garden journals available, it can be as simple as a piece of paper.

I hope to make notes and observations in my gardening journal as the season continues. While it would be beneficial to make notes daily, both on the plants themselves as well as on the weather, and animal or pest activity, I’m not sure I have the discipline. My goal, therefore, will be to observe and write weekly. Then, next winter as Trace and I sit down to plan the 2013 garden, hopefully the 2012 gardening journal will provide us with hints as to what we might do to improve our garden, or at least, what we should avoid doing.

A garden is half-made when it is well planned. The best gardener is the one who does the most gardening by the winter fire.” ~ Liberty Hyde Bailey, Cofounder of the American Society For Horticultural Science

(Friday: What We Did This Week To Prep)