Backup Power You Can Carry With You – A Review

As a prepper, I like things that are rechargeable. It minimizes the gear I have to store and carry. I especially like rechargeable batteries, with very little pre-planning you could continue charging and using them for a long period of time —  even during a collapse.

One of the primary rechargeable devices that I–and everyone else–carry is my phone. Most of the time keeping my iPhone 5S charged isn’t a big deal, I keep it plugged in if I’m in the car, at work, or in bed; in between those times it typically has plenty of battery life. But for the times I’m not around a standard outlet, I like to have a portable charger. Previously I used a New Trent i-Torch External Battery, but recently–after testing and evaluating–I’ve changed to Portable Power Solutions M110 External Battery.

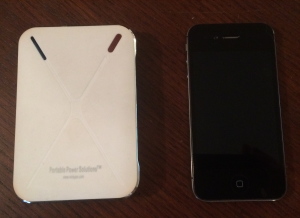
External Battery compared to iPhone 5

External Battery compared to iPhone 5

The M110 External Battery is ruggedly built, it feels like I could drop it and it really wouldn’t care. It’s not much bigger than a deck of playing cards at 4″ x 2.8″ x 1″, weighing 10 ounces (a deck of cards is 3.5″ x 2.5″ x 5/8″). It nicely fits into a convenient pocket on my EDC bag (it even fits in my back pants pocket). It has enough power to completely recharge my iPhone, even if the phone’s dead, four times. The External Battery has an USB outlet so it’s easy to recharge; to completely recharge it takes about 10 hours.

Portable Power Solutions also has a 7W Foldable Solar Panel that pairs nicely with their External Battery. But the Solar Panel can also provide enough power to charge your cell phone, or even tablet, directly from the sun. It folds down to a convenient 7.5″ x 7.5″ x 1″ with a rugged cover that includes a pocket to store accessories. When in use, it folds out to 15 inches long and can easily be attached to your pack (it has eyelets for this purpose), or set down angled toward the sun.
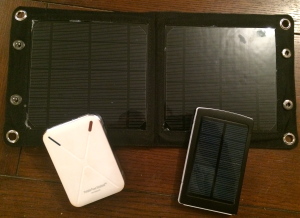
portable power productsPortable Power Solutions’s final product is a 10K Solar Charger. It has the same lithium battery storage capacity as the M110 External Battery, and is about the same size (5.2″ x 3″ 0.8″, weighing 6.2 ounces). It’s a highbred, meaning it can both store power and be recharged by the sun — but it doesn’t do either thing as well as the two individual ones above. It has a small solar charger so it takes a long time to charge (36 hours). And though they still try to make it rugged, it does have a solar panel on it and needs to be handled with much more care. But it can, and does, do both jobs to the best of it’s capability.

Portable Power Solutions is veteran owed, and they’ve “been there”. All of their products are built to be heavy duty, durable, and weather resistant — they’re designed primarily for military guys to take to the field (who are notoriously hard on gear). I like the products and the company, and it’s definitely earned a spot in my everyday carry (EDC) and my Get Home Bag.

Nuts & Bolts by Nick: Home Center EDC Kit

by Nick Romaniello -

I spend an exceptionally large amount of time at hardware stores, and big-box home centers, acquiring materials for my work. I’m usually rushing through with a list of specifics but on occasion I have a chance to browse and consider items for use outside of the scope of my business. When looking through the eyes of a prepper, stores like Home Depot, Lowes, and True Value are a goldmine of survival and readiness gear. Big ticket items like generators and chain saws are obvious, but there is a wealth of smaller preps hidden throughout the shelves that won’t break the bank. If you haven’t had the chance, it’s well worth the time to visit your local home center and just explore the isles.

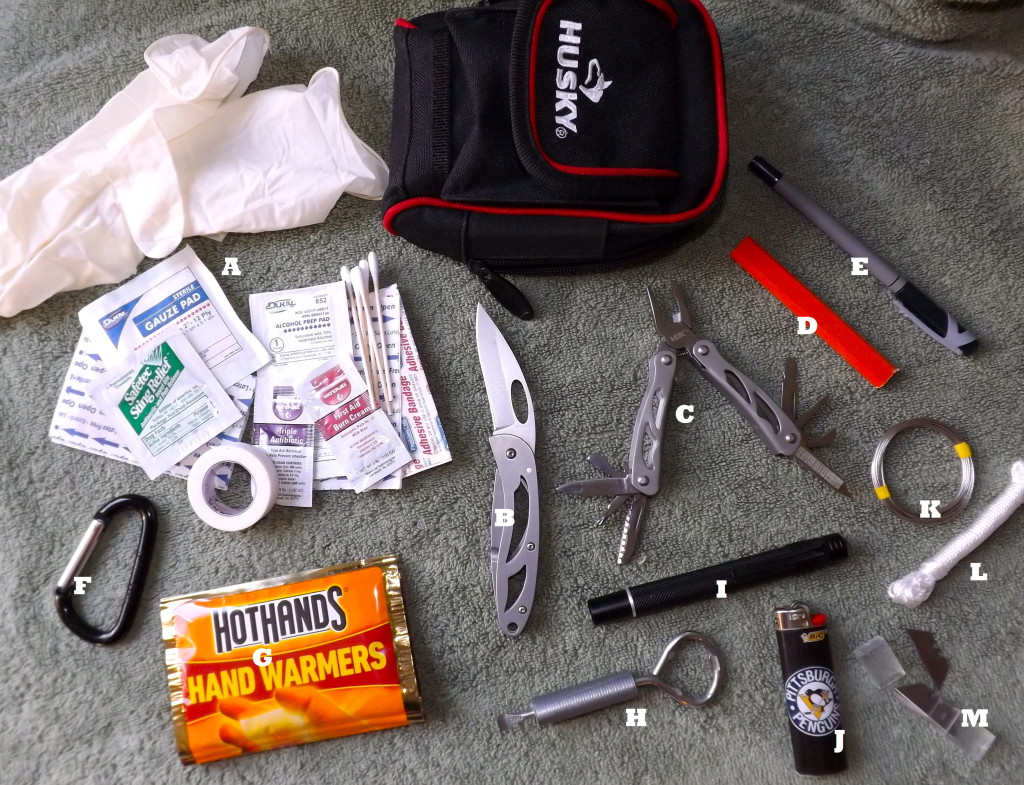
To put this idea into practice I decided to assemble a thorough, yet budget-minded, Every Day Carry (EDC) kit from items only available at the Home Depot I frequent. Here is what this kit contains:

  • A. First Aid Supplies: I purchased a small first aid kit, and then paired it down to what was practical for this kit.
  • B. Folding Knife: Any Boy Scout will tell you not to leave home without one of these.
  • C. Mini Multi Tool: Pliers, screwdrivers, wire cutters, file etc. Multi tools pack a lot of function into a small package. This mini multi tool came packaged together with the knife above and a full size multi tool on clearance for $5.
  • D. Carpenters Pencil: Thicker and more durable than a regular pencil, it could also be carved into a toggle for fishing or whittled into a pile of dry shavings for tinder.
  • E. Ball Point Pen: You never know when you will need to write something down.
  • F. Carabiner: Useful anytime something needs to be clipped to something else.
  • G. Hand Warmers: It’s January in Pittsburgh so can you blame me for throwing a couple of these into the kit? In the summer you can delete these to make room for a sweatband.
  • H. Paint Can Opener with Duct Tape: Paint can openers are usually free when you buy a can of paint and are handy for use as a miniature pry bar. The top is a bottle opener. Duct tape is wrapped around the middle for easy access.
  • I. LED Flashlight: This LED penlight outputs 23 lumens, far better than the 2 lumens of the comparable xenon bulb penlight. Plus the bulb never needs replacing.
  • J. Lighter: Fire good!
  • K. Picture Wire: 9 feet of 40lb wire can make some pretty strong improvised repairs and wont be affected by heat.
  • L. Masons Line: Basically a heavy duty braided twine that can become anything from a shoelace or a belt to emergency fishing line.
  • M. Mini Razorblades: Five of these come in a protective case for $.99 and weigh almost nothing. They would be useful for any extremely fine cutting tasks (particularly medically related) that the folding knife is too bulky for.

DSCF3221

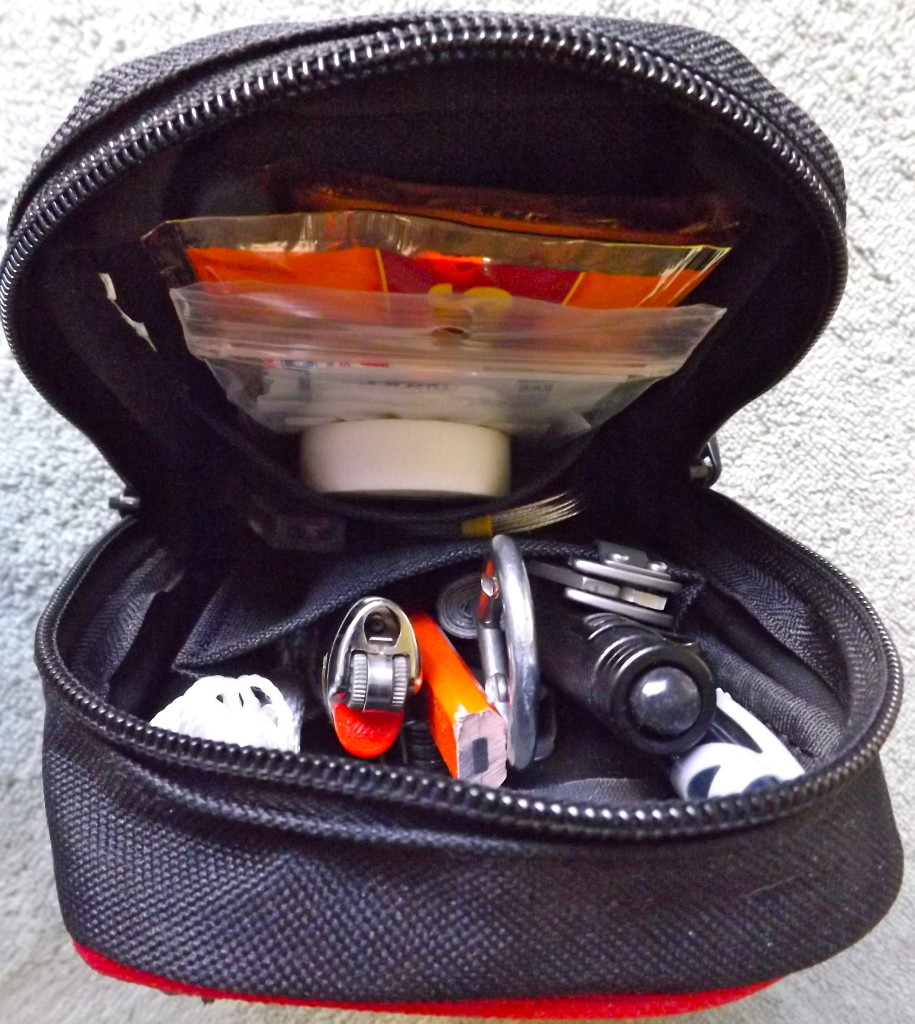
The whole kit fits into a sturdy belt pouch and cost around $35.

DSCF3225

EDC is a personal matter and can range from keys and a wallet to handguns and survival knives; so don’t take this necessarily as what I think you should carry but rather as an example of some of the resources available from places you may not have previously considered. While specialized survival gear sites and catalogs are endlessly fun to look through, don’t forget the local hardware and building supply spots. There are plenty of wallet friendly options for the thrifty prepper. What can you find that will help you be prepared?


What We Did This Week To Prep 11/9/12

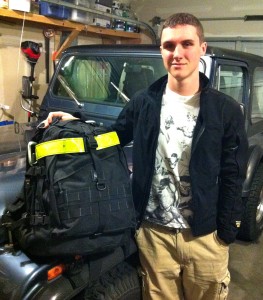
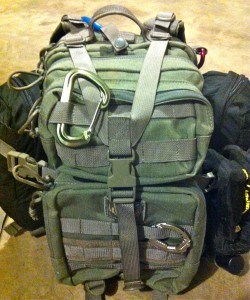
Since we’ve added a Ford F350 truck to our household we needed to get a bug out bag (BOB) in it. We’ve got top-notch ones in each of our two primary, daily use, vehicles; then a pretty good one in the Jeep CJ-7. We took the one from the Jeep and put it in the truck. Now Ryan (my 18 y/o son), who is now the primary driver of the Jeep, is in the process of building his own BOB. He has a Maxpedition Vulture II pack and we’ve gathered some stuff for his kit; he’s got a decent start and has made a list of items to round it out. It’ll be good for him to build his own BOB so that when he goes off on his own he’ll have his kit that he knows and has confidence in.

It was interesting seeing all the views of my blog during and after Hurricane Sandy. It got double the hits in that week than I get in an average month. It’s ironic how being prepared all of a sudden becomes “common sense” when a disaster is on the way (or after it has already struck…). It’s also interesting to see which posts people are searching/reading. In the near future I’m going to add a new page that has a list of all of the top viewed posts that people seem to find the most valuable. By far the most popular post during this time was How To Wire Your Gas Furnace To A Generator by guest contributor Rick Brodersen; it received hundreds of views daily. Plus Rick has been a great resource, he has personally answered each of the comments in the section and has been directly responsible for several people being able to heat their homes when their power was out.

Last spring Momma Bear wrote a post entitled Home-Made Reusable Sanitary Napkins. It was a valuable topic that may, one day, be very relevant to almost half of our population. Recently “Kate” wrote in the comments section of that post about menstrual cups. Her knowledge and experience were quite extensive and she wrote a great summary. I contacted her and asked her if she’d be willing to write it as a blog post for us and she pleasantly agreed. So Monday (10/12) I’ll post the first of her two-part article on menstrual cups; first-hand knowledge is always invaluable.

Well the time for having baby rabbits came and went. Apparently, despite some maternal indications, Clover was not pregnant. She did gain weight (though we fed her more thinking she was pregnant) and she did go through a nesting phase, but no babies. Apparently it’s not that easy to tell when a rabbit is pregnant, and determining it mostly comes down to experience and knowledge (neither which we have yet). So this weekend we’ll try breeding our other doe, Artemis. I’ve done some additional reading and feel more confident about how to maximize our chances of fertilization. Who ever thought breeding rabbits would be hard??

What did you do?

Momma Bear: Our Favorite Military Things

Just to clarify (again), being in the military is NOT synonymous with being a prepper. But, it does give you an edge on preparedness. So, I thought I would highlight some of our family’s favorite military items that we use and have in our GOOD (Get Out of Dodge*) bags and/or car kits.

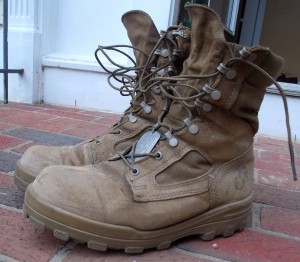
Military boots have come a LONG way since Vietnam and even Desert Storm. There are a number of  “military-approved manufacturers” these days and the boots come in a variety of styles to fit the working conditions. Gone are the days of just “steel toe” or “no steel toe”. There are quality boots for hot weather, cold weather, ultra lightweight, steel toe, and everything in between. The least expensive cost about $100. My husband’s favorites (and mind you, shoes/boots are a very personal choice) are the Bates Durashocks Hot Weather boot, which run about $140. These are a medium weight, suede boot in a natural leather color. He wears these even in cold weather because he says the cold weather boots make your feet sweat unless temperatures constantly stay below 35 degrees. Around military bases there are still shoe repair places (cobblers), so it is common to have your favorite boots resoled and repaired rather than buying new ones.

When it comes to staying warm and dry, layering is the best method. Two invaluable items, in the military, for this are: Gore-Tex and liners. Gore-Tex is a high-end trademarked fabric used for making outer apparel water-proof and breathable. Most commonly you will see these as big, hooded camo jackets with matching pants. These can be expensive when purchased for personal use, but can be found used and are truly worth their weight in gold. The second component, which you can also find used–and these are inexpensive–are the jacket and pants liners. These are made of a ‘poofy’, olive drab, quilted fabric very similar to a parachute. They are very light weight, easy to compress, and excellent for layering under coats. We purchased a 10-pack of used jacket liners for about $35, including shipping, from eBay. I personally am terrible about NOT wearing coats, even in the winter, so I keep a couple of these stashed in my kit in the trunk of my car.

The last thing I will mention is the military poncho liner, affectionately known in the military as a “wooby”. It is made from the same parachute type quilted fabric as the jacket/pants liners. It is also easy to compress and pack along. BUT, in my opinion, it’s greatest strength is that things don’t stick to it. That means I can use it in sand or dirt, then just pick it up and shake it off. Even pet fur tends to just slide right off. Also it will not only keep you warm, but when used in a warm climate it feels cool against your skin (you won’t sweat up against it). Since the military changed to a digital camo pattern, there are plenty of these for sale in the outdated “woodland” camo pattern. They can be found online from about $10-30. Our family owns several, keeps them in our GOOD Bags, and also packs them along whenever we travel.

All of these items are easy to find online through military supply sites, or eBay. Most of them originally came from military sources; when the military discontinues items, they put them up at bulk auctions and people buy them in large lots (for example “400 mixed size jacket liners”). Dealers will buy these large quantities and then resell them in smaller lots or even individually, thus giving you access to genuine military-issue gear.

Building a good GOOD kit/BOB doesn’t have to be expensive or fancy, even when it comes to things to keep you warm and dry. You can get some pretty good deals using old military surplus items. Imagine, your very own veteran wooby could be just a mouse click away!

(Friday: What We Did This Week To Prep)

*A complete list of acronyms used can be found in the ‘Check Here…‘ tab at the top of the page.

What We Did This Week To Prep 7/20/12

Packing For The Trip

Not much happened this week, prepping-wise, because we were in Colorado visiting family for a chunk of it. Sarah and I went down for five days with the kids, and the kids are staying another week with their grandparents and cousins.

When I was packing for this trip–as I did for our Las Vegas trip last month–I pondered what I could bring to help me be as prepared as possible while traveling. Obviously on any trip like this you can’t prepare for a major disaster (if you think there is likely to be a major disaster maybe it’d be better to just stay home); you can be more prepared for minor problems though, and minor problems are far more likely to happen. We try to avoid checking bags, both because it’s a hassle and most of the time costs extra; so we’re more limited to what we can bring. Since we were going to be staying with my parents I wondered if I really needed to bring much of anything. Then I remembered that we were going to be renting a vehicle and doing a lot of driving around, and of course there wouldn’t be anything extra in a rental vehicle.

So I started with our ‘five basic needs’.

  • Food: I kept the four power bars in my bag, but on a trip like this going without food isn’t too big of a risk.
  • Water: I have a 3-liter CamelBak and a 750 ml water bottle in my pack (redundant). Enough for a day trip for myself and to share as needed. The kids each had their own water bottles.
  • Shelter: It’s summer so I took out the fleece jacket, rain jacket, and warm gloves, but I left in the thermal shirt and stocking cap. I also had leather work gloves and a small tarp.
  • Security: Again with just carry-on luggage you’re very limited: no knives, no pepper spray, no firearms. I do carry a heavy chain with my pack to secure luggage as needed, it could be used as a weapon if necessary.
  • Energy: I have a flashlight and a headlamp in my pack, both use AAA batteries; I also have extra AAA batteries and a cell phone charger. I took my fire starting kit out, but left in a couple of lighters.
  • Medical (6th basic need?): I have my personal trauma kit and then a back-up first aid kit with extra supplies. Excessive? Maybe. But I do have the knowledge and training to take care for those around me and I’m the one everyone will come to. I also carry a sampling of OTC meds.
  • Hygiene: I always have a towel (per Hitch Hiker’s Guide to the Galaxy), a ziplock bag of wet ones, and some antibacterial wipes.
  • Miscellaneous: I have a few basic hand tools, zip ties, some duct tape, para cord, paper and pens, and a couple carabiners.

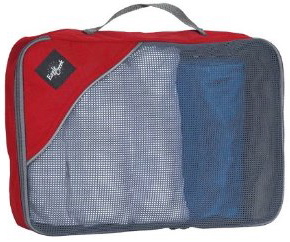
My bag is always checked VERY closely by the TSA, but it’s now been vetted in the Seattle, Las Vegas, and Colorado Springs airports. And yes, in addition to this I did fit my clothes. After years in the military, and long motorcycle trips, I have learned to pack lightly and very compactly. I can fit most of my clothes in an Eagle Creek Pack-It Cube which fits nicely in my pack’s main pocket.

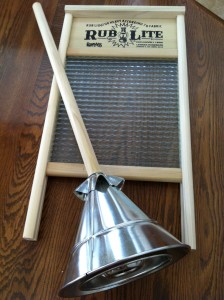
Also this week, the hand washing laundry stuff we ordered arrived. We are now proud owners of a Rub-Lite Glass Washboard and a Rapid Washer. Next month we’ll get a couple of wash tubs and probably a hand wringer. Then we’ll be ready to start learning that skill set.

What did you do?


An RV as a Bug-Out Location?

Recently Sarah and I have been discussing the value of a recreational vehicle as a portable Bug-Out Location (BOL).

Some background: In the future (probably two to five years) we hope to get a five to ten-acre homestead in rural Western Washington. For now, because of family, finances, and life circumstances we live in a suburban neighborhood.

Risk assessment of the area we live: In the prepper world there’s the discussion of when and why you’d bug-out or bug-in in a disaster. Each family needs to assess the risks/perils of the area they live in. Our house is in a relatively safe location: no risk of floods or landslides, earthquake damage would be negligible, too far from the coast to be affected by tsunamis, we don’t get tornadoes, forest fire risk is low and wouldn’t reach us, we’re far from urban populations and their potential civil unrest, and it never really gets too hot or too cold here. Although Mount Rainier is an active volcano, as of 2010 there was “no evidence of an imminent eruption“. Sure an eruption would be a huge deal, but even if it did erupt we’re not in a bad location: we live on a hill top community any lahars would be channeled through the valleys around us, and most of the ash would typically be blown south with the prevailing winds (we live north). Our only real complaint about our current location is the small size of our property, and the density of the neighborhood population; we’ve worked hard to get as prepared as we can here, carefully using the space and resources available. In summary, we feel that–short of a complete collapse–we could stay here.

If there was a complete collapse where would we go?: At this point, probably to nearby family or friend’s home. That’s where the RV idea comes in. If we did have to go somewhere it would be a better situation if we had our own living space; very few homes have enough room for six additional people.

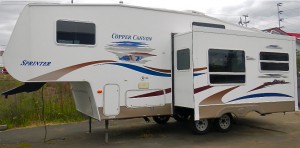
There are basically two major classes of RVs: There are motor homes (the kind where the vehicle is part of the unit) and travel trailers (the kind that are towed behind a vehicle). Both are available, in decent condition, for under $10,000 (used). After weighing the pros and cons we’d go with the travel trailer option and get a medium to large 5th wheel trailer. Having decided on a 5th wheel trailer means we’d have to have a vehicle capable of towing it. We don’t have one yet, but are actively searching for a 3/4 to 1-ton diesel truck so hopefully that won’t be an issue soon.

Advantages: While $10,000 is a lot, it’s not bad when compared to $100,000 to $200,000 for a true homestead/BOL. It gives you the flexibility of where you go in a disaster; what if your BOL isn’t an option? It also allows you to use it for camping or road trips (and you should, at least for practice), so it’s not like it’s useful only if the world collapses. Plus it could be pre-stocked with additional preps and keep in a secure off-site location — so if something did happen to our home we wouldn’t lose everything (repetitive and redundant).

Another thought is that it could be used during a pandemic as a quarantine area. Whether that means pulling it in front of our home, or on our future homestead.

Review the risks at your location, and your BOL options; a mobile BOL can be a good, flexible, in-between option.

(Friday: What We Did This Week To Prep)

Teaching The Kids (& Learning More Myself) – Practicing With Escape Ladders

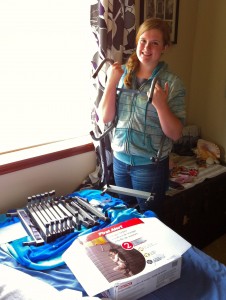
Recently we purchased two second story escape ladders. As previously mentioned we have two bedrooms with windows that are about 14 feet off the ground, our master bedroom and Emily’s room. We bought a ladder to keep in each room.

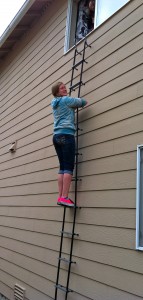
Because buying stuff is easy and it’s a good idea to practice with emergency items before you need them, we pulled the ladder out of the box and actually used it. I had Emily do most of the set-up because it will be in her room. I had to start off by explaining to the younger girls how to remove a window screen (don’t assume). Emily then hung the ladder handles from the window ledge and released the ladder to fall, against the side of the house, to the ground. Once I determined everything looked right and was secure, Emily climbed through the window and down the ladder. The rope ladder moved around a lot as she climbed down it, and she was more than a little nervous, but she did it. She was followed by Alison, also nervous, and Ryan, not nervous (Brynn was away at camp). We discussed that, in an emergency, Ryan would go last after ensuring everyone was out okay.

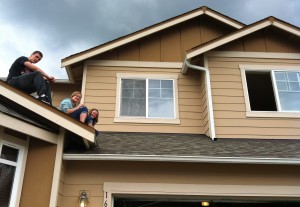
We then went to Alison and Brynn’s room which opens onto the roof above the garage (Ryan’s is next to theirs and opens to the same area). The screen was removed and the kids climbed out onto the roof. I was on the ground. My original plan was to have them hang from the roof and drop to the ground; having Ryan go first so that he can help the girls. After looking around I realized there was nothing safe to hold onto, the gutter was too weak and there were no other suitable edges. We decided to try the ladder, attached to the girls’ window down the roof and off the side. That worked okay and the kids were all able to climb down. I considered getting more ladders for those rooms but decided they probably weren’t necessary. We came to the conclusion that they could get out the windows, away from any potential danger, and wait on the roof for assistance; if they had to they could hang and drop from the gutters (but we didn’t want to practice this because we believe the gutters would be damaged from the weight).

It wasn’t rocket science to figure out how to use the ladder, and yes had there been an emergency we could have figured it out then. But the best time to learn a new skill, or a new piece of equipment, is not when an emergency is happening. There will already be anxiety, stress, and fear; possibly darkness, cold, and rain to deal with. Knowing how to use your emergency equipment will give you, and your family, the confidence needed to get through the disaster. And while a sudden life-threatening fire while we’re in the house–the most likely threat to cause people to escape through a window–is not a likely event, it is possible. We decided it was worth the purchase and practice to allow us to be prepared for that–or another similar–eventuality.

(Friday: What We Did This Week To Prep)

Be Sure You Have Alternate Routes

Work Evacuation Plan Revisited
– –
Several months ago I wrote a post entitled, But I’m Working Now – Creating Your Work Evacuation Plan. As mentioned, both Sarah and I commute to Seattle for work (separately, our work schedules only overlap in the afternoons), and we only work about a mile apart. We had made a plan for how we would meet up with each other in the event of a disaster.

So if we’re both there [in Seattle], she would come up the hill to where I work. My workplace is more secure, further from the water, and away from the downtown congested high-rise area. In case I have to leave work also, we’ve discussed what street she would walk up and what side of the street she would be on.

Recently we had to revisit, and revise, that plan.

So the ‘great work-evacuation plan’ that Sarah and I had come up with failed to take into account that minor detail. And just to clarify, it would be incredibly difficult–if not impossible–to cross the freeway without the overpass bridges; it’s too far down and up vertical cement surfaces. Back to the drawing board…

There are several roads that travel across the freeway going from downtown to Capitol Hill; our primary choice was Pike St. and our alternate was Pine St. (parallel streets). So recently I walked both roads with our plan in mind. Pike St. appears to be a very secure overpass–the convention center is literally built over the freeway there–it is a short bridge, and it is supported as well as possible; Pike St. will still be our primary route. When I looked at Pine St., I found that it is the longest overpass in the area with another street that intersects it right above the freeway; we felt that would be a poor route with a much higher probability of failing. We looked further and determined Seneca St., a few blocks south, is well supported and another short overpass bridge and chose to make that our secondary route. Our third choice is 8th Ave., a tunnel that runs underneath the convention center, then over the freeway. Once across the freeway, we’d attempt to make it back to Pike St. to continue to one of the predetermined meeting points.

I realize this is a lot of detail for anyone not in our situation and makes little sense to anyone not familiar with Seattle. But the point is: Determine your routes of evacuation and make a solid plan, then double and triple check your plan for flaws. Start by mapping it out, then make sure you drive (or walk) your evacuation routes both to familiarize yourself with them and to look for potential problem areas. When you develop your evacuation plan choose three routes, and have three potential meeting points. If you ever need to put your evacuation plan into action, especially if that plan is required to allow you to meet up with your family members, it needs to work.

(Wednesday: Momma Bear)

Momma Bear: Getting Out of Dodge B.Y.O.B.O.B.

Bring Your Own Bug Out Bag – How Our Family Did It
– –
For most preppers, the first baby step we take is to create a bug out bag (BOB). For our family, living outside of Washington DC and very close to the interstate (which is sure to be packed instantly); with the potential bug-out being done without my active-duty husband, we took this step very seriously. Although my husband likes to travel light in the field (with the military), the BOB has to encompass a plethora of unknowns; with a 72-hour usage as the goal for packing. How much water should we take and how much water purification? How much gear should we plan for sleeping rough? How much food do we want to carry? What if it’s cold? What might we need along the route? The list pretty much goes on and on. And with everything, as we practice our drills, we tweak and adjust the items in the BOBs.

But once you accumulate all that STUFF, how do you divide it up between your family members? How do you ensure that each pack is sufficient should you become separated from the rest of the family? With my husband included, we have two men in the family. But us girls… we are kind of wimpy backpackers. Our daughter may be 5’7” tall, but she only weighs 100 pounds on a good day. So we have had to keep the girls’ gear lighter, packs smaller, but still able to meet our needs. We opted not to carry sleeping bags, but instead have military poncho liners and also the foil emergency bevy sack. The heavier items, that were not quite as essential, were distributed between my husband and my son. For instance, do we need a tent on the go? Not really, but life is a heck of a lot nicer in a rainstorm when you have more than a poncho for cover. And my husband can certainly shoulder that extra weight a lot easier than one of us girls can.

Other things that we customized in our bags were the first aid kits, the food items (curse those picky eaters who refuse to eat tuna!), and the quanity of fire making materials for each family member. For instance, our daughter suffers terrible migraines so her kit has special meds in it, plus sunglasses. Our son is allergic to insect bites so he has insect repellent, Benadryl, and cortisone cream. With the meds, I broke them down into tiny little baggies and wrote the directions on the outside with sharpie marker, including how often they should take the meds. And because our kids have only recently begun practicing fire making, they both carry lots of matches, lighters, a magnesium starter, as well as a ton of lint and other light-weight combustibles.

Having a Marine for a husband has assuredly made the BOBs an easier task. Some things I had never considered, or would not have considered as a huge necessity, such as laminating our maps. In case the SHTF, we are looking to move south, away from D.C. We have maps of both Virginia and North Carolina, that we got for free at the visitor centers on the main interstate, and each of us has one in their BOB (kids included). The other thing that the military training helped with was packing the packs. The military utilizes packs with lots of pockets and my husband was positively insistent that certain things go in those easy access pockets: first aid, water, food, weapons/tools. Other things, especially stuff you have multiples of, is removed from the BOB and carried on your person: identification, weapon, fire making items, any item that you could not do without (like migraine meds). Our family utilizes three different types of packs, so when we loaded them up everyone was responsible for their own; that way everyone knows where there things are. And, of course, we regularly break them down and repack them to keep familiar with the gear.

Our household also has pets, which we have not been taking into consideration for bugging out. Unless we are driving out, the cats will pretty much be left to their own devices, but the dogs will go. It is pretty unrealistic to think that we can carry enough food and water for them too, so we are looking to put them to work for us. All of our dogs are pretty good walkers (we have Jack Russells and Weimaraners), and we are looking to train the big dogs in both pack carrying and carting. But I will post about that another time.

Like all our prepping, creating your BOB. requires good planning. Again, a good BOB is designed for 72 hours of mobile usage – getting you away from a SHTF scenario. Focus on who, what and why. Who is the bag for? What do they need? And why do they need that particular item? Last of all, practice walking with your pack and readjust your items/bag as necessary. You want to be well prepared to survive, but you don’t want to break your back because you brought the kitchen sink with you. Happy prepping!

(Friday: What We Did This Week To Prep)

Sarah’s View: Traveling For Work

This week I am travelling to Minneapolis for work. I’ve traveled for work a couple of times before, but never for a full week and not since Trace and I began prepping. Traveling offers a whole new set of “what ifs”, and not even of the SHTF* variety. Simply, what if the plane is delayed? What if they lose my luggage? What if…? And then there are the disaster what ifs.

Luckily I was able to mitigate many of the life ‘what ifs’ by taking a nonstop flight (if it’s delayed, it’s not a big deal as there are no connections I need to make) and I decided not to check any luggage. The luggage question, however, was one Trace and I discussed; not checking makes sense for many reasons – cost, time, risk (of loss) – however, from a prepping point of view it would make more sense to check a bag. By checking a bag I would be able to bring my pepper spray and my Gerber EAB knife both part of my EDC. We looked at the pros and cons of checking a bag, as well as at the likelihood that I would need those items, and decided not to.

There were a couple of reasons we came to this conclusion. First, my hotel is less than two blocks from where I’m working. Not only that, but Minneapolis has a wonderful system of skyways, which, for me, mitigated the need for either item. The skyways were also the reason I chose to leave my winter coat at home. What?!? Minneapolis in March and no winter coat? The weather report was uncharacteristically good – upper 40s to low 70s– and I did bring a number of layers that would keep me warm should the weather turn.

I did, however, decide to bring my good boots. If anything were to happen while I was here, it was important I be able to walk, through wet ground or snow if necessary. My sister works in the other Twin City, St. Paul, so, if the SHTF while I was here, my plan would be to get to her and/or her place of work. Obviously this is a fairly loose plan, but at least it’s something. I’ve planned for the likeliest scenarios (snow/bad weather, flight delays, lost luggage) and thought about how I would respond to something bigger.

All in all, for better or worse, I didn’t really bring any extra “get home” stuff. I have my work backpack which also serves as my GHB when commuting to and from work normally. Ironically, not only did I not add to it, but as I said, I took out my pepper spray and EAB knife (both of which usually “live” in my backpack). I also took out my mini-leatherman and any other non-TSA approved items. I did bring my towel, my headlamp with extra batteries, a few protein bars, and water bottle. Unfortunately I don’t have much that can be used as a weapon, however, I am prepared to be somewhat self-reliant and mobile, if necessary.

As the wife of a good prepper, I don’t have to think too much about our preps on a day-to-day basis (thank you Trace); he takes care of most (all) of the worry and the coordination. I help on an as-needed basis with logistics, planning, and allocation of finances. However, as the one travelling, alone, I was forced to think about what was important to me and what I needed with me in order to feel prepared and as safe as possible.

(Friday: What We Did This Week To Prep)

My wife Sarah writes, from a prepper’s wife’s point of view, ‘Sarah’s View’ the second Wednesday of each month. See her other posts: Time To Order Seeds, and “What Do You Think of All This?”.

*For my list of abbreviations and other information, open the above ‘Check Here…’ page tab.