Sarah’s View: Goats

As the possibility of our own property becomes more and more real Trace and I have been talking about what livestock we want. We already have Kate, our border collie, as well as the rabbits. We have talked about getting chickens shortly after we move. The other animals we’ve talked about are an additional dog, bees and goats.

GoatMilkProducts

I’ve been doing more research on goats. We look forward to having goats ‘browse’ on our property and help keep down weeds and other unwanted plants, however, our primary goal with goats is to use them for milk and other dairy products – we hope to learn to make our own yogurt and cheese. We would also like goats that are friendly, if we’re going to be milking them we want them to not dislike us! Plus, I think it makes sense to look for a breed known for higher fat milk; a higher fat content tends to result in creamier products (duh) and neither Trace nor I drink much milk so the higher fat content isn’t an issue there. Finally, while we want a good milk producer we don’t want to be overwhelmed by the amount of milk we get; we have no desire (at this time) to become a dairy.

To this end I wanted to determine how owning and raising goats works as well as figure out the best breed for our goals. As with most things there are a ton of resources on the web. And honestly, with goats I had start at the basics. What does it take to care for a goat? How do you get milk from a goat? What do you do with the babies? Because it finally gelled for me that in order to have a female producing milk she will have had to have a kid.

The first couple of sites I ran across talked about bottle-feeding the kids. This had me thinking second thoughts about goats all together. I have no desire to bottle-feed baby goats. After reading more I found a number of people who allow the babies to remain with their moms until their weaned and either don’t milk the does during this period or only milk once a day. Phew. I can handle that, especially since the kids are old enough to be sold around 8 weeks yet the does will produce milk for 10 months.

Nigerian DwarfsOnce I was feeling good about having goats again, I started perusing the various breeds. There are about 7 to 8 well-known dairy goat breeds in addition to any mixes you might run across. They all have their pros and cons, but I have to say that I’m pretty hooked on the Nigerian Dwarf Goats. First, they’re cute, not that this should be a deciding factor, but it did make me more interested in reading about them. Second, they’re smaller than the other breeds. For me, at 5’3”, a smaller more manageable goat seems like a positive. Now, we may decide that the Nigerians are too small (between 16” and 23” usually) especially for Trace, but we’ll see. Third, they’re very friendly. And finally, their milk is between 6 – 10% fat (other breeds are in the 3 – 4% range).

We still have a few steps between now and getting goats, most glaringly actually closing on a homestead. But I’m definitely excited at the prospect of having goats and being able to produce our own cheese and yogurt. Can we do goat’s milk butter? Definitely more to learn.

If anyone has any thoughts or advice on goats, please let us know!

GoatMilkSign

Efficient Energy Usage, RE: Cooking Beans

Most preppers, our family included, have a fair amount of dried beans in their food storage. If you store beans you need to know how to prepare them.

Quick review, there are two steps to preparing dried beans: soaking and cooking. Soaking (typically overnight) allows dried beans to absorb water and rehydrate; cooking beans makes them tender and digestible. The beans need to be brought to a boil, then reduced to a simmer for 60 to 90 minutes.

As our family’s preparations become more involved, I find myself focusing more on the ENERGY aspect of our basic needs (food, water, shelter, security, and energy). While I’m not planning on powering all the electric amenities of our day-to-day lives in a power outage, we plan to power some basic lights and small appliances, have a warm house, and BE ABLE TO COOK FOOD.

Our family likes beans (and rice), and they are a core part of our long-term food storage, so I wanted to be able to prepare them as efficiently as possible. Cooking beans, even at a simmer, for 60 to 90 minutes uses a fair amount of energy resources.

dutch oven on induction cooktopTo increase our energy efficiency we recently bought an Aroma Induction Cooktop (Costco $50).Think of it as a very efficient (cooks/boils up to 70% more faster than traditional stove tops); very safe (immediately cools when the pot is removed) hot plate. During a power outage we’ll only have to power the induction cooktop, not the whole stove, to use an electric burner.

Our family’s plan–during a power outage–is to run the generator for a couple of hours in the morning to: recharge our battery bank, charge any rechargeable items, run the blower on the furnace, run the deep freezer, and cook food for the day.

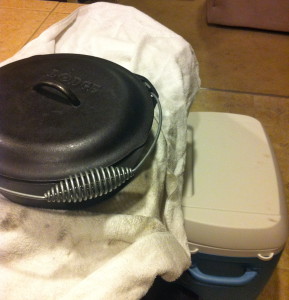
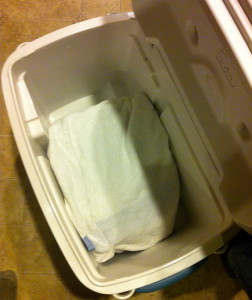
To prepare our beans we would soak them overnight so they are ready; then with the generator running, bring them to a boil in a cast iron dutch oven using our wrap it in a towelinduction cooktop (FYI induction technology only works with iron/magnetic metals). As soon as they begin boiling, turn off the cooktop–and here’s the energy savings part–wrap the dutch oven in a thick towel and place the entire dutch oven in a large cooler. Though we traditionally use insulated coolers to keep things cool, they will also keep things warm. (Fill any open spaces in the cooler, with a towel or newspaper or anything, to maximize heat retention.) Leave the beans in the cooler, and they will continue to cook, for about three to four hours.

We practiced this the other day and it was smooth and easy. place it in the coolerRemember, in a power outage any power you have comes from sources you have to provide, and–as opposed to traditional grid power–it is finite based on the amount of fuel you have stored. Plan, beforehand, to use this power efficiently.


Nuts & Bolts by Nick: Home Center EDC Kit

by Nick Romaniello -

I spend an exceptionally large amount of time at hardware stores, and big-box home centers, acquiring materials for my work. I’m usually rushing through with a list of specifics but on occasion I have a chance to browse and consider items for use outside of the scope of my business. When looking through the eyes of a prepper, stores like Home Depot, Lowes, and True Value are a goldmine of survival and readiness gear. Big ticket items like generators and chain saws are obvious, but there is a wealth of smaller preps hidden throughout the shelves that won’t break the bank. If you haven’t had the chance, it’s well worth the time to visit your local home center and just explore the isles.

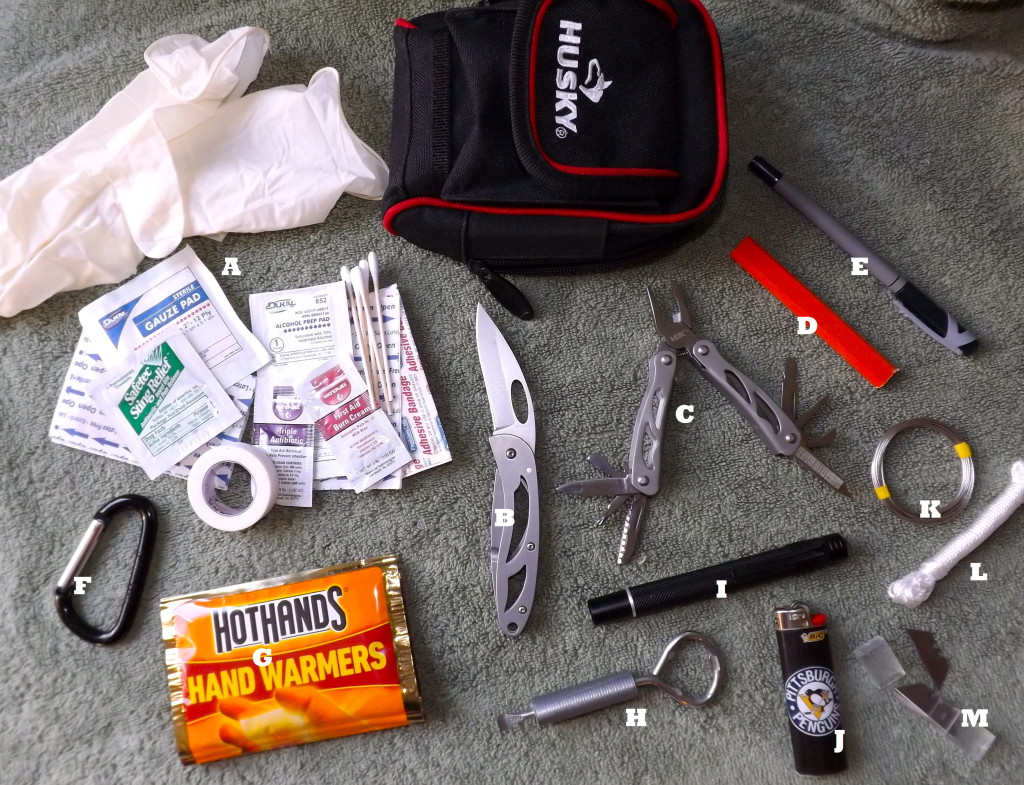
To put this idea into practice I decided to assemble a thorough, yet budget-minded, Every Day Carry (EDC) kit from items only available at the Home Depot I frequent. Here is what this kit contains:

  • A. First Aid Supplies: I purchased a small first aid kit, and then paired it down to what was practical for this kit.
  • B. Folding Knife: Any Boy Scout will tell you not to leave home without one of these.
  • C. Mini Multi Tool: Pliers, screwdrivers, wire cutters, file etc. Multi tools pack a lot of function into a small package. This mini multi tool came packaged together with the knife above and a full size multi tool on clearance for $5.
  • D. Carpenters Pencil: Thicker and more durable than a regular pencil, it could also be carved into a toggle for fishing or whittled into a pile of dry shavings for tinder.
  • E. Ball Point Pen: You never know when you will need to write something down.
  • F. Carabiner: Useful anytime something needs to be clipped to something else.
  • G. Hand Warmers: It’s January in Pittsburgh so can you blame me for throwing a couple of these into the kit? In the summer you can delete these to make room for a sweatband.
  • H. Paint Can Opener with Duct Tape: Paint can openers are usually free when you buy a can of paint and are handy for use as a miniature pry bar. The top is a bottle opener. Duct tape is wrapped around the middle for easy access.
  • I. LED Flashlight: This LED penlight outputs 23 lumens, far better than the 2 lumens of the comparable xenon bulb penlight. Plus the bulb never needs replacing.
  • J. Lighter: Fire good!
  • K. Picture Wire: 9 feet of 40lb wire can make some pretty strong improvised repairs and wont be affected by heat.
  • L. Masons Line: Basically a heavy duty braided twine that can become anything from a shoelace or a belt to emergency fishing line.
  • M. Mini Razorblades: Five of these come in a protective case for $.99 and weigh almost nothing. They would be useful for any extremely fine cutting tasks (particularly medically related) that the folding knife is too bulky for.

DSCF3221

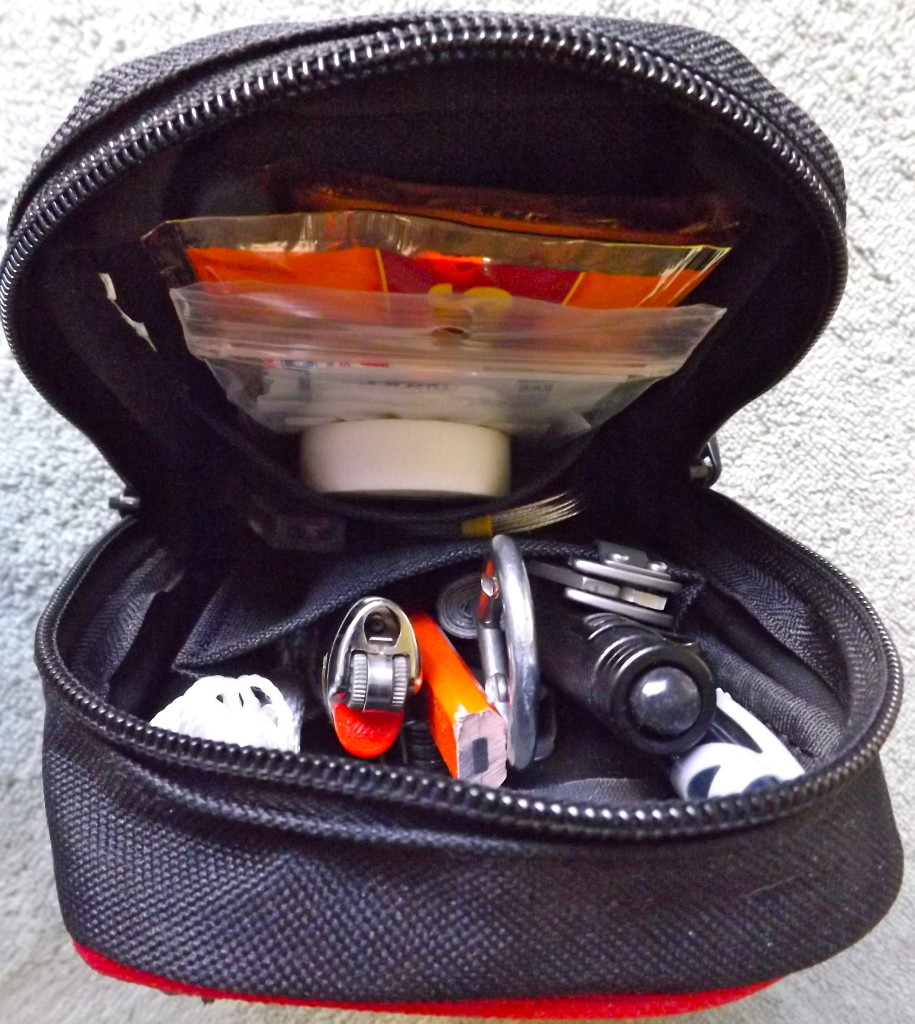
The whole kit fits into a sturdy belt pouch and cost around $35.

DSCF3225

EDC is a personal matter and can range from keys and a wallet to handguns and survival knives; so don’t take this necessarily as what I think you should carry but rather as an example of some of the resources available from places you may not have previously considered. While specialized survival gear sites and catalogs are endlessly fun to look through, don’t forget the local hardware and building supply spots. There are plenty of wallet friendly options for the thrifty prepper. What can you find that will help you be prepared?


Momma Bear: Thoughts On The Flu

My worst-case SHTF scenario: Facing a global pandemic. A pandemic that cuts all supply chains, destroys public services (electricity, water, medical, and government) and throws civilization into uncontrolled chaos.

sick w fluUnless you have had your head in the sand this past month, you are probably thinking about, and watching, this current flu epidemic. I took this as an opportunity to study up on the biggest global bout with the flu, known as the Flu of 1918 or the “Spanish Flu”. We’ve all heard how tons of people died from this flu (it killed 20 to 50 million people — 1 to 3 percent of the world’s population at that time). But there were three giant facts that surprised me:

  • This flu actually lasted two full years (1918-1920), and had three specific “waves” of infection at a time when the world population was not very mobile.
  • It killed quickly (in some instances only one day of symptoms)
  • It killed healthy people in the 20-40 age group (not the norm for flu related deaths).

We are a million times more mobile, as a population, than we were in 1918 so our transmission rates are much higher. Although we have modern medicines, we are also starting to see resistance to those medications. A pandemic is a very believable SHTF scenario.

stop the fluOur family got hit with the flu over the long holiday. Because we instituted some severe tactics, only two of us got moderately sick, one was minimally ill, and three escaped unharmed. When the first person became ill, it started quickly with chills, 102+ fevers, and a croupy, nasty cough. Initially thinking it was just a severe cold, he didn’t go to the doctor right away so he missed the two day window for Tamiflu but he did test positive for flu. The first thing we did was to isolate him to his room. When he wasn’t in his room he wore a mask, hand sanitized multiple times, did not touch any food/cupboards/fridge to serve himself, only used disposable plates and cups, and we sanitized the counter area where he ate. Medications he took, to treat the symptoms, were ibuprofen and MucinexDM (12 hour doses of guaifenesin and dextromethorphan) with moderate success (but he still felt crappy). The second person, our daughter, became ill by accidentally drinking from the first person’s cup. Like the first person, we isolated her at home and treated her with the MucinexDM. Unfortunately she got the vomit portion of the flu and she DID have to go to the emergency room for an IV to treat the dehydration migraine and vomiting. The last person to become ill only suffered from cold symptoms and chills. In all three cases, the people have suffered from a long term dry cough that has taken weeks to go completely away.

Isolation is the best method for treating a big flu outbreak. But in America that is something we just aren’t good at. We are very mobile and we insist on working, shopping and doing pretty much everything while we are sick (all the while spreading our germs as we go along). In Japan though, when we had a big flu outbreak, it was routine to close a public school down (or businesses or whatever) for a week and decontaminate it; while allowing the virus to, hopefully, work its way through the population AT HOME. What a great way to keep from infecting more people!

Medical masks are also key in reducing contamination rates in a mobile population but most people misunderstand how they work. When sneezing or coughing, germs can travel in the air up to six feet or so and remain active for hours. Masks are primarily used to keep an infected person from spraying their germs outward, NOT to prevent a person from breathing in germs. When you see pictures from Japan of people wearing masks, those are the sick people going about their lives while limiting their illness from transferring to others. This is a culture that is centered on being considerate and concerned with how their behavior affects others and it is considered rude to cough and hack in public and NOT wear a mask. Masks are available everywhere in Japan, including a big section at the dollar store where they come in all different sizes, colors and cartoon characters. But here in America you rarely see anyone cover their cough with a mask and most often that masked person is looked down on as being some sort of germaphobe. Our own cultural norms work against us when it comes to how we deal with illness.

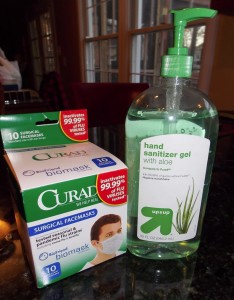
mask & sanitizerIn a medical study testing the efficiency of masks at preventing an infected person from spraying their germs, it was found that N95 masks had the same effectiveness rate as a plain medical mask at suppressing the passing of germs into the air through coughing and sneezing. So the good news is that you can stock up on the plain and less expensive masks! You certainly can choose to wear a mask in an effort to prevent breathing in germs, though the masks are not air tight and germs can enter from the sides. You are also still susceptible to any surface contact with germs; they can live up to eigh hours on surfaces so it is important to wash your hands regularly, use hand sanitizer and clean any and all surfaces touched by an infected person. Similarly, most people are contagious with the flu for a day or two prior to experiencing symptoms. If you go out in public, mask or not, you are going to come in contact with the virus.

Our bout with the flu was by no means what I would term as a severe case because in both instances the fever was reduced by medications and overall the symptoms were manageable at home. My daughter suffers from recurring migraines so we do not necessarily consider her ER visit an acute occurrence of the flu. All that said, we were prepared to treat the flu here at home for an extended period of time if necessary, but how many “average citizens” have a stock pile of food, meds, masks, and sanitizer in their closet? Keep up the good preps folks, and cover that cough!


Sarah’s View: Community

meet the neighborsThe topic of community comes up quite often in the prepper world – what does forming community really mean? How do you develop it? What is too much? Too little?

I recently read a story on NPR, The Key To Disaster Survival? Friends and Neighbors. This got me to thinking more about this topic, and I agree even if it’s somewhat loose, a basic awareness and familiarity with neighbors is a good thing.

extrovert vs introvertBut in our house I’m the introvert. And, to clarify, when I say introvert I mean in the sense that I gain energy from being alone — I recharge in solitude. An extrovert (i.e. Trace), on the other side, would be someone who gains energy from interacting with others. Most days, when I get done with work, all I want is to curl up and not talk to anyone. I want to sit and be quiet and recharge.

For me, the idea of forming community makes sense; I completely agree that it is so important to be a part of a group that helps each other. However, in reality the last thing I feel like doing is taking time to chat with the neighbors when we pass them going to check the mail, or when we’re out doing yard work. I just want to be left alone.

In addition to my personal desire for solitude, I’m also struck by the United States’ emphasis on the other side of the coin – independence. Being independent is viewed and portrayed as a sign of strength; asking for help is viewed as a sign of weakness. We are raised to be suspicious of those who can’t do it on their own; to see those who need aid as a nuisance or even a threat. And, as preppers, there could be a real threat if we have supplies, power, a refuge and those around us do not.

Meet-Neighbors.jpgSo, how do we reconcile all of this? There is the need (and desire) for a community. There is the need for solitude. There is the pride of independence. There is the threat of strangers. I think the key–and it’s something Trace does well–is to form relationships simple at first, and develop them over time. Start with waving at the neighbor as they unload the groceries. Then maybe say hi and ask who they’re rooting for in the game when you see each other the next time. Get to know their names, a little about their family, where they work. Eventually you might even ask them over for a backyard BBQ.

Maybe it only gets as far as a simple “hi” when you see them. That’s okay. The two of you have moved from the unknown (strangers) to the known (passing acquaintances). For humans moving out of the realm of strangers is incredibly powerful on a very basic level. I can barely remember our neighbors’ names, yet I know what house I’d go to if I needed help, or to just borrow a cup of sugar. I don’t know them well, but they are not strangers.

Being prepared isn’t just about stuff or even skills, it’s also about stretching ourselves to reach out and meet new people, thereby forming the community that could be the difference between success and failure.


Goals For 2013

2012 was the first time I had publicly posted my goals. Last week I reviewed those goals: some achieved, some postponed, some re-prioritized.

goals-for-2013So here it goes for 2013.

Most of our goals revolve around finally buying, and moving onto, our homestead. We’ve done a lot here in our rented home in suburbia, with our 1/10th of an acre yard (living with strict HOA rules) and two-car garage. Not that we’ve done everything we can, but we’ve done about all we’re likely to do. We are in a pretty good situation prepardness-wise–with all the above limitations considered–but now we’re ready to take the next step.

We’ve been looking for a homestead for the past year and a half, including having an offer accepted on one we really liked — only to have the seller back out. But both Sarah and I really feel like it’s time. We want to own a home on a rural piece of property. We have a relatively small budget, because we want to keep our mortgage low so we can easily live within our means, but we believe it’s enough to find what we are looking for. That being said, we can pretty much guarantee there will be additional expenses, and a lot of sweat-equity to make it properly livable. We have a limited range, we don’t want to move very far from where my girls live with their mother. We’d prefer the house to have at least three bedrooms and two baths, with a garage. The property needs to be mostly usable, at least half forested, preferably with water on it. We’ve got some leads we’re working on and hopefully everything will fall into place soon.

Goals (assuming we get the homestead)

  • Add more livestock. The first year in our new place we’ll probably just add chickens (in addition the rabbits we already have). Future years may bring ducks, goats, bees, and/or pigs — we’ll see.
  • Get a second working dog. Most likely a Great Pyrenees, to help with security of the livestock and property.
  • Learn more about permaculture design (developing sustainable, mostly self-maintained, agricultural systems based on natural ecosystems), and begin incorporating it into the property.
  • Begin planting annual fruit (and nut) bearing trees and bushes.
  • Get at least some type of garden in, and actively work on developing additional gardening spots through clearing, composting, and mulching.
  • (if there’s water on the property) Learn more about, and hopefully begin developing, a micro-hydro system to develop electricity.

1882313856_1356989402Other Goals

  • Learn to pickle vegetables
  • Continue to blog, at least weekly
  • Learn to preserve, and use, herbs in a variety of ways
  • Develop proficiency working with Kydex

Goals carried over from 2012

  • Learn to make yogurt
  • Learn to brew beer
  • Grow cabbage, then make sauerkraut
  • Get extra rice and beans to share with neighbors (if/when needed)
  • Learn to identify local plants (especially ones on the homestead)
  • Learn more about solar power, evaluate feasibility

What are your 2013 goals?


Review of Goals for 2012

http://www.dreamstime.com/-image24241030Accomplished Goals in 2012

Major Goals

  • We are now debt-free — This goal took over two years of effort, and more patience and austere living than we were use to (but interestingly we seemed to adjust to it and now it’s sort of the norm). But Sarah is great at numbers and budgeting, and we were able to do this relatively painlessly. There are some exceptions, but we achieved what we set out to accomplish.
  • We own two female and one male American Chinchilla Rabbits — Though as we’ve still been unable to successfully breed them, we’re beginning to wonder if our male will need to be replaced.
  • We bought a 2004 F350 Ford Diesel pickup truck 4×4 crew-cab with an extended bed — We saved and bought it with cash, and are now slowly completing the repairs it needs (that’s why we got it at such a good price initially.)
  • I blogged for a full year, three times a week, through September — I’m now posting less regularly now but it’s still an active, and enjoyable, part of my life.

Minor/Ongoing Goals

  • We got a pressure canner, and used it — We successfully canned turkey and broth. We’d highly recommend this to anyone who preserves food, it was easy.
  • We inspected and rotated our BOB, etc. (later than scheduled, but it got done) — This is far more of a hassle than it should have been, but definitely needs to be done on a regular basis — it’s amazing how quickly you forget what you have, and where it is, in your kit.

(I reviewed my goals Halfway Through 2012, in July, and at that point wasn’t doing to bad. But I didn’t end up getting a whole lot done after that.)

stop go back try againGoals I’ll Roll Over To 2013

  • Learn to make yogurt  — This isn’t a hard one, it just needs to get done. Our family likes yogurt and it’s a great source of nutrition and protein.
  • Learn to brew beer — Now that my friend, Tad, is back living in the area I have no excuses. We hope to get together and make beer this month.
  • Grow cabbage, then make sauerkraut — We planted it, and it completely failed (no heads developed, possible pollination problem?). We’ll try again this summer with another variety. I guess we could have bought cabbage to make make into sauerkraut — but we didn’t.
  • Getting extra rice and beans to share with the the neighbors (if/when needed) — This  is still a priority. We’ll budget for it soon.
  • Learning to identify local plants (we got the book, now we need to use it).

Goals That’ll Wait Until We Get Our Homestead

  • Adding solar panels — When everything is said and done, we live in Western Washington and just don’t get a lot of sun to make this a top priority. It’d be nice, and I hope to experiment with it one day, but there are other projects first.
  • Honey Bees — This is something we’d really like to do, but have decided to wait until we’re situated at the new place
  • Planting Ground Nuts — They take a couple of years to mature, and we hope to be moved by then.
  • Get a 1/2 cord of wood — We decided we didn’t really need it at this house. Once we get our place I’ll add “cut and stack wood” to my to do list.

So how did you’re 2012 goals turn out? Are you better off as a prepper now then you were at this point last year?

(Next week: Goals For 2013)

Green highlighted words are links to posts that cover those topics.

Nuts & Bolts by Nick: Tool in focus – Cordless Reciprocating Saw

by Nick Romaniello -

On December 26th the snow was falling fast and heavy here in Pittsburgh. I opened the curtain and saw a vehicle stuck a few houses down on my steep front road. It’s a spot where cars often get stuck in bad snow, I grabbed my shovel and salt bucket and went down to offer help. The older gentleman inside informed me that in addition to being stuck that he had a flat, and a tow truck may be hours away due to the weather. His Dodge Caravan had the spare mounted underneath the chassis held in place by a metal and plastic retainer and lowered by turning a nut inside the tailgate. The retainer was corroded into place and could not be lowered. I returned to the scene with my trusty cordless reciprocating saw. I slid under the stuck van and within moments had cut through the retainer allowing the spare tire to be removed. In no time the tire was installed, and with some shoveling and salt, the driver was on his way.

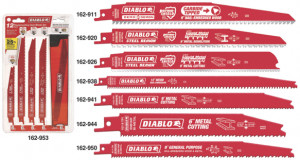
Ryobi SawzallI have a lot of tools, but in a disaster situation where I could only take one power tool it would likely be my cordless reciprocating saw. It is commonly called a “sawzall” (original trademarked name) because that’s exactly what it does. With the right blade it can hack its way through anything from metal to wood to plastics and even some masonry applications. Easier to handle and more versatile than a chainsaw and faster than handsaws, a sawzall is a good choice for emergency cutting. In construction it’s used most often in demolition and rough carpentry, but with its wide variety of blade choices the sawzall is able to step in and do the job of almost saw bladesany other saw in a pinch. A corded sawzall is more efficient for extensive work, but battery power will work where and when an outlet isn’t an option. Definitely choose lithium ion batteries over NiCad since sawzall’s are energy hungry. I will make a plug: the Ryobi One+ 18-Volt Cordless Reciprocating Saw (available at Home Depot for about $60 plus battery). I have one that, despite its hobbyist status in the tool hierarchy, has been in my professional tool kit for seven years. The One+ system has multiple tools that operate with the same interchangeable battery and is reasonably priced. A car charger is even available so that the batteries can be maintained on the road. Whichever brand or model you choose, make sure that you also purchase an assortment of blades, including a few “fire and rescue” blades which cut aggressively through a variety of materials.

It is worth mentioning that this was actually the second time I had to perform this exact same procedure on a Dodge Caravan. The first I went out to rescue a friend who’s Caravan got a flat on the interstate in the heat of August with her infant daughter aboard and she was unable to lower her spare. Everyone, apparently Caravan owners especially, should take the time to locate their spare tire, familiarize themselves with how it is deployed, and make sure that everything related to changing the tire is actually in working order. Practice changing a tire in your driveway on a nice day so you don’t have to learn how on the side of a busy road in a snowstorm.

My cordless sawzall is the ‘go to’ tool for all-around cutting, from pruning trees to extracting someone from a wrecked car. Its seemingly limitless abilities should earn it a place in every prepper’s tool kit. But just like the spare tire, be sure to familiarize yourself with it’s operation before you need to put it into use.


Momma Bear: Back-Up Cooking Systems & a Review of the Jetboil Zip Stove

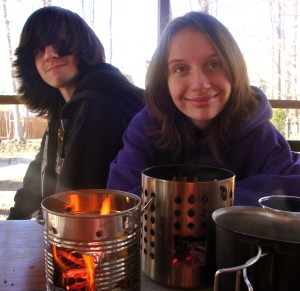
the kids with their hobo stoves

the kids with their hobo stoves

Redundancy is key in good prepping. We live in the D.C. area and I worry about another Snowmageddon that could result in multiple days without power. We have a nice propane fireplace, so we would have heat for quite a while without electricity, but cooking can really be a chore in the cold. We can always use our BBQ grill, but who really wants to go outside if it’s THAT cold? Therefore, here at our suburban fortress I keep multiple cooking systems in reserve for just such an emergency. I divide my cooking into two categories: home cooking and field cooking. While many of you probably have the exact same home cooking systems.

My first line of defense, for heating things up at home, is a case of sterno I picked up at Costco (for less than $20). I have two different sterno cooking setups: one contentsis a fondue set, and the other is actually a hot beverage urn holder. Sterno is also super easy for the kids to use! Our second and third lines of ‘electricity-free cooking’ are my small cooking stoves, one uses propane and the other butane. The butane comes in a giant can that looks like a big can of hairspray. You don’t tend to see butane stoves as much as the propane ones, but we have had ours for some time and it’s a pretty compact piece of equipment. Typically I have each stove packed in a bug-out kit in the garage. setupLast, for the home cooking, I keep two of the small portable grills for better fuel economy in an emergency.

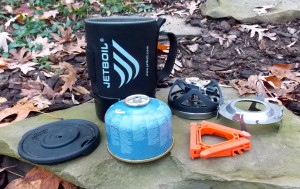
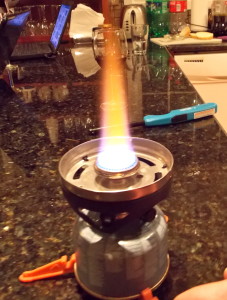
When it comes to field cooking, we have a small variety of hobo stoves that we have in our bug-out bags. These have been great for the kids to get hands on fire making experience. But my husband, Mr. Marine, likes something a little bit quicker when he is in the field so I thought you would enjoy my husband’s review of his new Jetboil Zip Stove. Since he goes to the field so often, we have recently invested in the Jetboil Zip Stove. This is a smaller version of the original Jetboil and cost about $70 online. The big plus here for him is that it is a self-contained non-stick stove and coffee mug/cook pot all in one, with a coozie, handle, bowl and even a sipper lid. The pot even serves as the holder for the stove and fuel. The compactness is awesome for field use. Please note, we bought the one without the igniter so ours requires a lighter or matches to start. The cook system gets its name based on the extreme flame it puts off, which looks very much like a jet engine burning!

flameAfter recently spending a week in the field with his new stove, Mr. Marine said he was boiling 16 oz. of water in about 3-4 minutes, half of which would be used for his meal and the other for his instant coffee. A Jetboil fuel canister costs about $5, and in a week of light usage he still had fuel. Compared to a number of past field stoves, from years of deployments, he found this one to be far superior, primarily because of its compactness, simplicity and rapid cooking speed. The biggest downsides are you have to buy the Jetfuel pre-filled fuel canisters, and he mentioned that the pot gets extremely hot. The sippy lid and coozie are there to protect from the hot metal, so make sure you use it. You won’t forget after the first time you burn your lip!

We intend to eventually buy a couple more and stick them in the bug-out bags. I could also see putting one in the vehicle if I was taking any sort of winter driving trip where we could encounter serious weather. For anyone who preps, camps, hunts, or hikes regularly, the Jetboil Zip is a great stove.

Sarah’s View: 1st Time Using a Pressure Canner

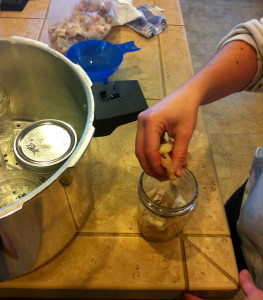
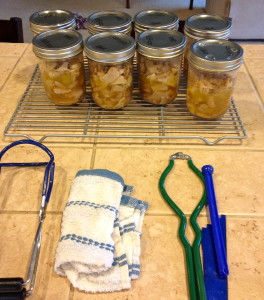
meat into jarThis weekend we used our pressure canner, for the first time, to can turkey meat and stock. We had bought two turkeys during the post-Thanksgiving sales, I cooked them, and Trace cut up the meat and used the carcasses to prepare a large pot of turkey stock.

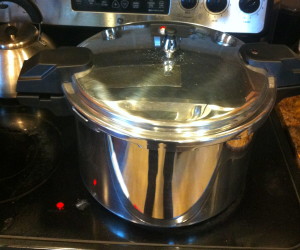
Originally the intention had been for Trace and I to work on the project together, however he had a number of other things he needed to get done around the house and once I got started I just kept going. About three weeks ago we purchase a Mirro 16-Quart Aluminum Pressure Cooker Canner. Sunday morning we took it out of the box and started reading the directions.

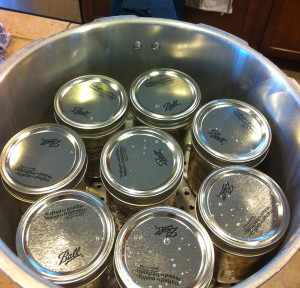
jars into pressure cannerThe first step was to run the canner through a quick “cycle” without any jars so we could determine how high the heat on our stove needed to be to keep it at the appropriate pressure. This process went smoothly enough and, after the canner cooled back down, I felt ready to move on to the real thing. At the end of the summer we used the water bath canning method to can our salsa, so I was somewhat familiar with the next steps. I did consult a couple of sites to determine the best way to pack the turkey meat – loosely and with some water/stock – and then consulted both the canner manual and our So Easy To Preserve book to determine the pressure (10 psi for our elevation) and time for processing (75 min pressure canner on stovefor the pint jars).

I was pleased to read that for pressure canning I did not need to sterilize the jars so I simply rinsed them, filled them with hot water, and set them in the canner to wait – this also allowed me to confirm how many jars would fit at one time. I started with the turkey meat, first pouring a bit of stock in the bottom of the jar and then packing in the meat. While our meat was cooked when we canned it, we read later that we didn’t need to cook it all the way, or could even can it  meat cannedraw. However we both felt that trying to cut it off the bone raw would have been more difficult and we had used some of the cooked turkey for meals and sandwiches before setting aside the rest for canning, so cooking it made sense for us. I probably could have packed the meat tighter than I did as it shrunk during processing, but as it was we canned 13 pints of meat.

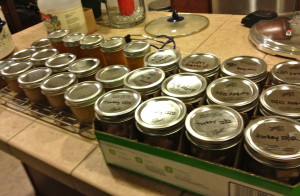
Once I finished the meat I moved on to the stock. Trace wanted to keep the condensed stock in manageable quantities, so we did that in half-pints. We ended up with 16 half-pints of stock, as well as a quart jar we put in the refrigerator to use right away (we were out of half-pint jars and it didn’t really make sense to run the canner for one quart jar).

all doneI have to say that the process turned out to be remarkably easy. Though a bit noisy with the steam escaping a couple of times each minute! I must give credit to Trace for having the meat and stock ready to go – the meat was cooked and chopped, the stock was boiled and strained. I’m looking forward to doing more canning. Of course, the true test will be when we open one of our jars and taste our home-canned turkey.

It’s refreshing to know that we now have the tools and knowledge to can our own foods. For us this means we can start storing more locally produced meat and vegetables. We will have more control over the source(s) of our food storage. This also allows us to rescue and preserve frozen meats in the case of a long term power outage (using a propane heater). As Trace would say, repetitive and redundant. Plus it was kind of fun!