When we started gardening this year I hadn’t really thought much beyond learning more and what produce we could get out of it. But, as the season continued I started thinking about next year and, being cheap, I started wondering if I could save seeds from this year’s garden instead of buying more. Turning to my good friend Google, I started researching how to save seeds for our more unique garden items.

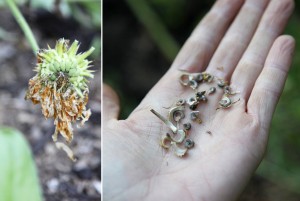
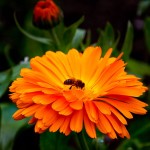
 The first I looked for was Calendula. I’m not sure why I started there exactly, except that there weren’t many seeds in the seed packet. Not only that, but the Calendula seeds had looked really odd and I couldn’t come up with where on the plant they would be. It turns out, as the petals wilt the center is surrounded by seeds. Now, these seeds don’t look like any others you might have seen, or at least not like any I’d ever seen. But, once I knew where to look they were remarkably easy to harvest. Some had dried on the plant, others I dried in the house and then stored the dried seeds in a small plastic bag. (Plastic isn’t ideal, I’d prefer to use small envelopes so as to prevent moisture building, but the coin envelopes just seemed pricey – see, I’m cheap.)
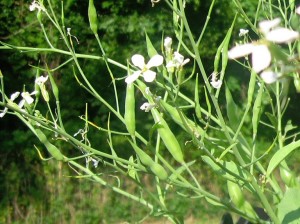
 Once I figured out how to harvest Calendula seeds I was excited to see what else I could save. I next looked into radishes and garbanzo beans. These are both rather easy – they have pods which form on the mature plant and the seeds inside the pods are dried and saved for planting. Granted, we didn’t plant radishes for eating (we planned on them flowering to attract pollinators) so all our plants flowered and then formed pods. If you were growing radishes to eat and still wanted to harvest seeds, you’d need to let a couple of plants flower so they form the pods.
Next, I started researching the herbs. These are a bit trickier as their flowers, and therefore seeds, tend to be significantly smaller and not easily harvested right off the plant. From what I’ve read, the best way is to clip a few of the flowering stems and put them in a paper bag (lunch bag size) and hang to dry. The paper bag helps with moisture control, keeps out light, and prevents seeds from being lost as they fall off the drying plant. I’m still on the drying stage with my herbs, so I’m not sure how successful it will be.
With any luck I can harvest seeds from most of my plants this year. I still plan to buy seeds for spring, but hopefully they will be more for back up as well as to increase the variety in our garden.

Our big seed harvest this year has been with tomatoes and cilantro, and we are still waiting for the green onions to go to seed. The tomatoes were a bit trickier to separate from their slime coating (thank you internet). Also, speaking of cheap, I discovered that you can actually use store bought green onions to start your onions (just plant that white bulb part you usually throw out), grow and trim all season, then let them go to seed at the end of the season. We had actually grown ours from seeds, but when I was researching the seeds I ran across this tip which makes your first crop cheaper than a seed packet!!
A bit late, but think about it for next year. I make envelopes for seed-saving from parchment paper. When i freeze the fruits and vegs, i line baking pans with parchment paper and put the harvest on that. Each piece is usually good for 3 or 4 freezings. Then i cut them up for envelopes and write detailed notes, e.g., “yellow bell peppers, plant St. Pat’s Day, plant out 18″ after last frost.” I stack them in an oatmeal box with the first to be planted on top.
> Momma Bear — Thanks for the onion tip. My daughter-not-in-law has a great love of onions, so i’ll pass this on to my son!
> Sarah & Trace — came here from your link on TJ’s site. Yes, great podcasts!
Glad you found us and thanks for the tip!
Pingback: UNDYING BEAUTY | SAN