
 This weekend we used our pressure canner, for the first time, to can turkey meat and stock. We had bought two turkeys during the post-Thanksgiving sales, I cooked them, and Trace cut up the meat and used the carcasses to prepare a large pot of turkey stock.
Originally the intention had been for Trace and I to work on the project together, however he had a number of other things he needed to get done around the house and once I got started I just kept going. About three weeks ago we purchase a Mirro 16-Quart Aluminum Pressure Cooker Canner. Sunday morning we took it out of the box and started reading the directions.
 The first step was to run the canner through a quick “cycle” without any jars so we could determine how high the heat on our stove needed to be to keep it at the appropriate pressure. This process went smoothly enough and, after the canner cooled back down, I felt ready to move on to the real thing. At the end of the summer we used the water bath canning method to can our salsa, so I was somewhat familiar with the next steps. I did consult a couple of sites to determine the best way to pack the turkey meat – loosely and with some water/stock – and then consulted both the canner manual and our So Easy To Preserve book to determine the pressure (10 psi for our elevation) and time for processing (75 min
 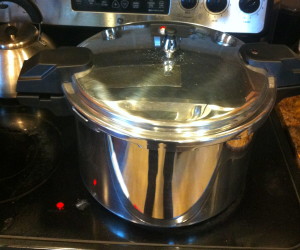 for the pint jars).
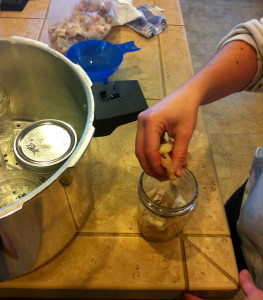
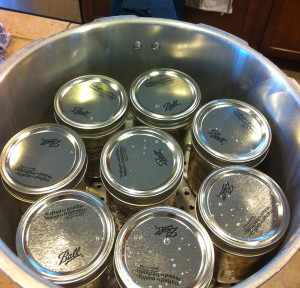
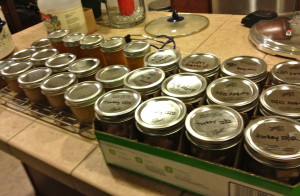
I was pleased to read that for pressure canning I did not need to sterilize the jars so I simply rinsed them, filled them with hot water, and set them in the canner to wait – this also allowed me to confirm how many jars would fit at one time. I started with the turkey meat, first pouring a bit of stock in the bottom of the jar and then packing in the meat. While our meat was cooked when we canned it, we read later that we didn’t need to cook it all the way, or could even can it 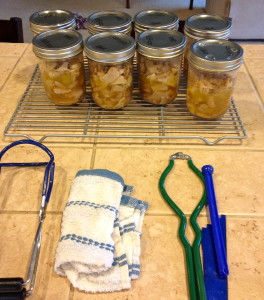 raw. However we both felt that trying to cut it off the bone raw would have been more difficult and we had used some of the cooked turkey for meals and sandwiches before setting aside the rest for canning, so cooking it made sense for us. I probably could have packed the meat tighter than I did as it shrunk during processing, but as it was we canned 13 pints of meat.
Once I finished the meat I moved on to the stock. Trace wanted to keep the condensed stock in manageable quantities, so we did that in half-pints. We ended up with 16 half-pints of stock, as well as a quart jar we put in the refrigerator to use right away (we were out of half-pint jars and it didn’t really make sense to run the canner for one quart jar).
 I have to say that the process turned out to be remarkably easy. Though a bit noisy with the steam escaping a couple of times each minute! I must give credit to Trace for having the meat and stock ready to go – the meat was cooked and chopped, the stock was boiled and strained. I’m looking forward to doing more canning. Of course, the true test will be when we open one of our jars and taste our home-canned turkey.
It’s refreshing to know that we now have the tools and knowledge to can our own foods. For us this means we can start storing more locally produced meat and vegetables. We will have more control over the source(s) of our food storage. This also allows us to rescue and preserve frozen meats in the case of a long term power outage (using a propane heater). As Trace would say, repetitive and redundant. Plus it was kind of fun!