How We Built Our Greenhouse – a DIY
– –
We started building the greenhouse the second week of March and I finished it yesterday – six weeks. Sure there are all the excuses and explanations: life is busy, I could only work on it a few days a week (and had to coordinate Ryan’s schedule with mine, when possible), weather was a factor, and we were learning as we were building – but it still took a long time. Now it’s done.
I found the plans we used on BuildEazy.com. I splurged and paid five dollars for the “handy pdf file, ad free”. I printed up the twelve pages of plans, bought the materials needed to get started (the first of many trips to the hardware store), and we began.
The first few steps could be built in the garage. First was the bottom frame; we built it out of pressure-treated 2x8s, 8 feet long. The plans had it built 10 foot by 8 foot – but I hadn’t noticed that before I bought the lumber. Since I only bought four 2x8x8s I went with that, ours would be 8 foot by 8 foot, we modified the plans as needed for the slightly smaller size. Other than the bottom frame we used untreated 2x4s for everything else.

 We then framed both sides and built the trusses. I had never built anything that had to be framed before and it was a learning experience. The sides were easy, they were just square. The trusses were tougher, because of the way the window was built into the peak of the roof there were several angle cuts that had to be identical and match up. The 60 degree cuts were especially a hassle because the mitre saw only goes to 45 degrees; they had to be drawn then cut with a circular saw. That was all we were able to pre-build in the garage.
 The project then sat for a couple of weeks waiting for a dry weekend when Ryan and I were both available. When that weekend arrived we laid out the bottom frame, put up the two side walls, then attached the trusses. The bottom and sides were pretty easy; we kept the square and level handy, and used them for each piece. The trusses were again harder, it was tough to keep them square – at that point they were only attached on each side and weren’t very stable. But, finally, the structure was outside and coming together (i.e. it sort of looked like a greenhouse).
 The directions for the front and back-end walls were far less “exact”, the plans stated “This is pretty much measure, cut, and fix as you go.” We varied from the plans and only put a door on one end (the plans called for a door on both ends). Building the door frame and the door (another thing I had never done before) went slowly and was a challenge because we knew it had to be completely square, or the door wouldn’t work; there also had to be enough space, around the door, to allow for swelling of the wood in wet weather. The hinge placement was another challenge, but we did it and the door fit and closed smoothly.
(All this happened over a period of weeks because of weather and time availability.)
 The roof trusses were then secured with ‘strap braces’, galvanized steel braces 2 inches wide and 1/4 inch thick. They connected the opposite corners of the long section of the roof, tying in with nails each of the separate trusses. The trusses were now a lot more stable, but it had been difficult to keep the outside ones from pulling toward the center.

 Next was the roof window – the most complex step of the project. This window was one of the reasons I chose this plan, I really liked the ability to be able to open a portion of the roof to release heat on sunny days. The measurements had to be very precise and much of the work was done on ladders; it was also a hassle holding up the window assembly and getting the hinges attached to the frame. But finally it was in place and would open and close smoothly (mostly).
The entire wooden framed structure was now built. We then started on the shelving. There were no directions for this in the plans, so I decided to build the shelf frames at 44 inches from the ground. Sarah, who is 62 inches, came out and saw the height and nicely mentioned that they were a little high; after some discussion I re-installed them to 32 inches – a height much easier for her (our primary plant starter) to work at.
Now the wood part was done and it needed to be covered. For this directions said, “Cover the greenhouse with a UV-resistant polythene (there are other options also).” We did some reading and also talked with the expert at the local hardware store (McLendons – we love them, very helpful and knowledgeable) about the “other options”. We found out the polythene/Visqueen-type plastic, though inexpensive, breaks down because of the sun’s UV rays and the weather and would need to be replaced each year. So, with the goal of making the greenhouse longer lasting and sustainable, we instead purchased polycarbonate plastic that lasts 20+ years. It did cost significantly more, but we felt that it was a one-time cost and a worthwhile investment which would require far less maintenance. It came in 2 foot wide sheets (with some extra for overlapping) and we bought 10 foot lengths.

 When we got it home, using a friend’s truck, we first covered the long roof section. This is where we really saw that the framing wasn’t quite square, but fortunately the polycarbonate has a little flex to it and we were able to compensate. The roof was the hardest part, again, all the work had to be done on ladders and we had never used the polycarbonate before. It is relatively easy to cut with a circular saw (kind of), and smaller cuts could be done with my old trusty bandage shears.
 The following week we covered both sides, the short side of the roof, and the window (that was a pain). Finally, this last weekend, I was able to get the back, front, and door done and that meant the greenhouse was completely enclosed. All that was left was to finishing the shelving. Sarah determined that a 1/4 inch wire mesh would be the best material, as it would allow water to drain and sunlight to pass through. The sunlight passing through was important because it allows containers on the ground to also get sunlight.
So it’s done. We’re pretty proud of it. I can’t help but smile every time I see it though the window or go outside. I’m really glad we have it. I’m sure the greenhouse will be a regular topic in our posts as we continue to learn, discuss our failures, and celebrate our successes.

- north side

- south side

- east side

- west side
Thanks very much to Ryan for all his hard work and time. I also appreciate Chanse helping when he could. And I want to acknowledge and thank Sarah for her technical advice, monetary budgeting, and most of all, patience. (And thanks to my father-in-law, Jay, for his DeWalt compound mitre saw.)
(Wednesday: The City Cousin)
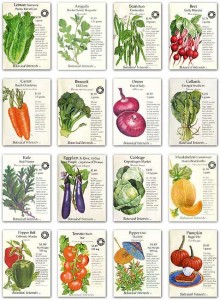 This year, while surfing the internet for seeds, I came across some interesting articles about seed banks. The National Geographic article, Food Ark, refers to the world seed vault (which I initially thought was kind of a hokey idea). But I kept reading and discovered why it is so incredibly important. I am sure most of the prepper community understand the value of using heirloom seeds, instead of hybrids, for seed harvesting. But, what I found to be both fascinating and horrifying is that 95% of vegetable and fruit varieties have gone extinct in the last 100 years. Mass production, produce values, and hardiness were chosen over variety. While we are busy saving pandas, polar bears, and whales, no one seems to be worried about saving our food. (Another good article is, The Extinction of Food: Why Heirloom Seeds May Be Our Only Hope.)
 the category of hearty store-bought ones. There is nothing unique or special about my seeds. So what can we do to help with this problem? My advice would be that we all seek out these rare varieties, join seed exchanges, and support farmer’s markets and CSA Co-Ops (Community Support Agriculture) whenever possible. Find the uncommon and value its place in our future.
 My new growing/gardening goal is to seek out a variety of quality seeds, and to grow some of those vegetables on the high pesticide laden foods list that we would normally buy. So this year–in addition to growing tomatoes, cilantro, and green onions from last year’s seeds–I will be growing my own spinach and peppers (two of the dirty dozen). We eat spinach more than most other varieties of lettuce and it grows really well in containers. Additionally we are still on the canning salsa kick so we are really looking forward to the peppers. I will also be networking with some friends in the Pacific Northwest to see if I can get some of their heirloom seeds for next year, and possibly getting involved in the Seed Savers Exchange.



 Now that summer gardening is over, I wanted to get a jump on improving and expanding the growing space for next year. I hate watering grass, but the home owner’s association thinks it’s important, so I came to a ‘compromise’. I expanded the gardening area in the front yard so it now covers about a third of the yard. Next summer I’ll feel better about watering because now I’ll also be watering a garden. Removing the sod was a hassle, it’s a lot of work and it’s heavy.