Momma Bear: Sequestration, Military Life & Our Growing Family

The military received a 1% pay raise this year.  But with a 2% tax increase, that is the same as a 1% pay cut. I am thankful to report that while this did infuriate me, we were able to absorb the loss with minimal discomfort.  Sequestration hit right about the time that we were re-arranging our house to accommodate the two kids we are planning to adopt. While I had been busy spending to get ready for a larger family (beds, linens, 2nd fridge, etc.), some of our friends who are federally employed were getting furlough notices. Our one friend is being furloughed to the tune of a 12% pay cut.  With a new mortgage and small children at home, I hope that they can weather the storm. Other friends are being forced to retire early from the military because they are not at the top of their fields and the military needs a drastic reduction in forces. We are lucky in that my husband has a secure job, with a promotion on the horizon, and he is not at risk of a forced retirement. But it is a stark reminder that you can never be financially prepared ENOUGH to survive what life might throw at you.
another military moveIn addition to all of the sequestration drama, I was reminded recently that we will be facing our next set of military orders to move, sometime in the next year, probably moving in about 16 months . We usually know about 4-6 months prior to our moves (sometimes we know as early as a year in advance), which will allow us time to get our lives ready for the next big adventure. Those months leading up to finding out our next duty station is always filled with speculation about where we will go, how we will get there, etc., and a few times we have been utterly surprised by where the Marine Corps has chosen to send us.  For us, this will be the first time that we have moved since beginning a long term food storage program. While the movers will pack food in containers for moves within the U.S., it counts against our overall weight allowance. Foods are typically discouraged on international moves. This will be complicated for us because we will be moving a much larger household than ever before, and there is always the possibility of another international move. After rearranging our storage areas to accommodate the 2nd fridge last weekend, my husband raised the white flag and told me I needed to lay off the food storage (I believe the word “hoarder” may have been mumbled). He said I needed to develop a plan to deal with all this food for our next move. I think in his mind he was envisioning us having to throw out hundreds of pounds of food. Of course in my mind, I am more concerned with our increasing family size and feel the need to store more, but I can see his point.
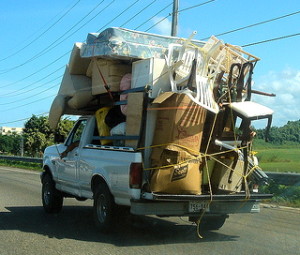
moving-truckWe have both compromised and developed a plan. All future food storage purchases (in our current location) will need to be for our regular food storage pantry that we routinely eat from. No more long term storage food purchases until we reach our next duty station. The mylar and bucket food storage will be moved with our household goods (unless we are headed overseas and are limited on weight). Once we know where/when we are moving we will begin eating from our easy access long term food storage that I have in 2-liter bottles (see previous article on storage containers).  These are containers and food items that are easy to replace once we are relocated. When they come to move us, any surplus pantry items in original containers may then be donated to the local food pantry. I consider this a workable solution that we can both live with, and he promised not to use the word hoarder again.

Has anyone else ever had to deal with moving a great distance with their long term food storage?  Any tips or suggestions?


The Importance of Community

“You Can’t Do It Alone”

I consider myself, and our family, to be pretty well prepared for most eventualities. I’ve evaluated our needs and tried to plan our preps accordingly, including building in redundancies. I’ve also considered the emergencies/disasters, big and small, that we may have to deal with and tried to plan for them. Not only have we acquired much of the proper equipment we’d need, but we’ve also developed many of the required skill-sets, and mental attitudes.

But on Thanksgiving day The Universe took the time to clearly teach me:

1. YOU CAN NOT BE PREPARED FOR EVERYTHING
2. YOU CAN NOT THINK OF EVERYTHING YOU NEED TO BE PREPARED FOR
(and most importantly)
3. YOU WILL NEED HELP FROM OTHERS

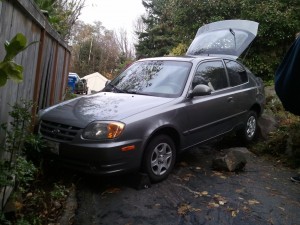
In an accidental incident–that even though I know how I did it, I’m still not sure how I did it–I got my car stuck between a rock and a hard place. Literally.

Ryan and I were in my Hyundai Accent, driving to meet with family in West Seattle (Sarah had gone up earlier). The house is in an older neighborhood and difficult to find, so we were following the iPhone mapping directions. We were almost there and the map showed that the road we were on went through, when in fact it didn’t. We turned where we thought we were supposed to, driving up a very steep, narrow road (that ended up being a paved driveway). When we got to the top we realized our error, and I began backing down.

It was kind of slippery from the recent rain and wet leaves. There was an angled turn-off and decided to use it to turn around and drive down correctly. The angle of the turnout was more than I expected, and it was also steeper; as I backed up the tires began to spin on the wet pavement and leaves. I decided I had gone far enough, put it in 1st gear and tried to turn down the hill. Not enough yet, so reverse again, tires slipping, not much progress. I cranked the wheel hard to the left, back into 1st gear and, inadvertently, drove over the side of the turnout — there was the associated grinding and scraping as I went over the large rocks that bordered the driveway. The car was now almost perpendicular across the driveway with the front of the car against the fence (fortunately a 6×6 fence post). Back into reverse, to straighten the car out out, and…nothing? Tires spinning. What? We got out and discovered that the rear of the car was hanging by the bumper on the large rocks and the back tires were about four inches off the ground.

Ryan and I stood back to survey the scene. The front of the car was wedged against the fence post, and the back of the car was stuck on top of, and against, these large rocks. I was sort of stunned, I felt incredibly stupid, wished there was some way I could blame Ryan, and really wasn’t sure how I was going to get out of this.

We opened the back, which contains our car bug out bag (BOB), a large crowbar, a wool blanket, and a scissor jack — those are the tools we had to work with. I pulled out the crowbar and looked around, there was no way to pry or lift or anything, I put it back. I got out the jack to see if there was anyway I could lift the car up off the rocks — but I couldn’t see anyway to do it safely that wouldn’t cause more damage to the car (and likely us).

Ryan and I tried to see if we could lift up the rear end (it’s a sub-compact), but all we did was raise up the shocks. I really had no idea what to do, I knew I should call Sarah and let her know what had happened but I really wanted a to come up with a solution before I did. I considered a tow truck, but knew since it was a holiday it would take forever, and I wasn’t sure what even a tow truck could do.

I called Sarah and she send down her brother (David) and cousin’s husband (Chason). They got there soon after, evaluated the situation, and we debated. We decided, with the additional help, to again try and lift up the back of the car off the rocks and swing it around to the correct angle. The four of us lifted, and still no luck, but it looked like the idea had potential. Chason went back to get more help and David (helpfully) suggested it as a topic for the blog.

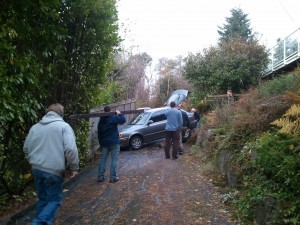
Soon afterward all the able bodied men from the Thanksgiving gathering were there to help. We positioned ourselves around the back end of the car, being as safe and careful as possible, and were able to lift the car off the rocks and move it into the needed position. Fortunately there was almost no damage to the car, and the fence would only need very minor repairs (we left a note on the residence explaining what happened).

Once successful, and with everyone chuckling about what had happened, we all went up to enjoy a Thanksgiving day with family. My place in the family Thanksgiving lore had been ensured.

Take Away Lesson
I could not have handled this alone. I had never considered this situation happening, and had no preparations in place to deal with it. Had this been during a disaster when emergency services wouldn’t be available the only way this could have been done is with the help from others. Without that help the only option would have been to abandon the car and walk, which in bad weather or with people unable to walk far, could be dangerous or even life-threatening.

Develop community around you. Develop strong relationships with your family and friends. Get to know you neighbors around you so you can ask for, and provide, help for them.

No one can do it alone — that plan will fail.


Sarah’s View: What Are You Waiting For?

Please accept my apologies for this rant as I know, if you’re reading this, I’m likely preaching to the choir.

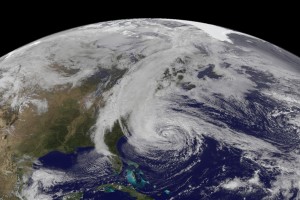
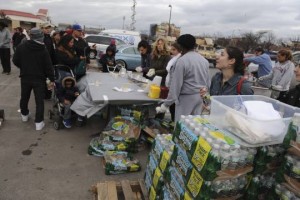
There are many articles out there about what the government officials, government entities, and utility companies could/should have done differently to prepare for Hurricane Sandy. I can’t name the number of times I’ve heard some member of the public exclaim how they keep waiting for help and are so frustrated that it hasn’t yet arrived. Now, I don’t mean to lessen the true needs of many, but I’m tired of the helplessness, the lack of personal responsibility and, yes, lack of preparation.

What made the government responsible for your well-being? Especially in a disaster like Sandy where there was warning days in advance. Yes, the government is responsible for those items that you pay for with your taxes – highways, bridges, schools, basic communications. However, they are NOT responsible for you having food, water, clothes, even a house. That is your responsibility.

A friend of mine, who’s been through hurricanes before, posted these recommendations on an online forum I belong to:

  • Make sure you have cash. ATM machines don’t work without power and when stores begin to open they will only be able to accept cash since power and phone lines might still be down.
  • Fill your freezer full of anything you can fill with water.  I was able to turn my freezer into an old school “ice box” and kept my frozen foods frozen for 5 days without power. Probably not as tough given the temperatures in the area, but it was huge when we were dealing with 90+ temps after our hurricane. When I would get ready to defrost something frozen to eat, I would move it into the refrigerator and it would help to keep the refrigerator cool.
  • Make sure your vehicle is full of gas. Gas station pumps do not work without power.
  • Make sure you can charge your cell phone with your car. It was only during the hurricane that I realized we no longer own a phone that doesn’t need electricity to run.

This is incredibly reasonable and sound advice. It makes complete sense to stock up on water, food, cash, gas, and warm clothes when you know a disaster is approaching. But – why is this only sound advice when a known disaster is approaching, but in “normal” life doing these things is odd, weird or extreme?

Our family was fortunate, since we live in the Pacific Northwest and were not directly affected by Sandy; nor were any of our extended family or friends on the East Coast greatly impacted. In fact, we are won’t ever experience a hurricane. We are likely, however, to experience an earthquake. I’ve lived through two big-ish ones and countless smaller ones in the 25 years I’ve lived in Washington. There is no warning with an earthquake; no advanced radar or news reports letting us know what time it will “make landfall”. If we were caught in the “big one” it would almost be reasonable for us to expect the government to swoop in and help, after all we would have had no idea an earthquake was going to strike – how could we possibly have known to prepare?

Yet, we won’t be waiting for the government. We will be prepared. What are you waiting for?


Rural Relations with Josh: Lessons Learned, Part III – Is Rural Living Right For You?

When considering the purchase of a rural home it’s important to look at how much it will change your life. It’s convenient living in, or near, the city where stores, jobs, and services are nearby. There is also internet access and utilities that may not be available in a more rural area. Unless you have a steady income from retirement, or disability, or you’re independently wealthy, you need to have gainful employment. If you can handle these possible down-sides, living in a rural environment has a lot of up-sides that, I believe, more than make up for the negatives. It’s great to see wild life, enjoy the silence, and have room to raise animals and plants for personal and/or financial gain.

One of the challenges of moving to a rural area is commuting to the city for work, or finding a way to transfer a career to a more rural area. Other options include telecommuting or home-based jobs that provide the needed flexibility. I have an occupation which allows me to work from home 95% of the time. One of the greatest challenges that I have faced is finding good internet service. I rely on high-speed internet for work to join conference/video calls, solve customer problems, and generally enjoy the benefits the internet has to offer. Other challenges include commute time, gas expenses, and shopping availability. Since we often have to travel a lot further to shop we have to plan accordingly and stock-up.

Shortly after moving into our new house, about 30 miles from Seattle, I called around trying to find high-speed internet service. I was dismayed to discover that the options were limited to satellite, mobile hot spot, or a land line. I tried both satellite and a mobile hot spot with mixed results. Satellite internet provided sufficient bandwidth but with high latency it felt pretty sluggish. The mobile hot spot worked, most of the time, and was fast enough, most of the time, and had low latency, most of the time. In my line of work, quality/reliable high-speed internet is a requirement. I ended up signing up for a $435/month T1 connection that would provide 1.5Mb with unlimited usage each month. This type of connection is extremely low latency and no shared bandwidth which provides a consistent connection at a very high cost (relative to consumer prices). I remain shocked that living this close to Seattle I struggle to find quality affordable high-speed internet.

Another problem I face is commuting to various locations around the greater Seattle area. Even though downtown Seattle is only 40 miles away, it takes me up to an hour and a half to get there. Any time I have to drive to a job it’s a road trip. I pressure all of my clients to let me work remotely and work harder because of it. Working from home has saved me around $400/month in gas expenses.

Living this way also encourages personal preparation and self-reliance as help/resources are much further away, the power typically goes out more often, you are more likely to get snowed in, or have a tree fall across the driveway, law enforcement/EMS takes longer to respond, etc., etc.. But in the end, living in a more rural area is well worth it to our family. Raising our kids in an area where they can run out and play in the woods and explore and adventure is a big deal, that’s how I grew up.


Rural Relations with Josh: Lessons Learned, An Introduction

(Josh is our newest regular Guest Contributor and will be posting, Rural Relations with Josh, the first Wednesday of every month.)

Three years ago, this December, I stumbled across a real estate listing on Craigslist; it described a heavily treed 5-acre lot with a distressed rambler, built in ’88, in need of a new owner at a fantastic price. The current family had taken out a second mortgage and was in the foreclosure process with a trustee sale a mere three days away. A quick call to the listing agent and we had an appointment the following day to view the house.

Our first impression of the property was of a cosmetic fixer, on a dead-end road, two foot tall field grass in the yard, various junk strewn in and around the house, and tree branches behind the house attempting to reach inside as nature made a valiant attempt to overtake this small piece of civilization before humans could reign it in. Trees had fallen all over the property during snow and wind storms, blocking all trails and access except by foot beyond the driveway. The list of tasks to make it livable was relatively short as the structure and foundation were solid: remove and replace all flooring and trim, repaint floors, ceilings, and walls, and replace a few doors. Except for those projects, this place had some serious potential and was perfect for a young family with three kids and a dog.

Beyond the first impression there were two issues to consider, 1) the neighborhood is controlled by an HOA (home owners association), and 2) there is an easement through the south end of the property to a single home at the end of the road. After careful review and talking with the HOA president and a few neighbors, it was determined (and repeatedly stated) that the only reason for the HOA was to maintain the two miles of asphalt road that wound through the development. (The fee for this maintenance was $45 a month, for each property.) Review of the HOA documents revealed that excessive control was possible, although nothing else appeared to be enforced or in place. The easement, we decided, was something we could work with and would not be an issue.

Outside those two issues the home and property were great for a prepper! It is one mile from the nearest county road, six miles from the nearest small town, and 20 miles from the nearest mid-size city. It is heavily treed with wood heat; and there is a 160 acre wood lot to the north and a few acres of nature preserve on the east boundary. The only downside is there is no pasture or cleared land other than the yard and house area.

Six months later, through the trustee sale deferral and short sale process, we were first time home and property owners on an adventure with no idea how much we were going to learn.

Please join me in this multi-part series as I write about lessons we’ve learned from our first “homestead” property purchase; lessons that we will apply when we buy our next one.

Josh’s Bio:
Josh is a small business owner, in the greater Seattle area, focused on implementing open source software solutions (think Linux).  He grew up in Eastern Washington living several different places with a mother who moved around quite a bit. At 19 years old, Josh joined the Navy; he spent four years on a fast attack submarine stationed at Pearl Harbor, with visits across the Pacific Ocean. He now lives with his wife and three young kids in a rural development, where they have a garden, two dogs and 12 chickens.

(Friday: What We Did This Week To Prep)

Teaching The Kids (& Learning More Myself) – Practicing With Escape Ladders

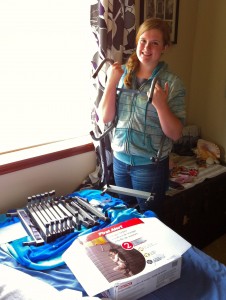
Recently we purchased two second story escape ladders. As previously mentioned we have two bedrooms with windows that are about 14 feet off the ground, our master bedroom and Emily’s room. We bought a ladder to keep in each room.

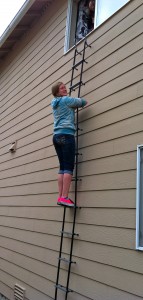
Because buying stuff is easy and it’s a good idea to practice with emergency items before you need them, we pulled the ladder out of the box and actually used it. I had Emily do most of the set-up because it will be in her room. I had to start off by explaining to the younger girls how to remove a window screen (don’t assume). Emily then hung the ladder handles from the window ledge and released the ladder to fall, against the side of the house, to the ground. Once I determined everything looked right and was secure, Emily climbed through the window and down the ladder. The rope ladder moved around a lot as she climbed down it, and she was more than a little nervous, but she did it. She was followed by Alison, also nervous, and Ryan, not nervous (Brynn was away at camp). We discussed that, in an emergency, Ryan would go last after ensuring everyone was out okay.

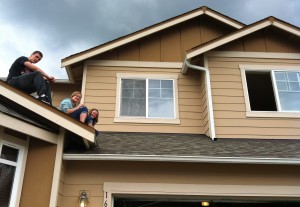
We then went to Alison and Brynn’s room which opens onto the roof above the garage (Ryan’s is next to theirs and opens to the same area). The screen was removed and the kids climbed out onto the roof. I was on the ground. My original plan was to have them hang from the roof and drop to the ground; having Ryan go first so that he can help the girls. After looking around I realized there was nothing safe to hold onto, the gutter was too weak and there were no other suitable edges. We decided to try the ladder, attached to the girls’ window down the roof and off the side. That worked okay and the kids were all able to climb down. I considered getting more ladders for those rooms but decided they probably weren’t necessary. We came to the conclusion that they could get out the windows, away from any potential danger, and wait on the roof for assistance; if they had to they could hang and drop from the gutters (but we didn’t want to practice this because we believe the gutters would be damaged from the weight).

It wasn’t rocket science to figure out how to use the ladder, and yes had there been an emergency we could have figured it out then. But the best time to learn a new skill, or a new piece of equipment, is not when an emergency is happening. There will already be anxiety, stress, and fear; possibly darkness, cold, and rain to deal with. Knowing how to use your emergency equipment will give you, and your family, the confidence needed to get through the disaster. And while a sudden life-threatening fire while we’re in the house–the most likely threat to cause people to escape through a window–is not a likely event, it is possible. We decided it was worth the purchase and practice to allow us to be prepared for that–or another similar–eventuality.

(Friday: What We Did This Week To Prep)

Sarah’s View: Raising Children in a Collapse World

Momma Bear’s post about birth control got me thinking: “What would it be like to be raising young children in a collapsed world? What would that look like? How would it be different from what we do today?”

I should start by saying that I don’t have any children of my own. However, that doesn’t mean that I won’t someday or that my friends or step-kids won’t. It’s important to consider the ramifications of having a child, both in our society as it is now, and how it would be in a potential disaster or complete collapse.

The challenges of having an infant or toddler in a post-collapse world would be huge for today’s ‘modern’ parents. It becomes incredibly difficult – if not impossible – to easily bug-out, especially if you’re going any distance on foot. An infant (child under 12 months old) can be carried, but if you are carrying that child you are then limited in what else you can take with you, i.e. BOBs, additional water, food, etc. Now, what if that child is a toddler? Anyone who’s spent any time with a child this age knows that they don’t always (ever) want to be carried. You now have a toddler fighting being carried and/or walking (toddling) beside you. Neither of these scenarios allow you to walk with any speed and could potentially draw unwanted attention.

If you can instead bug-in this removes some of the mobility issues that accompany infants and toddlers. However, now there’s the surviving day-to-day. Are you hunting and/or scavenging for food? A crying child doesn’t do much to lure game to you, or help you remain unseen. What is your child willing or able to eat? If your child isn’t used to eating anything but jarred baby food, suddenly switching to a hunter/gatherer diet, or even an MRE diet, will not go smoothly.

The things to think about with young children don’t differ greatly from the things we need for ourselves.

Food – The best thing you can do for an infant is breastfeed. I know this is not possible for some, but it is the easiest and cheapest way to feed a baby. If you can’t breastfeed, make sure you have in your preps enough formula or other supplemental milk to last your baby through six months of age. For toddlers, start encouraging them to try the food you eat (and store). If you need to, overcook it a bit and squish it up.

Water – Young children are especially susceptible to dehydration caused by overheating or diarrhea from dysentery, therefore sanitary water is key. Unlike adults a child will appear just fine, until they’re not, and then deteriorates very quickly.

Security (Safety), Shelter – Infants and toddlers love to explore so keeping them safe, even today, can be a challenge. In a collapse, when every able adult will need to be working, minding the babies is not something that a mom or dad can be spared to do. For infants I recommend checking out the various slings available for carrying babies – they are simple, come in many shapes and sizes, and are tremendously versatile. This option allows the child to be carried while leaving both hands free for working. What is your group’s plan for caring for toddlers? It’s great if there are older children around, or maybe a “grandma”, who can play with and watch over them. Keeping young children safe truly is the ‘village’ raising the child.

I believe that much of our “preps” for living with young children can be taken from human history and can be applied now and not just in a collapse situation. For thousands of years infants and toddlers were raised in tribes where they are no daycares, formula, or Purell. Instead there were grandmas, slings, and water. Prepping with and for infants and toddlers doesn’t need to be difficult; but thinking and planning for it now is key.

(Friday: Momma Bear’s June Preps)

The City Cousin: Making A Plan

Contributed by Shawn (aka The City Cousin)
(Shawn is writing a series of posts about prepping in an urban environment.)
– –
If your car’s tank is almost always near empty, or you are constantly running out of toilet paper, shampoo, milk, etc. then you are not a natural prepper! Fret not, few of us are. As with many skills and mind sets, most have to be learned. Here are some experiences that motivated me, and a system I’ve developed to become better prepared.

I was living in Seattle, in 2001, during the Nisqually earthquake (a 6.8 quake that lasted 45 long seconds). After the initial quake ended, I immediately called my parents to let them know I was okay. Then, I knew we still had electricity because the TV was  on; I checked that I had running water and then filled the bathtub; I checked my apartment and then the building for damage; I moved my truck out of the garage, under my building, and parked it where nothing would fall on it if there were more quakes. All good initial reactions to an earthquake, but how did I plan afterward to be better prepared for the next time? What had I learned? To be honest I didn’t do anything. I felt good, and rather smug, about my actions and resourcefulness after the Nisqually quake. But, I wasn’t really prepared for what COULD HAVE happened.

It wasn’t until I saw the pictures of the aftermath of Hurricane Katrina in New Orleans, in 2005, that I recognized I have to be prepared for a big disaster and for at least the ‘FEMA suggested’ 72 hours. And, after seeing how FEMA and the military responded in New Orleans–a city that is located much closer to government resources than Seattle–I decided I needed to be personally prepared to handle things for a minimum of five to seven days before outside help will likely arrive to the city.

So my project management experience kicked in and I developed a chart to help guide a household discussion to prepare for likely perils. I again focused on my journalism questions of Who, What, Where, When, and How.

Prepare Short Term (72 hours) Medium Term (6 Months) Long Term (over 6 Months)
Who You, your immediate family, significant others. Condo/homeowners association, neighbors. Neighborhood (consider becoming an advocate for your local government.)
What Select the perils that might affect you: earthquake, flood, tornado, etc. After prioritizing the perils you want to address, prepare for the first one. Then expand to cover the remaining perils. Review what you’re preparing for, have things changed?
Where Preparing your home and/or car(s).  Consider alternative locations. Determine meeting points in case you and your family are separated. You might focus on your home first for the initial 72+ hours then on your car or alternative locations. Develop alternative location(s).
When Set a start date and end date for each Term’s goals.  Costs and preparation for longer term goals can be researched and set. More expensive items can be budgeted for and a priority list  can be developed for when to get them. Set up an annual/regular review to make sure everything is current in your preparations, i.e. check batteries, rotate food and water.
How Research! Read, take classes, use the internet.  For this section one of my favorite online resources is 72hours.org. How also plays into when depending on cost and time needed to prep. Continue learning. Stay informed. Network with others. Review new information.

This is a great exercise for a household of any size to get organized and take the first steps, or for reviewing what you’ve done, or confirming you’re on the right road with your preparations. This discussion will help everyone have input and feel involved (the “buy- in” to the project), and tasks can be assigned based on age and experience. Make lists and write down your goals; studies have shown, when we write things down we are more likely to remember and act on them. Once we have a plan in place, and we know which road we’re taking, we can get prepared.

Next month: I will discuss what I have in my apartment to prepare for the perils I have identified, some of the resources I’ve tapped, and how and where you can store things with limited space.

The City Cousin’s Bio
I come by prepping by growing up watching the example my father set; he was always prepared for whatever situation would arise. Now, as a single man living and working in Seattle, I have opted to live near downtown in a small apartment. For me this is a comfortable space; trying to be “green” it has reduced my use of resources from electricity to gas for my truck. With limited space, I have reviewed what I can reasonably be prepared for in my urban environment.

(Friday: Momma Bear’s April Preps)

Sarah’s View: A Prepper’s Budget

by Sarah Adams -

How To Have A Balanced Household Budget Every Month

Trace regularly refers to me as our family’s Chief Financial Officer, and that I “control” the finances. Actually, we do our overall budgeting and planning together; I simply take care of the day-to-day bills as well as maintain our financial spreadsheets (aka all the work).

For various reasons we both came to the relationship with more debt than either of us liked. However, early on in our marriage we agreed that a mutual goal was to be debt-free. I wanted the peace of mind of not constantly playing catch-up and Trace felt like getting out of debt should be a primary goal for any prepper. In the beginning we tried to save, tried to pay down debt, but we struggled without a concrete strategy and plan. Then, about 18 months ago, a good friend of mine introduced me to Dave Ramsey and his Seven Baby Steps. I really liked his “debt snowball”; it inherently made sense to me. In addition, his concept of spending money “on paper and on purpose” helped give me some focus on how we could move forward. From there I read more about zero-based budgeting.

Since December 2010 we have created a zero-based budget every month. I start with our joint income and assign each dollar a “job”. Before the month even starts we have “pre-spent” every dollar we are going to make. It sounds a bit scary, even a bit controlling, to budget this way but to tell you the truth it is completely freeing. When we go to the grocery store we know exactly how much is available for the month; we can spend it all the first week or spread it out over a couple of trips. There’s no worrying about whether the funds are available or not – they ARE, this is their job!

Even better, you can plan for fun too. Last year, when we had a family trip scheduled, I started budgeting a couple of hundred dollars into a vacation fund each month. By the time we took our trip we had plenty of money set aside, allowing us to play while not worrying whether we’d be able to pay the bills when we got home. It was one of the most relaxing trips, money-wise, that I’ve ever taken.

Instead of feeling restrictive, budgeting this way has allowed us to do and buy things that otherwise might not have been possible. We’re building a greenhouse this spring. Last month we assigned some money for it; turns out that didn’t quite cover the full cost so this month we’ve assigned a bit more. Trace wants to build a rabbit hutch; I’ve got it on the list to add to the May budget. It may mean we allocate less to Costco or entertainment or somewhere else, but because we both review the plan each month and talk about our desired expenditures, it works out well.

The other strategy that we both like is to use cash as much as possible. I do pay most of our bills online, but other than those and buying gas, most of our expenses are paid with cash. Instead of the traditional envelope system, I use a receipt folder; each slot is for a different category (Haircuts, Groceries, Costco, etc.) and I put the total amount budgeted for each category in the proper slot at the beginning of the month. We’ve both found it’s a lot harder to hand over five $20s than it is to hand over a debit card. Each purchase is that much more deliberate. And, from a prepper point of view, this means we always have cash on us in case of a disaster (i.e. the power is out at the gas station, you can still pump gas, but they will only take cash, allowing us to fill up if necessary).

Money is a tough topic for many. When we don’t have enough it’s scary and when we have plenty, well, no one wants to hear about that! Trace and I have found that working as a team to plan, budget, and spend has made money simply another prepping resource.

(Friday: What We Did This Week To Prep)

My wife Sarah writes, from a prepper’s wife’s point of view, ‘Sarah’s View’ the second Wednesday of each month (see her bio, and the posts she’s written, on the Guest Contributors page).

Teaching The Kids (& Learning More Myself) – Trauma First Aid

Teaching About Pressure Dressings, Tourniquets, QuikClot Bandages, and Israeli Battle Dressings
– –
Because of my background–as an Army medic and civilian paramedic–I sometimes forget that not everyone understands the basics of first aid. To me it’s very logical: if there’s bleeding – you need to stop it; if they’re not breathing – you need to try and restart it; if they’re pale and dizzy – lay them down and keep them warm, etc. I forget that hurt and/or sick people frequently make others uncomfortable. I forget that blood can be scary and that people don’t know it’ll be slippery, then sticky. I forget that crying out in pain isn’t as easily ignored by others, as you’re calmly and systematically evaluating the source of that pain. And the list continues.

However, I do try to remember to teach first aid skills to my family. Not to make them experts, but so they will know the basics and recognize the major symptoms. Also, since in most collapse situations I’ll be the medic for whatever group I’m with, maybe one of them will learn enough to help me care for others (or themselves, or me…)

I’ve recently made personal trauma FAKs* for Sarah, Ryan, and Brynn (Emily and Alison have less space and a much abbreviated version), and I want them to know how to use the contents when they’re needed (and I’m not around). This week we reviewed pressure dressings and tourniquets (I’ve taught them before), then introduced stopping bleeding with a QuikClot bandage and how to apply an Israeli Battle Dressing.

Pressure dressings were a review (with varied amounts of correct recall). To create an effective pressure dressing, to stop moderate to heavy bleeding, I taught them (using a “wound” drawn on my forearm) to start by folding up a piece of gauze and putting it directly over the wound. Then, while applying direct pressure, use a tightly rolled cravat (aka triangular) bandage to apply more pressure over the initial dressing. To make the actual pressure dressing, take a second cravat and, folding it so it covers the pressure cravat, wrap it around the limb. Wrap it tightly and then tie the ends, in a square knot, on top of the pressure dressing. A pressure dressing done this way will stop all but the worst wounds, i.e. one’s with arterial bleeding (remember arteries are deep blood vessels, coming from the heart, carrying oxygen, under pressure).

For “the worst wounds” I’ve taught them to apply a tourniquet. Again we use cravat bandages, this time two (or three for a leg wound). This is hard to show (maybe I’ll make a YouTube video, if there’s interest – never done that before). Tie it securely around the limb about two inches wide and about two inches above the wound. Make sure it is secured tight enough to stop the artery from flowing (and thus bleeding). Then tie off the tourniquet, placing the knot over the artery. To check that it’s effective, when practicing, see if you’ve stopped the distal pulse.

I recently bought QuikClot bandages at the gun show. I hadn’t used them before, so I read reviews and watched YouTube training videos. Then, using an accordion folded three-inch gauze roll to simulate the (rather expensive) $14 QuikClot, we practiced. I had them feed it directly into the (simulated) wound, right into the bleeding, until the bleeding slows; then use the rest, rolled tightly, right on top of the wound as a pressure dressing and secure it with a cravat. I also had everyone watch the training video.

Lastly they each applied the Israeli Battle Dressing (IBD), aka the Emergency Bandage. I love IBDs, but I feel they are too big for easy day-to-day carry in a small FAK (and a pressure dressing or tourniquet can be made with cravats). But we do keep them in our BOBs and our larger home FAK. I’m not even going to try and describe how to put one on (you need to watch the video). They are a great tool to stop heavy bleeding and I highly recommend them (but again, they’re just another tool).

We’ll continue practicing these skills–medical skills are perishable and easily forgotten–until they can do them competently, in a dark room with their flashlight. Each time I will introduce new ideas and scenarios.

Teach your kids–and spouse–the skills you know; you may not be around when they are necessary. And remember, “To teach is to learn twice.” (- Joseph Joubert)

(Wednesday: Sarah’s View)

*For my list of abbreviations and other information, open the above ‘Check Here…’ page tab.