Momma Bear: Sequestration, Military Life & Our Growing Family

The military received a 1% pay raise this year.  But with a 2% tax increase, that is the same as a 1% pay cut. I am thankful to report that while this did infuriate me, we were able to absorb the loss with minimal discomfort.  Sequestration hit right about the time that we were re-arranging our house to accommodate the two kids we are planning to adopt. While I had been busy spending to get ready for a larger family (beds, linens, 2nd fridge, etc.), some of our friends who are federally employed were getting furlough notices. Our one friend is being furloughed to the tune of a 12% pay cut.  With a new mortgage and small children at home, I hope that they can weather the storm. Other friends are being forced to retire early from the military because they are not at the top of their fields and the military needs a drastic reduction in forces. We are lucky in that my husband has a secure job, with a promotion on the horizon, and he is not at risk of a forced retirement. But it is a stark reminder that you can never be financially prepared ENOUGH to survive what life might throw at you.

another military move
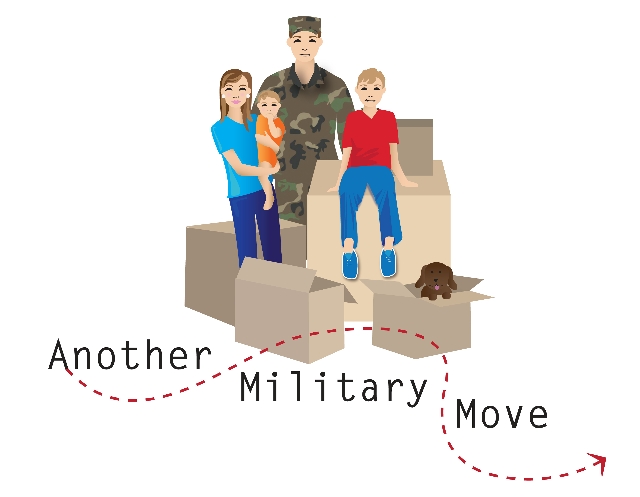
In addition to all of the sequestration drama, I was reminded recently that we will be facing our next set of military orders to move, sometime in the next year, probably moving in about 16 months . We usually know about 4-6 months prior to our moves (sometimes we know as early as a year in advance), which will allow us time to get our lives ready for the next big adventure. Those months leading up to finding out our next duty station is always filled with speculation about where we will go, how we will get there, etc., and a few times we have been utterly surprised by where the Marine Corps has chosen to send us.  For us, this will be the first time that we have moved since beginning a long term food storage program. While the movers will pack food in containers for moves within the U.S., it counts against our overall weight allowance. Foods are typically discouraged on international moves. This will be complicated for us because we will be moving a much larger household than ever before, and there is always the possibility of another international move. After rearranging our storage areas to accommodate the 2nd fridge last weekend, my husband raised the white flag and told me I needed to lay off the food storage (I believe the word “hoarder” may have been mumbled). He said I needed to develop a plan to deal with all this food for our next move. I think in his mind he was envisioning us having to throw out hundreds of pounds of food. Of course in my mind, I am more concerned with our increasing family size and feel the need to store more, but I can see his point.

moving-truckWe have both compromised and developed a plan. All future food storage purchases (in our current location) will need to be for our regular food storage pantry that we routinely eat from. No more long term storage food purchases until we reach our next duty station. The mylar and bucket food storage will be moved with our household goods (unless we are headed overseas and are limited on weight). Once we know where/when we are moving we will begin eating from our easy access long term food storage that I have in 2-liter bottles (see previous article on storage containers).  These are containers and food items that are easy to replace once we are relocated. When they come to move us, any surplus pantry items in original containers may then be donated to the local food pantry. I consider this a workable solution that we can both live with, and he promised not to use the word hoarder again.

Has anyone else ever had to deal with moving a great distance with their long term food storage?  Any tips or suggestions?


Momma Bear: Long Term Food Storage Specifics

For our family, as I discussed in last month’s post, there are a number of obstacles to long term food storage. It is not only about packaged vs. fresh foods, but some of the traditional prepper foods and storage methods are EXPENSIVE! Food that comes in #10 cans can be very pricey, and putting away my own foods in mylar and buckets was just not working for me (though I did it heavily in those first few months). Last is a common prepper notion that anyone will eat anything if they are hungry enough (and by this people usually mean beans and rice). That is just not a realistic approach with kids, especially if you are trying to get them to support your prepper habits. At our house we have embarked on ways to incorporate long term food storage into everyday life so that if the SHTF, the food will not be foreign and mysterious (aka “ICKY”).

The ideal of prepper packaging for the apocalypse seems to be centered around big mylar bags and 5-gallon buckets. I personally hate both of these things. I hate the big bag because it costs money, it makes it almost impossible to check on your food or to use it in any sort of rotation. And I really hate the buckets because they are round which wastes space on shelves. They also weigh a ton and make it impossible for me to move without assistance, which I may not have in an emergency. I do occasionally use the thick gallon sized mylar bags for food storage, but more frequently I recycle other containers. Currently I am storing beans, rice, flour, oatmeal and macaroni noodles in 2-liter soda bottles with two 100cc oxygen absorbers. On the internet you will see some debate as to the long term viability of these bottles, but I think as long as you are using the thicker PET bottles, there is no reason not to use them. Please note that water bottles are much thinner than soda bottles and I only use those for water. I feel the pros outweigh any cons. So far they have a beautiful air tight seal (as evidenced by their deflation caused by the 02 absorbers), I have the ability to visually check my product, they are much easier to move around by myself, and I can use my long term food storage as needed in smaller quantities without opening an entire 5-gallon bucket of something. The other container that I have taken to re-using is small mylar bags from some of our regular food items. For instance a bunch of candies and even prunes come in small mylar bags with ziplock seals on the top (at our house it’s Raisinettes). I clean these bags out and use them for storing popcorn (my husband’s favorite treat) and bean sprout seeds. These smaller bags are the perfect size for both. I treat them just like any purchased mylar bag: insert my food, drop in a 100cc O2 absorber and heat seal it as usual (but just below the ziplock seal area).

I find those #10 cans to be a bit of a mystery. Typically, the types of foods that I buy in #10 cans or in buckets are things that I cannot store myself, primarily protein items and vegetables that are tough to store/delicate to handle, or luxury items like butter and sour cream which would dress up storage foods for recipes. TVP, powdered eggs & cheeses, spinach and broccoli are items that we have recently been purchasing in cans. We had absolutely no experience with them and were not sure if we even wanted to buy them in cans or buckets without trying them first (Costco and Sams sells in bucket sizes). Fortunately, on their websites Auguson Farms and Shelf Reliance sell most of their products in small soup sized cans/mylar containers that are perfect for sampling. We ordered an assortment and are working our way through them to see which we want to buy in bulk. I will mention that on the Costco website, one of the food manufacturers (Thrive) sells their items sealed in a mylar pouch, in a bucket with a gamma seal (reusable lid), while many other companies only put the item directly into a traditional bucket with a one time use lid. In any event, like everything else, these dehydrated foods take practice to be able to use them effectively. And by trying the sample sizes, we feel we are making more specific choices about which ones we would truly use in an emergency.

So what do I store that makes all this food storage work for our family? How do I tie it all together to get the kids to eat it and still make it nutritional? For us it is all about the components. As long as the food contains a main item that my kids recognize, they can usually be coaxed into eating it. For us that is usually vegetables. My kids will never willingly drink powdered milk, so I make sure I have a bunch of their favorite cereals stored in mylar for long term (stashed away where they don’t see it in the pantry). Ramen anyone? It’s filled with empty pasta calories and high sodium, right? But after living in Japan, ramen is a staple in our household, much like rice, pasta and potatoes. I buy the low sodium ramen and then I start adding the nutrition in, normally fresh stuff. But with a little retraining, we are using chicken TVP, dried mushrooms, green onions and spinach (all that I dehydrated myself and vacuum sealed in mason jars), and fresh bean sprouts (that we grew ourselves in only a few days inside the house). Dried spinach seems to have a much stronger flavor than fresh (so don’t use as much). Another item that I store is curry powder, which can be added to any bean or rice dish for flavor (for us this is a familiar flavor after living overseas for so long). I have also started routinely using dehydrated vegetables in our regular recipes and have discovered that the kids often don’t recognize the difference. We also have a favorite “no-bake” cookie recipe which uses oatmeal, chocolate, sugar, and peanut butter and is made on the stove top (perfect without electricity!). It has been hard, but I am really trying to find ways to store foods that are familiar. Also, your food preps aren’t any good if you don’t have a list of recipes to go with it. As for my husband the bean hater…he will willingly eat almost anything if I can promise him that bowl of popcorn at the end of the day!

So what secret food storage tips do you use?  Any special ingredients in your closet that we might like to hear about?

Momma Bear: Figuring Out How To Make Food Storage Work

At our house food storage is a complicated issue. We all face obstacles to our prepping, whether it is financial, lack of family support, or just being unknowledgeable. I grew up poor, so you might say I have “food issues.” And when I say poor, I mean that I really only finished my senior year of high school because they provided low-income families two free meals a day; for me the school part was just the filler between my meals.  But what I did not realize until recently, thanks to the article: The 5 Stupidest Habits You Develop Growing Up Poor, is that growing up that way affects how I shop for food even today. After 20 years of marriage, with a much more substantial income, I was still shopping paycheck to paycheck. I had the mentality of only buying exactly what we immediately needed.  But once I became a prepper, I had to retrain myself to “buy extra.”

One obstacle of the ‘poverty cycle’ I was able to break, was my love of packaged foods. Packaged foods are cheap, have a long-shelf life, and feed more people than fresh foods do. Poor people eat lots of these, essentially training their bodies to expect high fat, high carb, and high sugar as the core of their diet. This causes their bodies crave these foods and, as a result, they tend to be frequently overweight, even obese. I was able to overcome this and have raised my children on fresh, home-made meals with plenty of vegetables. Though the flip-side of this is that it’s really hard to reconcile my love of fresh foods and wanting to stock my long-term food storage. To combat this personal conflict, we have been gardening and canning foods at home. I feel that at least then I can control exactly what ingredients are in my “canned” foods. (It has also been a great teaching tool for my children.)

I do not believe that there is only one way to have/create/do food storage. I believe that how we choose to store food needs to be a reflection of our families and who we are as preppers. Here is my take on different types of food storage:

Food Storage Theory 1: Most preppers live by the simple motto “store what you eat, eat what you store.” This is the simplest way to store food, one giant pantry that is in a constant rotation as part of your daily household diet. Most commonly you will see shelves filled with canned and packaged foods, and buckets of rice and beans. It makes prepping very easy because your goal is to store the same things in increasingly larger quantity, and you never run the risk of waste because you know you will use it. I applaud people who do this because they are able to use everything without risk of waste.  Although I have increased the amount of beans and other previously unknown foods my family eats, they will never be lovers of beans or packaged foods. This storage method simply doesn’t work for our family.

Food Storage Theory 2: This is the idea of having two separate food “pantries”, one that is for your regular rotational use and one that is exclusively long-term food storage (that you won’t eat unless the SHTF). The rotating pantry contains basic items that wouldn’t be the core of any diet, but that you do regularly eat, and could enhance the longer term food storage. At our house this is condiments, oils, canned vegetables, powdered broths, etc. The long-term food storage then consists of large quantities of beans, pasta, rice, TVP, and an assortment of canned and packaged foods that are NOT even part of our regular diet. This is a more expensive way to prep because you run the risk of possibly never using that long-term food storage and at some point you will have to decide what to do with it as it ages. This is how our family is storing food.

Food Storage Theory 3: This is a combination of the first two Theories, plus fresh foods from a garden and a renewable protein source raised at home (chickens, rabbits, goats, etc.). These are the people that are pushing for the greatest level of self-sufficiency should the SHTF. Many of us may never be able to attain this goal for a number of reasons. For instance, local ordinances restrict us from owning chickens, and although we are allowed to have rabbits, “processing” them at home is illegal. Even if we could, I’m not sure we would chose some of those options; I applaud those that can achieve this level of self-sufficiency.

My post next month will focus on specifics of food storage: container choices, canning and dehydrating, and purchasing bulk items from Costco or Sams Club. I would love to hear feedback from other preppers as to how they store food.

Momma Bear’s April Preps

April has been an unusual prepping month for us. The unseasonably warm spring in Virginia has been joined by some dry weather (sad face as I drag the hoses around the yard). The gardening is a huge, HUGE learning curve. This month I did manage to buy four 55-gallon pickle barrels and twenty 5-gallon buckets for ridiculously great prices (though the smell was terrible!). Two of the barrels are already composting on a new rack in my back yard; next I’ll focus on a rain barrel. I woke up one morning and discovered long white cat hair in place of all the leaves on our tomato and pansy seedlings. So rather than starting over, we sucked it up and bought heirloom tomatoes from the nursery, not hybrids, so that we can harvest seeds when we are finished. We also discovered that something has been eating our beautiful little blueberry bush so we had to make a cage around that. Currently we have lettuce, radishes, cilantro, sunflowers, onions and chives all making their first appearance in the various garden spots and planters. We are very happy so far!

Food storage is always on my mind when I prep. We stored another two weeks of food supplies in mylar, after adding sprouting beans to our stores. Having lived in Asia, mung beans (long bean sprouts) are our favored sprout. I buy mine at the international food store where they are super cheap and there is a big selection. I cannot tell you how great sprouts are as a secondary fresh food source in a SHTF scenario, especially since they are grown indoors in just a jar. I also recently got a second vacuum sealer attachment for my food sealer (now I have both sizes). I learned two things this month about vacuum sealing jars, 1) The jar of my husband’s favorite pickles can be resealed with the attachment (an additional source of jars/lids for things that don’t have to be “canned”), and 2) You can vacuum seal lids by using the Ziplock brand handpump over the Foodsaver jar attachment (see photo). Although with non-canning type jars, because the lids are harder to release once sealed, it is best to poke a pinhole in the lid and seal it with electric tape, then simply pull up the tape when you want to release the seal. In this case I am using the jars for seed vaults since the jars still smell like pickles (I think it’s the lids). I also managed to pick up almost three cases of mason jars in assorted sizes for $10 at a yard sale. I treated the family to a “beans night” which they survived. I am trying to incorporate more beans into our diet and try more recipes since it is the ultimate survival food. Half of us like beans, half don’t and this night was no different food (we love rice though!). In this instance I made northern beans in the crock-pot, with leftover ham/bone from Easter, and then threw in spinach at the end so it was like a soup (but a completely balanced meal since I used so much spinach). Here is the recipe link.

Our last area of preparedness for April was our taxes and a house refinancing (we also amended a couple of years of returns as well which were caught by our new tax professional). Because it was our first year in the house we were able to claim a lot of expenses and will get a nice tax return, which in turn will go toward credit debt. Because finances are a tough area for us, we pay to use a tax service that comes with one of those “previous year audits” and insurance to reimburse us for any of their mistakes that result in us making payments to the IRS. We balance the expense of using a preparation service against the peace of mind that it was done properly. We also were able to refinance the house (after only one year), reducing both our interest rate and our monthly payment. This was a tough decision for us since we are not the most financially minded people on the planet, but we’re trying to learn.

How did your preps go this month?

(Monday: DIY Indoor Grow Box)

Momma Bear’s March Preps

Aside from the usual slow and steady food, water and medical supply preps, here is what we did this month:

  • Our primary focus has been on preparing our garden areas and planting seeds. This is our first year planting, so it’s been quite an adventure!
  • Cleaned up our old tents and practiced setting up/tearing down. And created two camping gear “go boxes” to include tents, camp stoves, camp showers, etc.
  • Studied up about dog “carting” which is the idea of having one or both of our large dogs pull a good-sized garden cart with supplies in it (I am looking at the canvas garden cart at Costco). This has become a future project that we might try this summer.
  • Created a secondary food storage location at my mom’s house, one state/six hours away. This is our primary bug-out location until we can purchase property.
  • Laminated four state maps for the go bags. I got these free at the state visitor’s center on the interstate. I folded them in half before laminating to cut down on their size.
  • Read, or skimmed, 13 library books about gardening and homesteading. Ordered Guide to Virginia Vegetable Gardening as an addition to our prepping library.

Overall it has been a pretty steady month for prepping and we have had a lot of fun gardening in the unseasonably warm weather here in Virginia.

What did you do?

(Monday: “I’ll Figure It Out If/When I Need To”)

Gun Show Review

of the Washington Arms Collectors’ Gun Show at the Western Washington Fairgrounds
– –
Washington Arms Collectors sponsor gun shows at the Western Washington Fairgrounds, in Puyallup (which is only seven miles from our home), Evergreen State Fairgrounds, in Monroe, and at the King County Fairgrounds, in Enumclaw. Annually, in Western Washington, there are about twenty gun shows. This is the fourth time I’ve gone to show here in Puyallup.

The Washington Arms Collectors is a membership organization, affiliated with the NRA. Their shows are open to all, admission is $9 and parking is free. But to buy or sell firearms you must become a member. An annual membership is $35 (admission is free to all shows with a membership), and the application must be accompanied by a Concealed Pistol License (or other approved firearms license) or you can pay $12 for an instant background check. You can get a membership at any show.

Sarah and I went this past weekend. This was her third show, we enjoy going and spending the time together, and she learns more each time she goes (whether she really wants to or not). It’s an interesting place, with lots of personalities–all the stereotypes–but mostly good, hardworking, honest gun enthusiasts. It’s fun to go and browse the huge display hall filled with table upon table of merchandise.

Of course there are guns, lots and lots and lots. Everything from the most current semi-automatic rifles, to bolt-action, to lever-action cowboy-style carbines, shotguns, more handguns than you can count, custom firearms, and even collector’s pieces.

Then there are the gun accessories, every type of holster, magazine, part, upgrade, carrying bag, or specialty item you could want; if you can’t find what you want you can probably find someone to make it for you. Literally tons of ammo, from specialty rounds to bulk sales; they have the best prices on ammo I’ve seen, including online, in part because there’s no shipping. There is also a large variety of knives, from the cheap $10 ones to custom-made blades and sheaths. The experts there are willing to answer any of your questions and are happy to give you their opinions and advice on pretty much anything.

Since this is the first time I’ve been since I started the blog, I paid closer attention to the ‘non-firearms’ related tables – instead looking around for the prepper-type items that were available. There were definitely plenty. Shelf Reliance Thrive Foods had a large booth, offering bulk and individual items, even giving out samples of their LTS foods (though I don’t own any Thrive products, I’ve heard them referred to as the best tasting LTS foods). GettingPrepped.com had a nice booth advertising classes on emergency preparedness, carrying the Wise Foods brand of LTS foods, Berkey Water Filters, and food storage containers. There were tables full of books; books on pretty much any topic related to firearms or prepping/survivalism. There were first-aid medical supplies, bags, books, shears, suture material, bandages, and complete kits (we bought some QuikClot, that I’ll cover in a future post).

If it’s part of the firearm, knife, associated accessories, first-aid, and/or prepper/survivalism venues it was probably there. Good people and much to see make it a fun day to just wander and browse; if you’re willing to search diligently, and negotiate wisely, you can find some great deals.

(Wednesday: New guest blogger, The City Cousin (aka Shawn) will write about how he preps living in the big city in a small apartment. This, Part 1, will be an introduction to Shawn and his viewpoint on prepping.)

Note: All of the pictures in today’s post were taken from internet images, no pictures are allowed to be taken inside of the Washington Arms Collectors gun shows.

What I Did This Week To Prep 10/28/11

Last spring, working on our energy category, I bought a used Generac 5000 generator. My goal is to test it each quarter to ensure it still works properly. I especially wanted to be sure this time of year with the cold winter months approaching. So Ryan, his best friend Chanse, and I got it out. It took us a minute, but once we got the choke properly adjusted it fired up. I need to remember next time that the garage (even with the door open) isn’t the place to test it – it’s loud! Though we haven’t used it other than testing, so far I’ve been pleased with it – but I definitely need more experience using it.

Not long after buying the generator, continuing in the energy category, I bought four slightly used AGM deep cycle batteries and a refurbished Magnum inverter/charger. It took me a while to get all the appropriate knowledge and pieces together. But with the help of a couple TSP forum friends (thanks Dan and Rick), and their electrical/alternative energy knowledge, by early summer I had everything wired together and functional. This past week, after it had quietly sat in the garage for a couple months, I finally did my first test of the system. The test was to see how long our 14 cubic foot deep freezer would run (without opening the freezer) on the batteries. The battery bank, fully charged, started at 12.60 volts. I recorded the time and battery voltage several times a day. It ran for a about 100 hours, until the batteries were at 10.71 volts. A few days after my test I realized that the breaker from the batteries to the inverter had tripped and, after looking at the manual, I determined that the batteries probably should have discharged to 10.50 volts before the inverter tripped off; so add a few more hours to the total. I need to do more testing and develop a better understanding of my backup electric system, but it was a start. Next I’ll do a ‘lights out’ test and see how the battery bank does running some electrical appliances in the house. I also need to use the generator to recharge the discharged battery bank and see how long, and how much gas, that takes.

Ryan & Brynn with our combined order

Lastly, we went to the Mormon Family Home Storage Center (cannery) and canned food to add to our LTS. I previously posted about the Mormon canneries, and included a link to a video of the process, in Long Term Storage (Food Part 2). The staff (Mormon volunteers) were super friendly and helpful. The cannery is scheduled by groups; you can form your own group (Mormon or non-Mormon), or you can be added to a smaller group (we were added to a Mormon group from the Auburn area). A friend had planned to go with me but was unable to go that week, so I offered to do his order as well. Since it was going to be a large order (combined 91 cans) I brought Ryan and Brynn along to help. In addition to us, there were about eight other people in our group. We had each previously submitted our order forms, and all the bulk storage bags we would need had been pulled from the shelves and were ready to go. Start to finish, including orientation and cleanup, took just over two hours. We were assigned a task and, assembly line style, the process started: opening bulk bags, pouring into #10 cans, sealing the metal lid on the can, adding a label, and placing the can in a box for the appropriate order. When all the work was completed, we inventoried and paid for our order. We added 55 #10 cans to our LTS.

What did you do?

(Monday: Antibiotics In Your Preps?)

(10/23/11)

Long Term Storage (Food Part 2)

five basic needs: 1) FOOD, 2) water, 3) shelter, 4) security, and 5) energy

Long Term Food Storage (LTS) is defined as food that can be stored 10 years or longer, some more than 30 years. Because of the long storage durations, things must be packaged correctly. To review, the biggest enemies of food storage are: light, heat, moisture, air, and rodents. LTS has to be packed in airtight, durable, sealed containers. This will require almost all store bought food to be repackaged, or you can buy prepackaged LTS items.

LTS is almost always packed in either #10 cans (coffee can size), or a combination of mylar bags and plastic buckets. Cans are the best; they are dark, sealed tight, very durable, impervious to rodents, easy to rotate/handle, and come in usable amounts that can be covered with a plastic lid once opened. But sealing cans requires special equipment that most of us don’t have at home.

The mylar/plastic bucket combination is the easiest for home packing. Mylar (a registered trademark of DuPont) is often used generically, it refers to a polyester film with high tensile strength and chemical stability, sometimes simply called a dry pack pouch. Mylar comes in a variety of pre-made sizes, most common are one and five gallon. The LTS item is placed in the mylar bag leaving room at the top, then put oxygen absorbers into the bag and seal using a hot iron (or a similar heat sealer). Another option is a vacuum sealer (this doesn’t require the oxygen absorbers). Exercise care when handling the mylar–it can be punctured–and store in a five gallon plastic bucket.

The advantage to packaging your own items is cost and flexibility. It’s much cheaper to buy mylar bags and buckets than it is to buy prepackaged items. Also you can package anything you want, including specialized or uncommon items.

But, the option of buying prepackaged LTS items also has definite advantages. When purchased this way, everything is done for you and done correctly, it’s nicely labeled and convenient – you order and pay for it, and it’s delivered to your porch ready to be stored away.

A hybrid LTS packaging option is to go to your local Mormon church cannery (they refer to them as Family Home Storage Centers). The Mormons have been involved in food storage since long before it was ‘cool’, and they have the system figured out. Best of all they are very nice, happy to share with non-Mormons alike, and essentially sell items at cost. You can buy the items in bulk (mostly 25 lbs bags) to take home and repackage yourself. But the best resource they offer is to allow you to volunteer to work on a canning crew where you all work together canning your own items (paying only the cost of the product and the cans). They have an extensive canning operation: starting with bulk size bags, you fill up the #10 cans, seal them with the metal lids, and place pre-printed labels on them. They provide boxes for each case of cans, also plastic lids. Obviously, it takes some coordination and time to get this done, but for the money involved and the finished product I believe this is the best way to do it. Here’s a YouTube video of the experience you can expect at the cannery.

Common LTS items are: black beans, pinto beans, nonfat dry milk, white rice, sugar, salt, wheat, dried apple slices, pasta, oats, dry onions, and potato flakes.

As always, look at your needs, resources (including space), and local availability to create the LTS strategy that works for you.

(Wednesday: But Water is Heavy!)