(Nick is our newest regular Guest Contributor and will be posting, Nuts & Bolts by Nick, the fourth Wednesday of each month.)
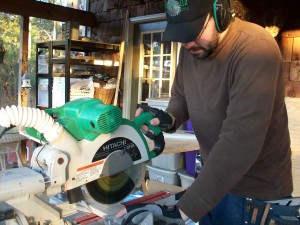
 I’ll be the first to admit it. Swinging a sledgehammer into a wall can be very therapeutic. As the yin to the yang of construction, demolition is the part of my job that folks always seem to want to try for themselves. Breaking stuff just looks like fun (and easy). But for every bit of The Hulk is an equal part of Isaac Newton. As a general contractor, It’s my job to know what’s inside those walls before I start swinging. To see beyond the plaster into the labyrinth of snaking gas pipes, drain lines, wiring and load bearing studs that–if accidentally damaged–could make for a really bad day.
So what does this have to do with prepping?
 In an emergency, or disaster situation, knowing how to interact safely with the structure of your home is a very useful survival skill set. With the varying levels of severity in each emergency, your home presents both differing levels of protection as well as hazards. Balancing these through awareness and understanding will increase your ability to utilize your home as a safe haven when problems arise. That’s where I come in. As someone who has made it their business to see beyond the surface into the inner workings of the home, I hope to bring insight to the relationship between disaster preparedness and structural awareness.
In one of my favorite books, Connections by James Burke, the author begins to explore the interconnectedness of the technology in our lives by asking us to look around where we are sitting and examine the things we see. He challenges us to ponder how many of the things we see do we really understand? How many could we fix or make for ourselves? It can be overwhelming to realize how surrounded you are by complex items that you have come to rely upon for your day-to-day existence. The prospect of trying to learn all of these bits and pieces for yourself can be down right frightening. Forebodingly, in the 1980’s BBC documentary based on his book, Burke is filmed explaining this condition by telling the story of the interruptions caused by the 1965 New York City blackout as he rides an elevator to the top of the World Trade Center. Faced with the feelings of helplessness in an overly complex world we have only two choices: accept fate, or choose to arm ourselves with understanding.
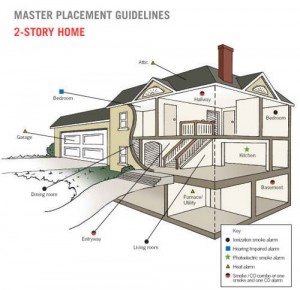
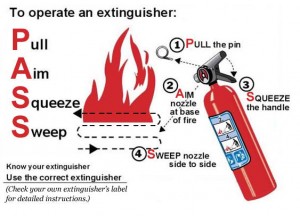
 So where to start? Like putting the first can into your food cache, or assembling your first bug out bag, the answer is to start with the simplest things first. Too often preppers focus on total world collapse, while forgetting the common disasters that happen daily. In the U.S. a house fire is reported every 90 seconds. It’s a disaster that’s statistically likely to happen yet so few take precautions. Start by ensuring that you have smoke and carbon monoxide detectors placed properly in your home and test them regularly. Keep fire extinguishers in kitchens, garages, work rooms, and on each floor. Test them, as recommended by the manufacturer, and locate them near exit doors rather than near stoves and counters; you don’t want to have to reach through a fire for the extinguisher. Lastly, plan your escape routes and methods then PRACTICE. When your bedroom is ablaze is not the time to learn how your escape ladder works.
By breaking down the whale of structural awareness into the bite size pieces of simple preps, you can move closer toward an understanding of your dwelling that will increase your self-sufficiency, disaster readiness, and overall peace of mind.
Nick’s Bio
Nick is a general contractor who brings construction experience and insights into the realm of emergency preparedness. His business, Mighty Oak Homecraft, is focused on sustainable remodeling, to protect the health of the environment and the dwelling’s occupants. A frequent domestic and international traveler, motorcyclist, outdoorsman and amateur writer and filmmaker, Nick lives in Pittsburgh, PA with his wife Jen, son Demetri and Boston Terriers Willow and Xena.


